How to select the correct mounting bracket
TP-Link rack-mountable switches and routers come with the brackets included in the package. If your mounting brackets are missing, follow the steps below to select the correct ones, and contact your local vendor to purchase them. For regional contact information, go to http://www.tp-link.com/en/contact.html.
1) Check the width of the device.
The device dimensions are printed on the top of the carton. You can also manually measure the width.
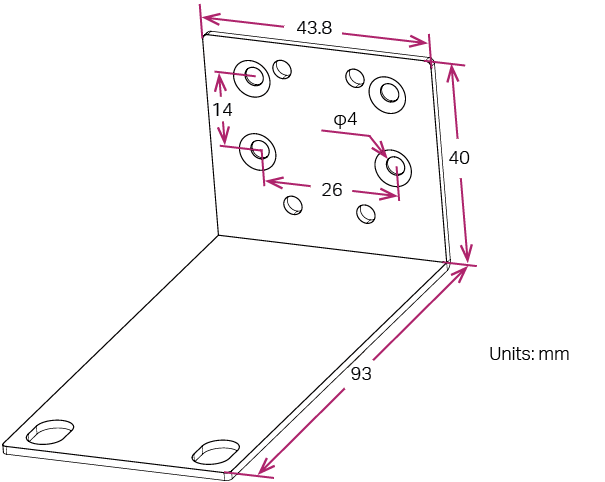
For TP-Link rack-mountable switches and routers, the width is either 440mm or 294mm. If your device’s width is 294mm, choose Mounting Bracket A shown below:
Figure 1-1 Mounting Bracket A
If your device’s width is 440mm, go to the next step.
2) Check the design of the device’s front face.
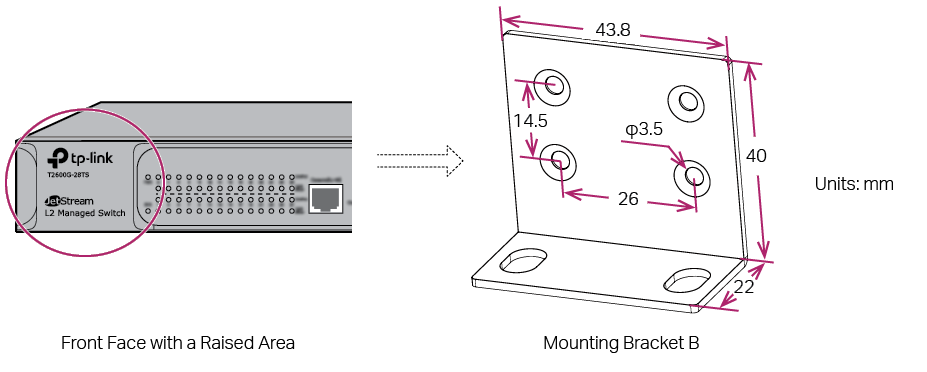
As the following figure shows, if the TP-Link logo, device model and device name are printed on a raised area, choose Mounting Bracket B. Otherwise, go to the next step.
Figure 1-2 Mounting Bracket for Switches Whose Front Face Has a Raised Area
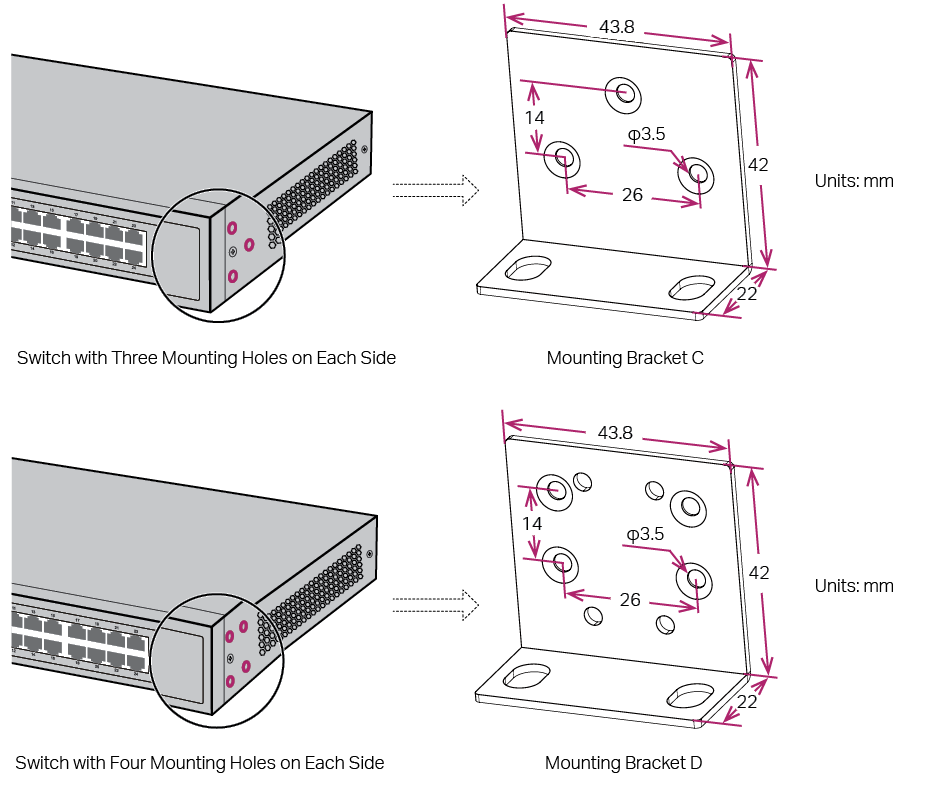
3) Check how many mounting holes are there on each side of the device.
As the following figure shows, if there are three mounting holes, choose Mounting Bracket C, and if there are four, choose Mounting Bracket D.
Figure 1-3 Choose Mounting Bracket According to the Quantity of Mounting Holes