How to configure the portal function on Omada Controller
Suitable for: Omada Controller 2.5.1 or above and EAP products with corresponding firmware.
Portal authentication is an access authentication method typically used in public WiFi settings to require users to accept certain terms and conditions or fulfill a specific requirement to access the internet. With the portal function configured on Omada Controller, when a wireless client connects to an EAP managed by Omada Controller and tries to access the internet, it will be directed to a pre-set web page, which requires additional authentication information. Only the wireless client that has the right authentication information can pass the web authentication to access the internet.
Portal authentication is suitable for managing wireless access in public places, such as hotels, malls, and airports. It provides both control over the connections to the network and customized authentication portal pages for business promotion.
This article gives some instruction on how to configure the portal function on an Omada Controller.
Step 1: Run Omada Controller
Start the Omada Controller software and login to the management page. For how to install and login to Omada Controller, please go to the Download page of Omada Software Controller and refer to Chapter 1 of the User Guide.
Step 2: Choose Appropriate Portal Authentication Type
- Go to Wireless Control > Portal and click
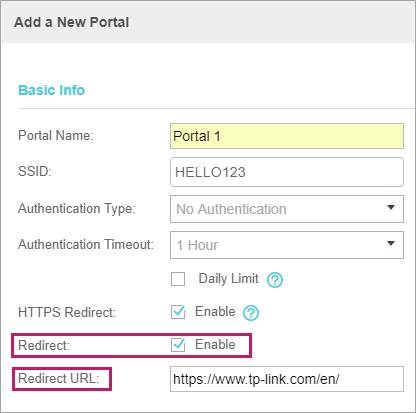
 to create a new portal. Specify a name and select the SSIDs for the Portal.
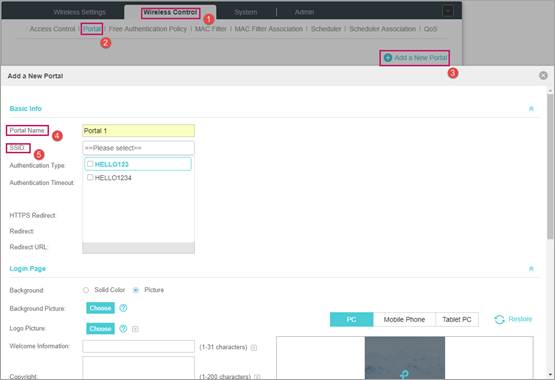
- Choose one of the eight authentication methods. These authentication methods are available: No Authentication, Simple Password, Local User, Voucher, SMS, Facebook, External RADIUS Server and External Portal Server.

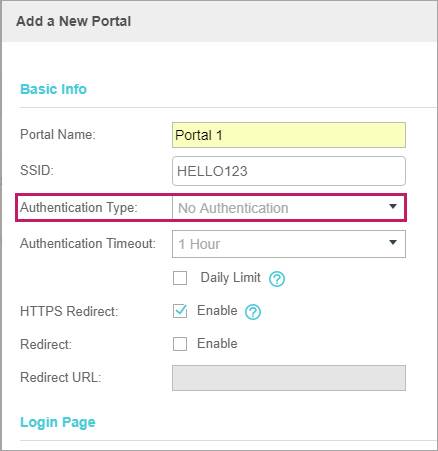
- With No Authentication configured, all wireless clients connected to EAP devices will have access to internet without any authentication. But clients will still see the pre-set login page.
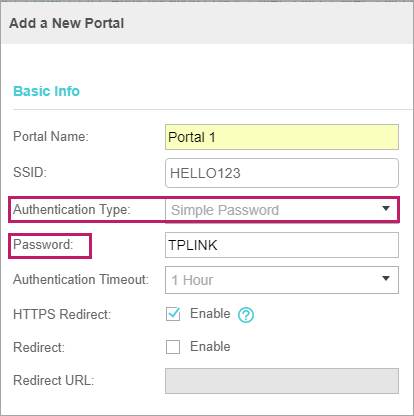
- With Simple Password configured, all wireless clients will use this single password for authentication.
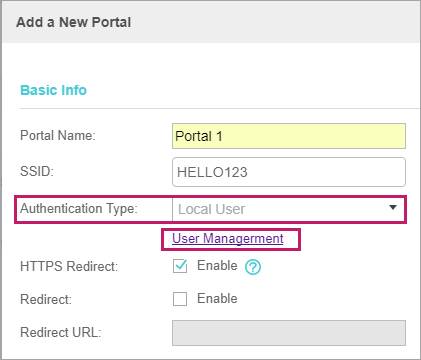
- With Local User configured, clients are required to enter the correct username and password of the login account to pass the authentication. You can create multiple accounts and assign different accounts for different users on User Management.
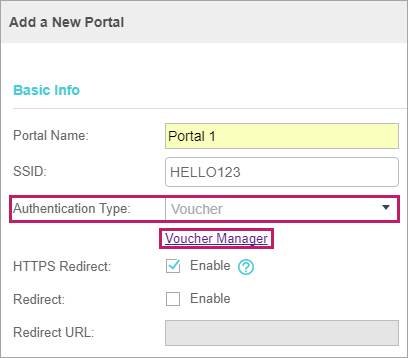
- With Voucher configured, you can distribute the vouchers automatically generated by the Omada Controller to the clients. Clients can use the vouchers to access the network. Voucher is configured on Voucher Manager. Voucher authentication requires your controller to stay running. Refer to How to Configure Voucher Authentication on Omada Controller? for detailed configurations of Voucher.
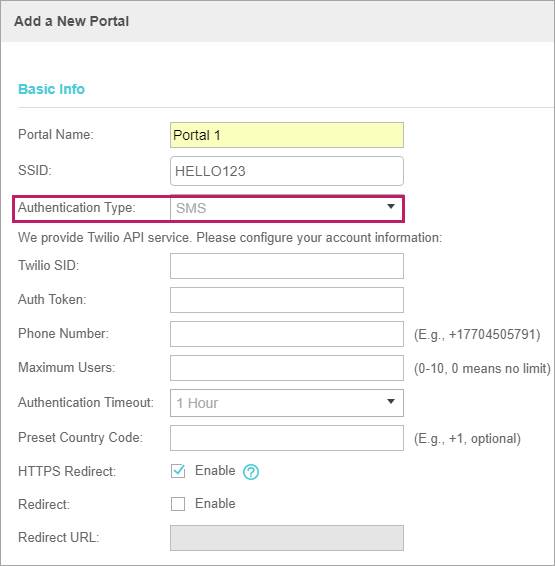
- With SMS configured, clients can get verification codes using their mobile phones via text message and enter the received codes to pass the authentication. For more details about how to configure SMS Portal, you can go to Download Center and download the configuration guide for SMS Portal.
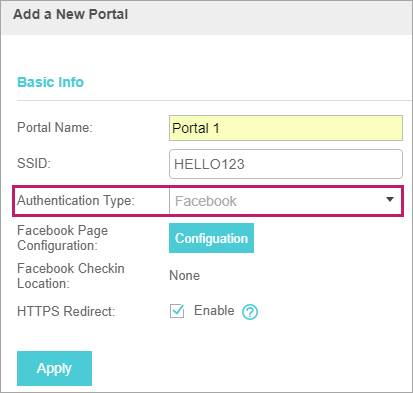
- With Facebook configured, when clients connect to your Wi-Fi, they will be redirected to your Facebook page. To access the internet, clients need to pass the authentication on the Facebook page. For more details about how to configure Facebook Portal, go to Configuration Guide and refer to the configuration guide for Facebook Portal.
- If you have a RADIUS server, you can configure External RADIUS Server. With this type of portal, you can get two types of portal customization: Local Web Portal and External Web Portal. The authentication login page of Local Web Portal is provided by the built-in portal server of the EAP. The External Web Portal is provided by external portal server. As different username/password can be added on the radius server, users can use their unique username for authentication.
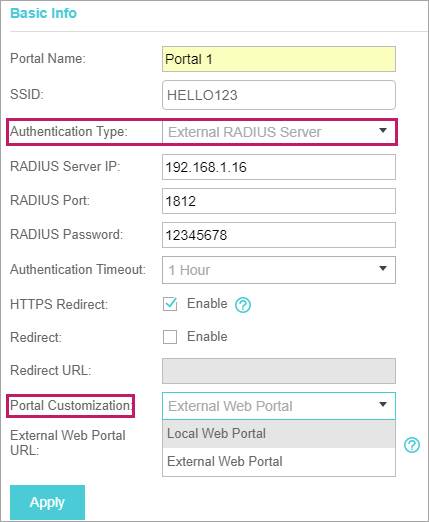
- If you have your own web portal, you can choose External Web Portal. You just need to fill in the External Web Portal’s IP address or domain name on the controller. However, there are some requirements for this web portal server. Please refer to Source code template for External Web Portal (Controller 3.0.5 or below) for details.

Notes:
- You can set the time that the wireless clients can stay online after passing the authentication. For No Authentication, Simple Password, SMS and External RADIUS Server, you can configure the expiration time on Authentication Timeout in the Basic Info section. For Voucher and Local User, you can set the expiration time when creating the vouchers and users. For Facebook, you can set the expiration time on the Facebook page.
- If you want to redirect the wireless client’s page to a predefined web page after authentication (such as TL-Link’s official website), you can enable Redirect and specify Redirect URL as http://www.tp-link.com/en/.
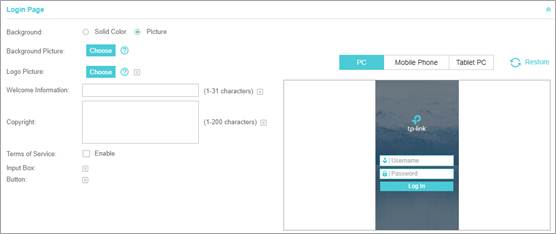
Step 3: Customize the Portal Page
After completing the basic settings for the portal authentication in the Basic Info section, you can customize the login page in the Login Page section. You can set the background, logo, copyright and Terms of service for the login page depending on your needs.
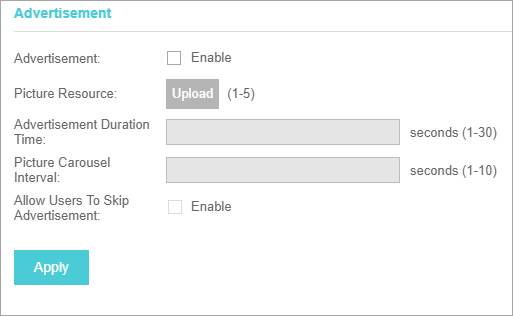
And you can select whether display advertisement pictures for users and configure the related parameters in the Advertisement section.
Notes:
- The maximum image size of the background and logo picture is 2MB. The supported formats are .jpg, .bmp, .gif, .png, .jpeg.
- Remember to click the
 after completing all the portal configurations.
 - Please keep the controller running when you use portal authentication.