How to Configure VLANs (Controller V6.X)
There are significant changes between the configuration of VLANs in Controller V5.X and before and Controller V6.X. If you are configuring VLANs in Omada Controller V5.X or earlier, please see this article.
Configure VLANs using an Omada Device as the DHCP Server
Step 1: Configure the LAN
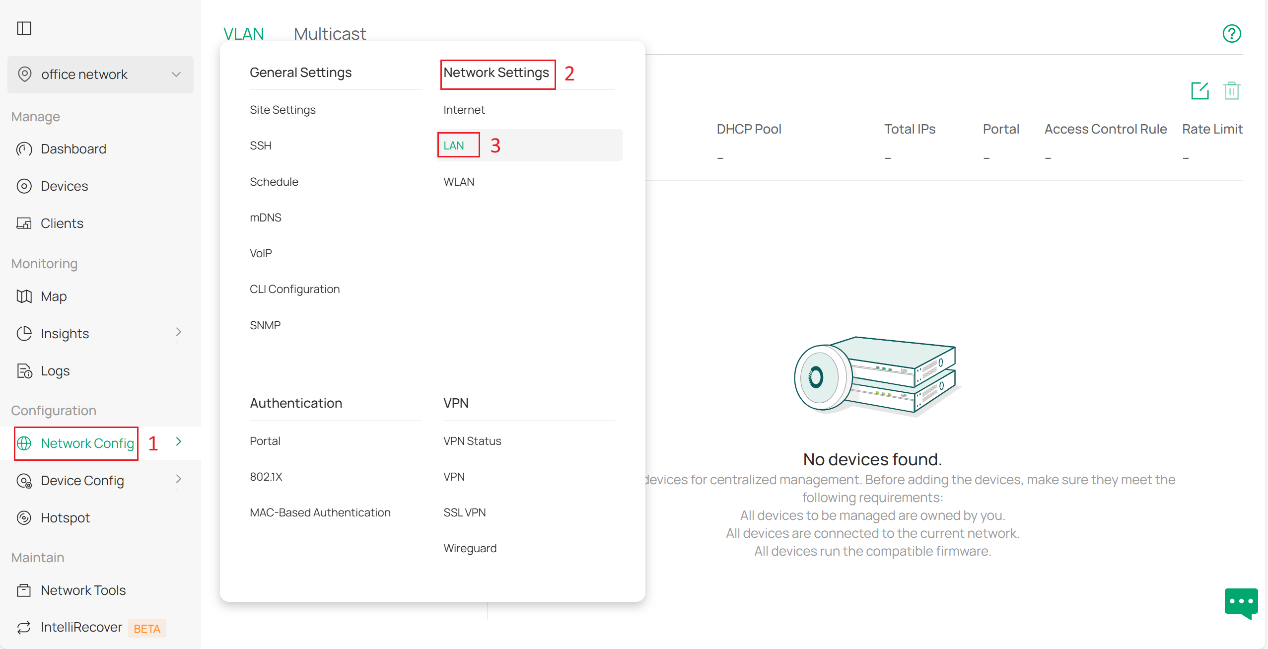
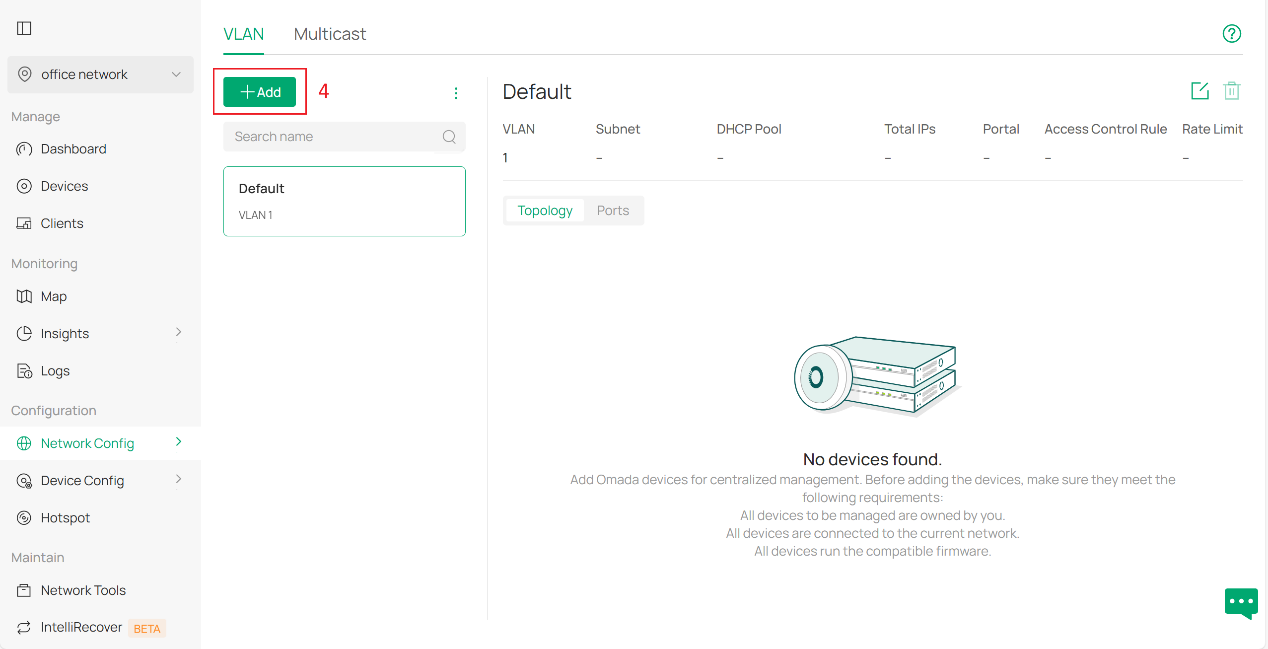
To create a new VLAN on the Controller. Go to Network Config > Network Settings > LAN and click Add under the column VLAN after logging into controller.
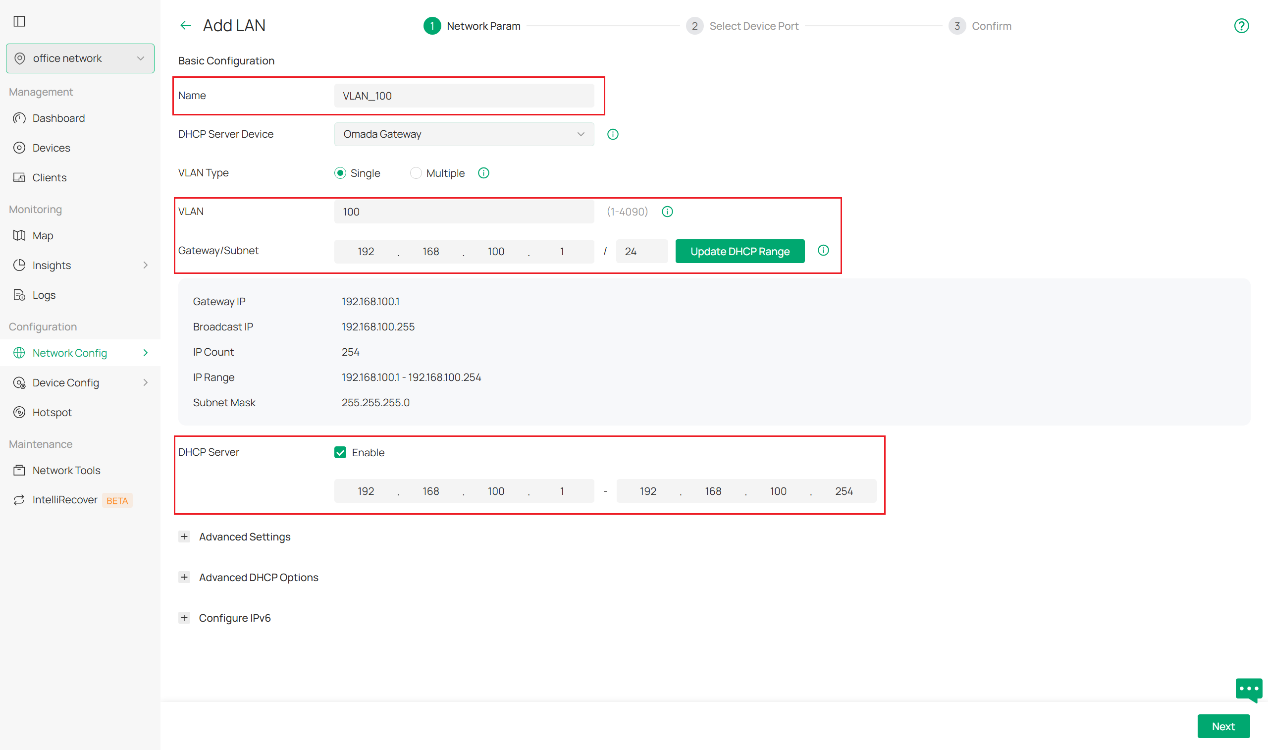
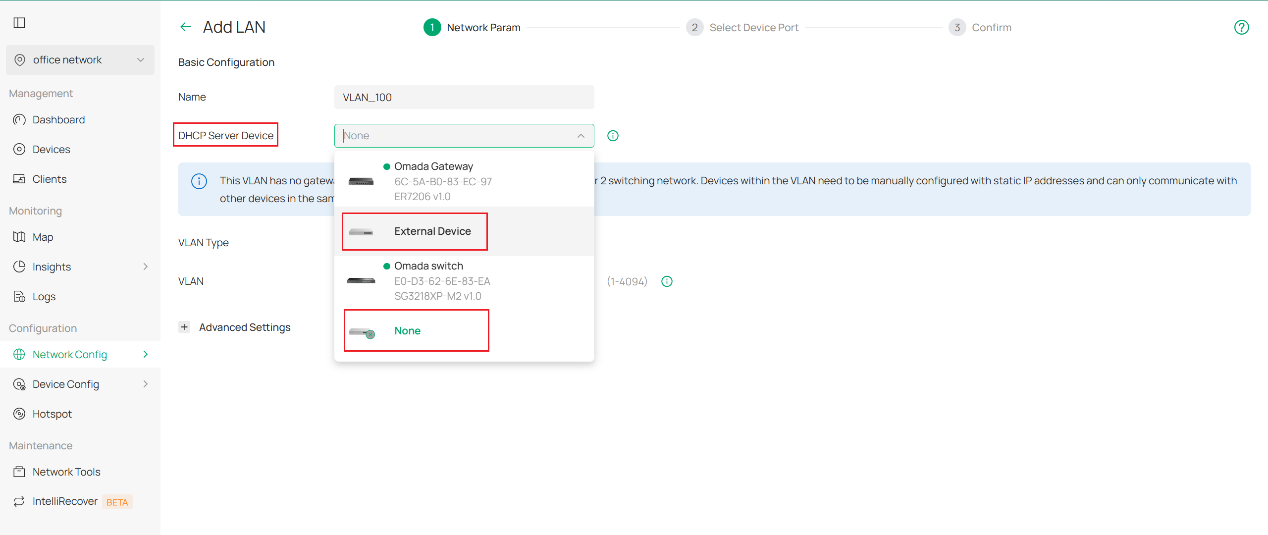
Select the device you are using as a DHCP server in the DHCP Server Device field. It should be a gateway or switch that supports DHCP services.
Then, specify the Name, VLAN ID, and Subnet for the new network. You may disable DHCP if you intend on using static IPs for all devices on the network.
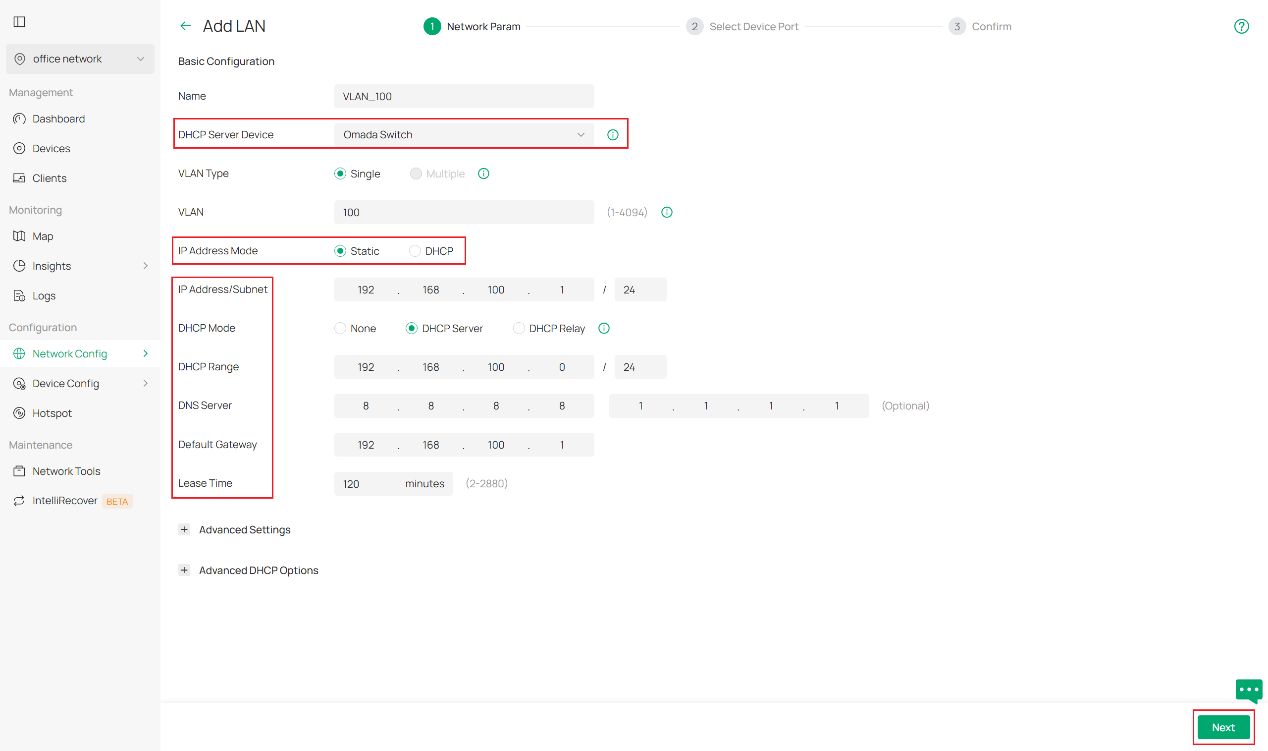
If using an Omada Switch as the DHCP server, these parameters need to be configured manually according to your needs. Select Static for IP Address Mode and specify the IP Address and Subnet Mask. Select DHCP Server for DHCP Mode and enter the required parameters, such as DHCP Range and DNS Server.
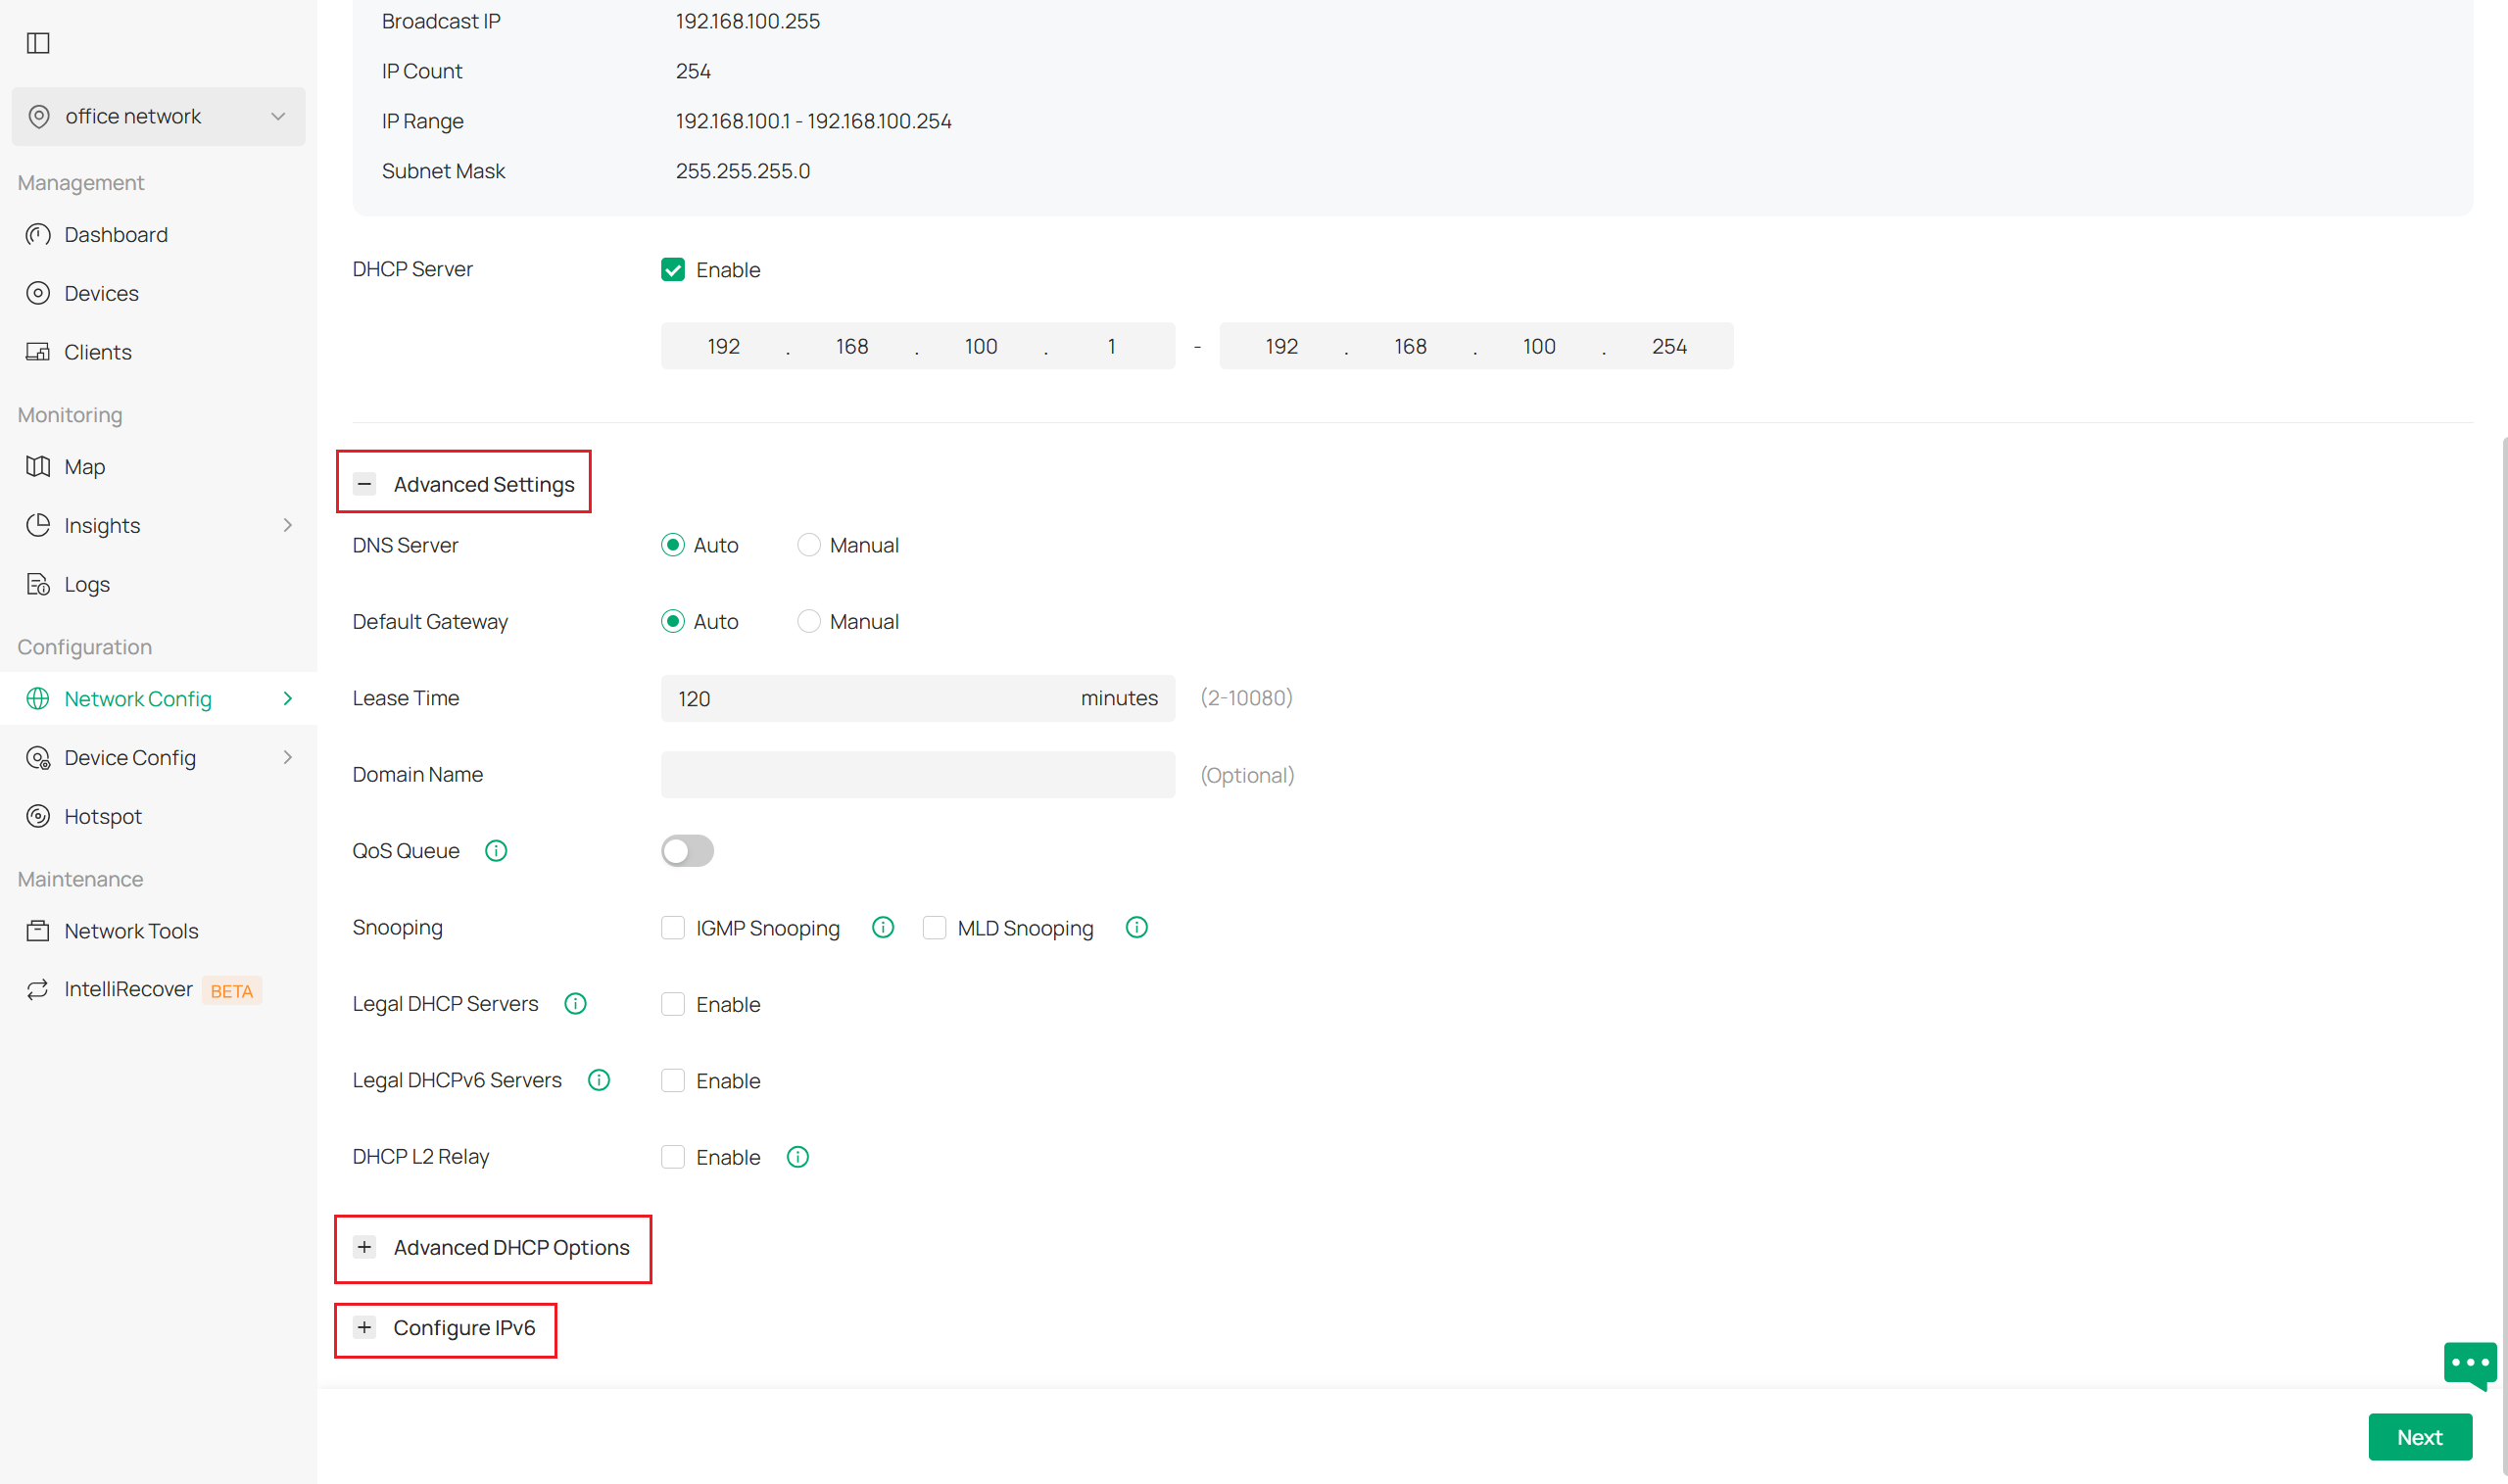
You may also configure advanced network settings like Snooping, Legal DHCP Servers, and DHCP L2 Relay in Advanced Settings. DHCP Option 138 and other custom DHCP Settings can also be found under Advanced DHCP Options. For more info on these, see the articles in the Other Recommended Articles section at the bottom.
Step 2: Configure the Device Ports
Select the device that you want to configure first and then select the ports to apply the VLAN configuration you created in Step 1. Be aware that for switch ports, if a port remains unselected for any VLAN configuration, it will be a trunk port that allows traffic on every VLAN to sustain connectivity. You may also enable our recommended features, such as port isolation and flow control, on these access ports. Once compolete, click Next to continue.
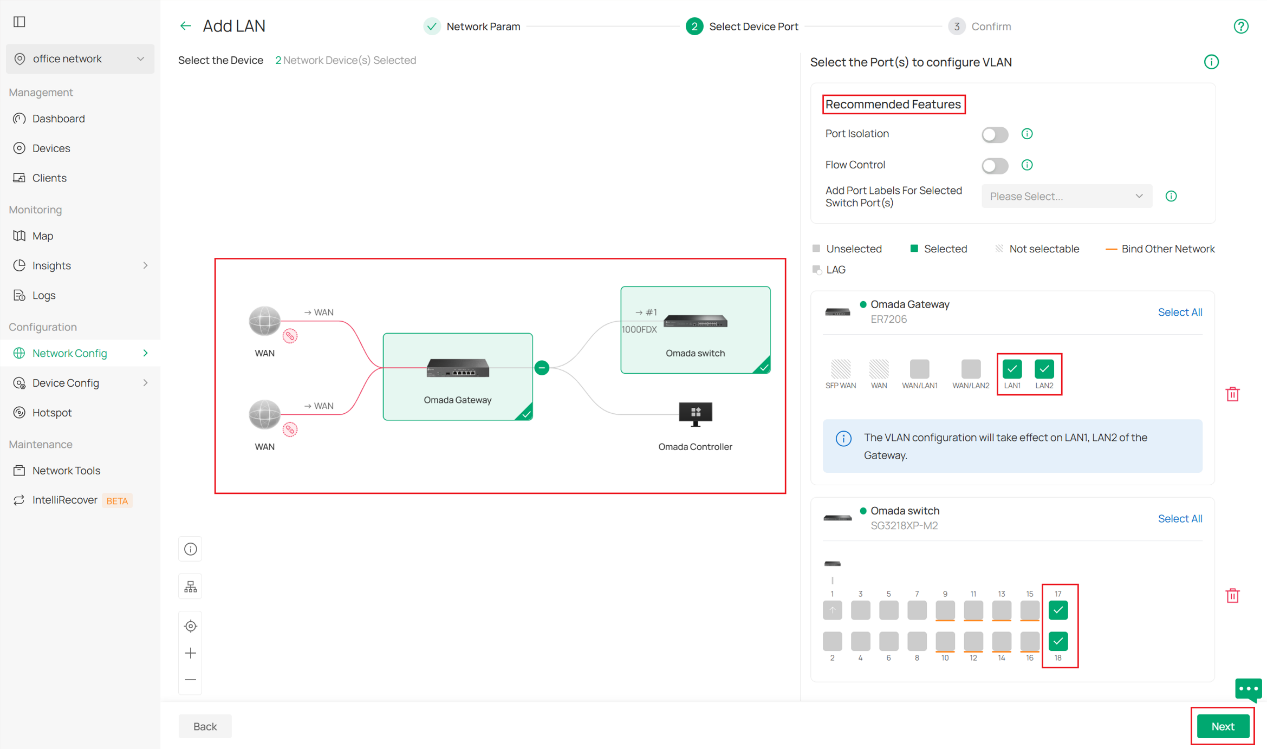
Note: We recommend selecting the access ports on your switches for your network (the ports that connect to hosts or clients, e.g., PCs) in this step. A result is given in step 3 to explain how it behaves.
Confirm everything you've configured is correct, and then click Apply to finish.
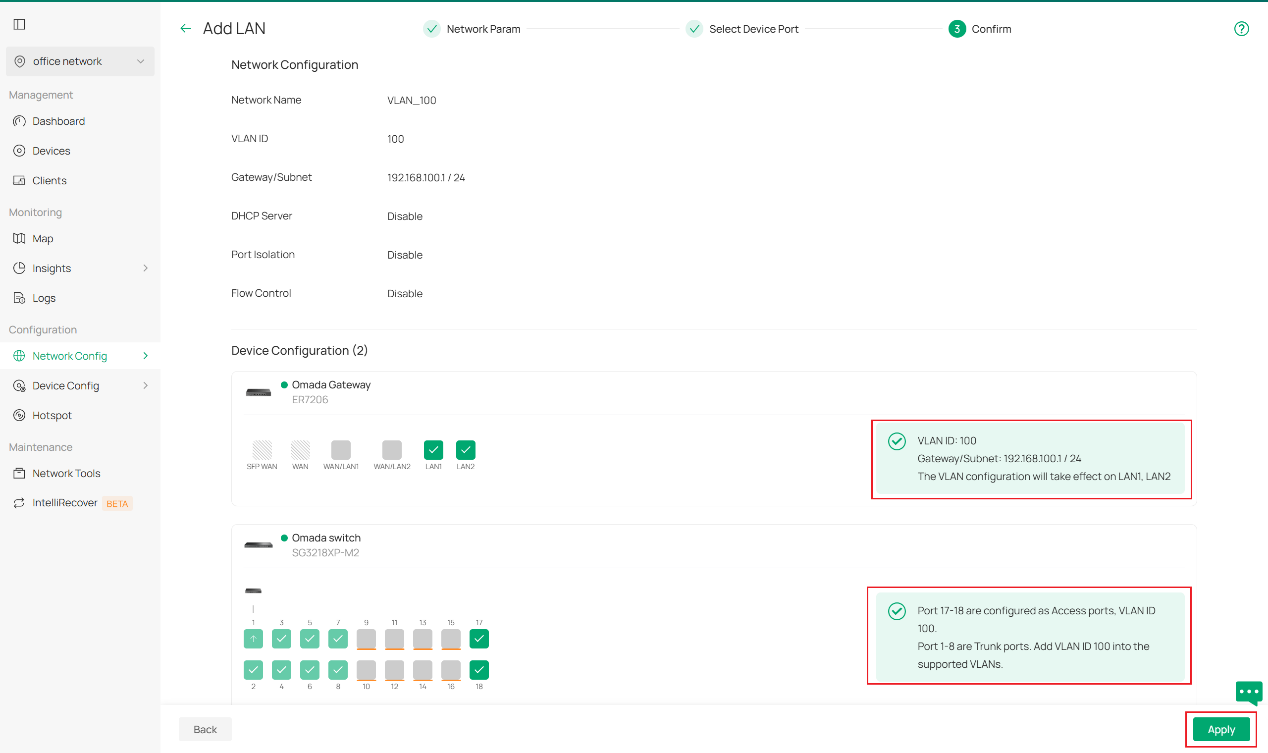
This demonstration sets up a gateway with VLAN 100 enabled on ports LAN1 and LAN2. It also sets up a switch that uses ports 17 and 18 as access ports for VLAN100, and ports 1-8 as trunk ports for all VLANs. If further configurations are needed, such as PVID or tagged/untagged ports, please edit those from the switch details page.
Configure VLANs with an external DHCP server or without a DHCP server
If VLANs need to be configured without an Omada device as the DHCP server, you will need to select External Device as the DHCP Server Device. If VLANs need to be configured without a DHCP server, you will need to select None as the DHCP Server Device.
The rest of the network configuration follows the same steps as Configuring VLANs using an Omada Device as the DHCP Server.
This article refers to Omada Controller V6.X. If the screenshots do not match what you see on your controller, please check out the KB article here.
Link to Controller V5.X VLAN Setup