Interference Detection (Omada Controller 6.X)
What is Interference Detection?
Intereference detection is a feature that helps identify and analyze sources of Wi-Fi interference within your network environment. By scanning the surrounding wireless spectrum, it provides detailed channel occupancy and interference information to help optimize network performance. After the scan is complete, it generates scan results that include channel utilization data (available only on devices that support this feature) and details about Wi-Fi interference sources.
Interference detection is only available when using Omada Controller 6.0 or higher and when using Omada Access Points adopted and managed by the Controller.
Configuration
Method 1: Via the AP Details Page
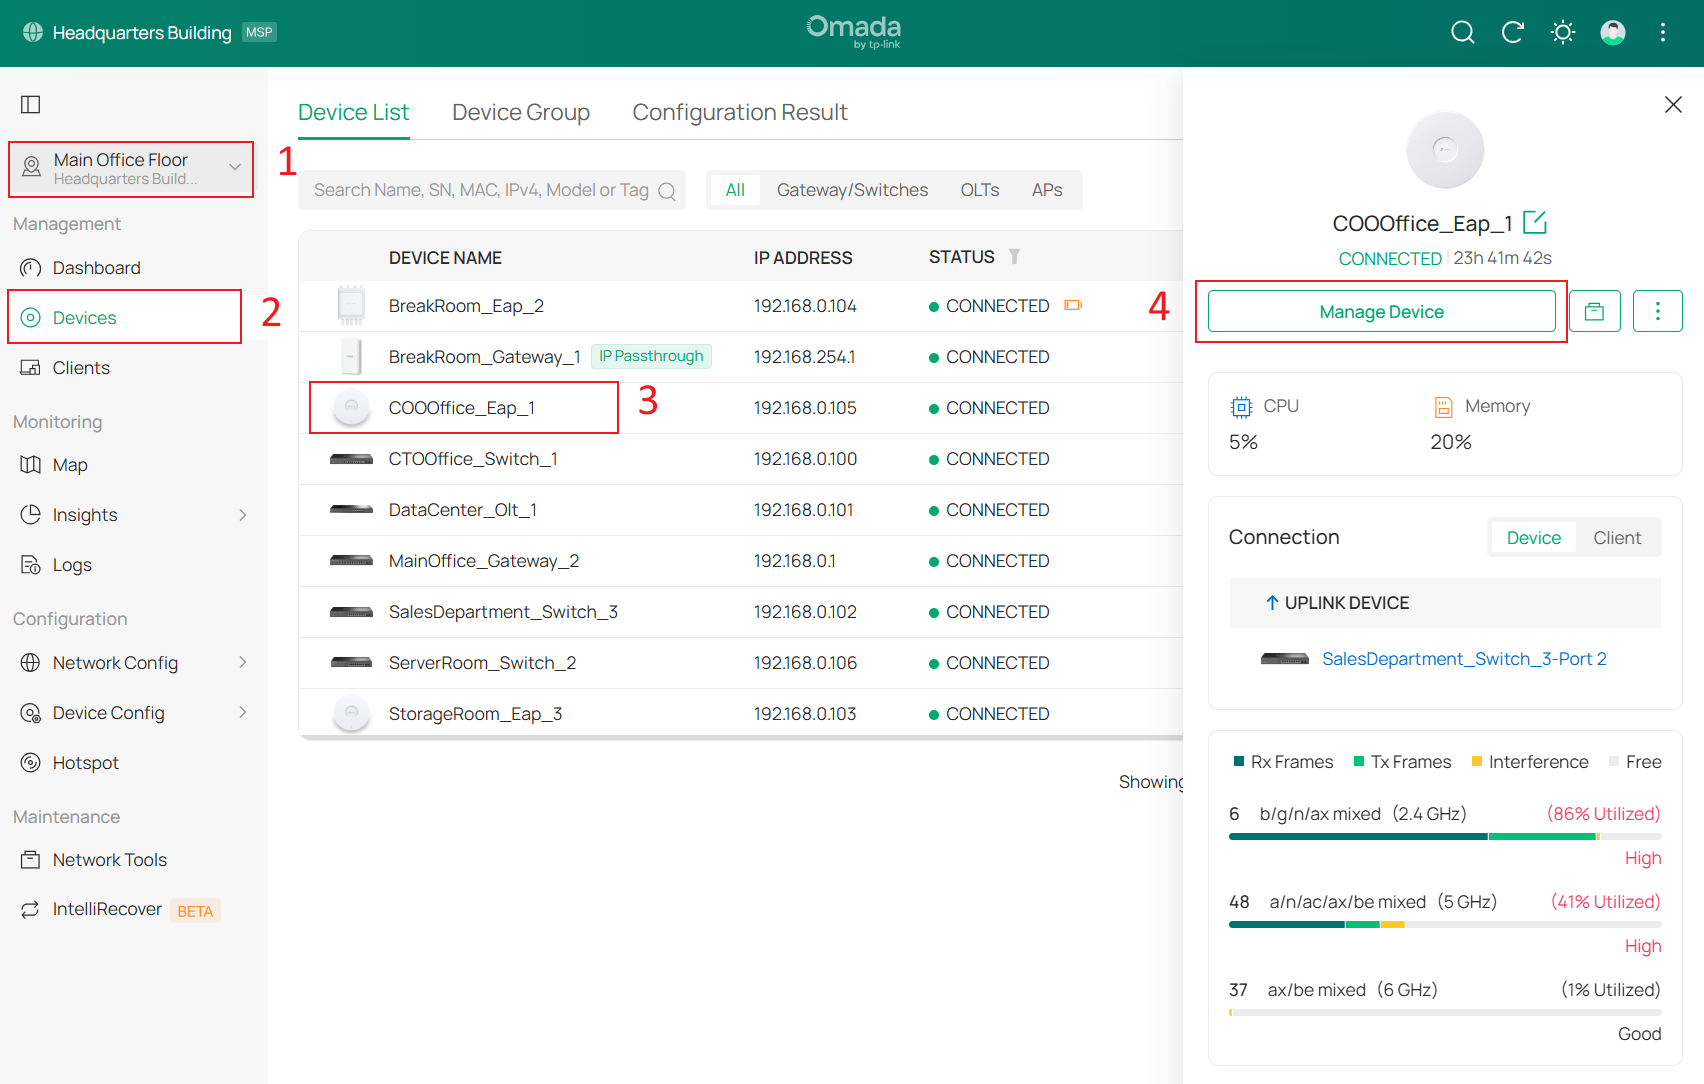
Step 1: Go to Global View (or Site View) and click on your desired Access Point (AP).
Step 2: On the Drawer View, click on Manage Device.
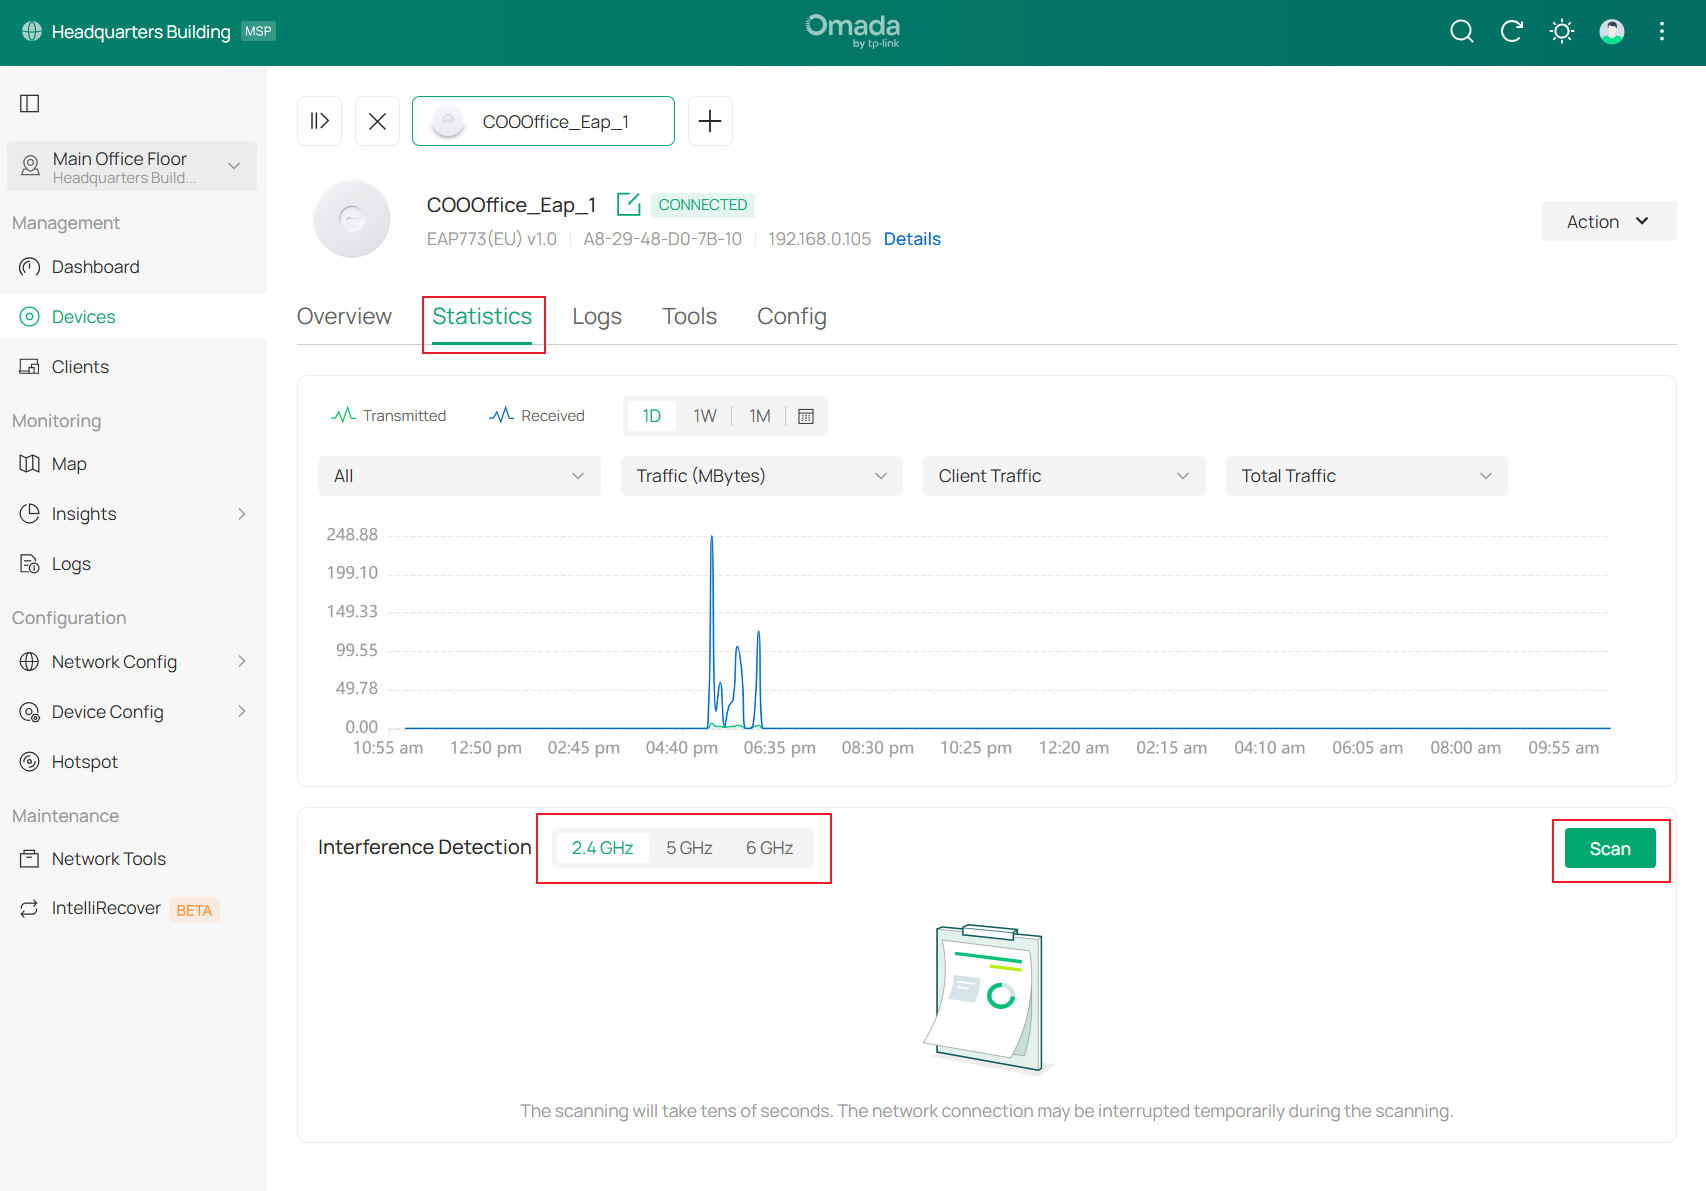
Step 3: Go to Statistics and scroll down to Interference Detection.
Step 4: Choose the desired Frequency Band (2.4 GHz/5 GHz/6 GHz) and then click Scan.
Step 5: Utilize the displayed information as needed for analysis or troubleshooting.
A complete list of detected wireless networks will be displayed, including each network’s name (SSID), BSSID, channel used by that wireless network, security type, beacon interval, signal strength (RSSI), and the date it was last detected.
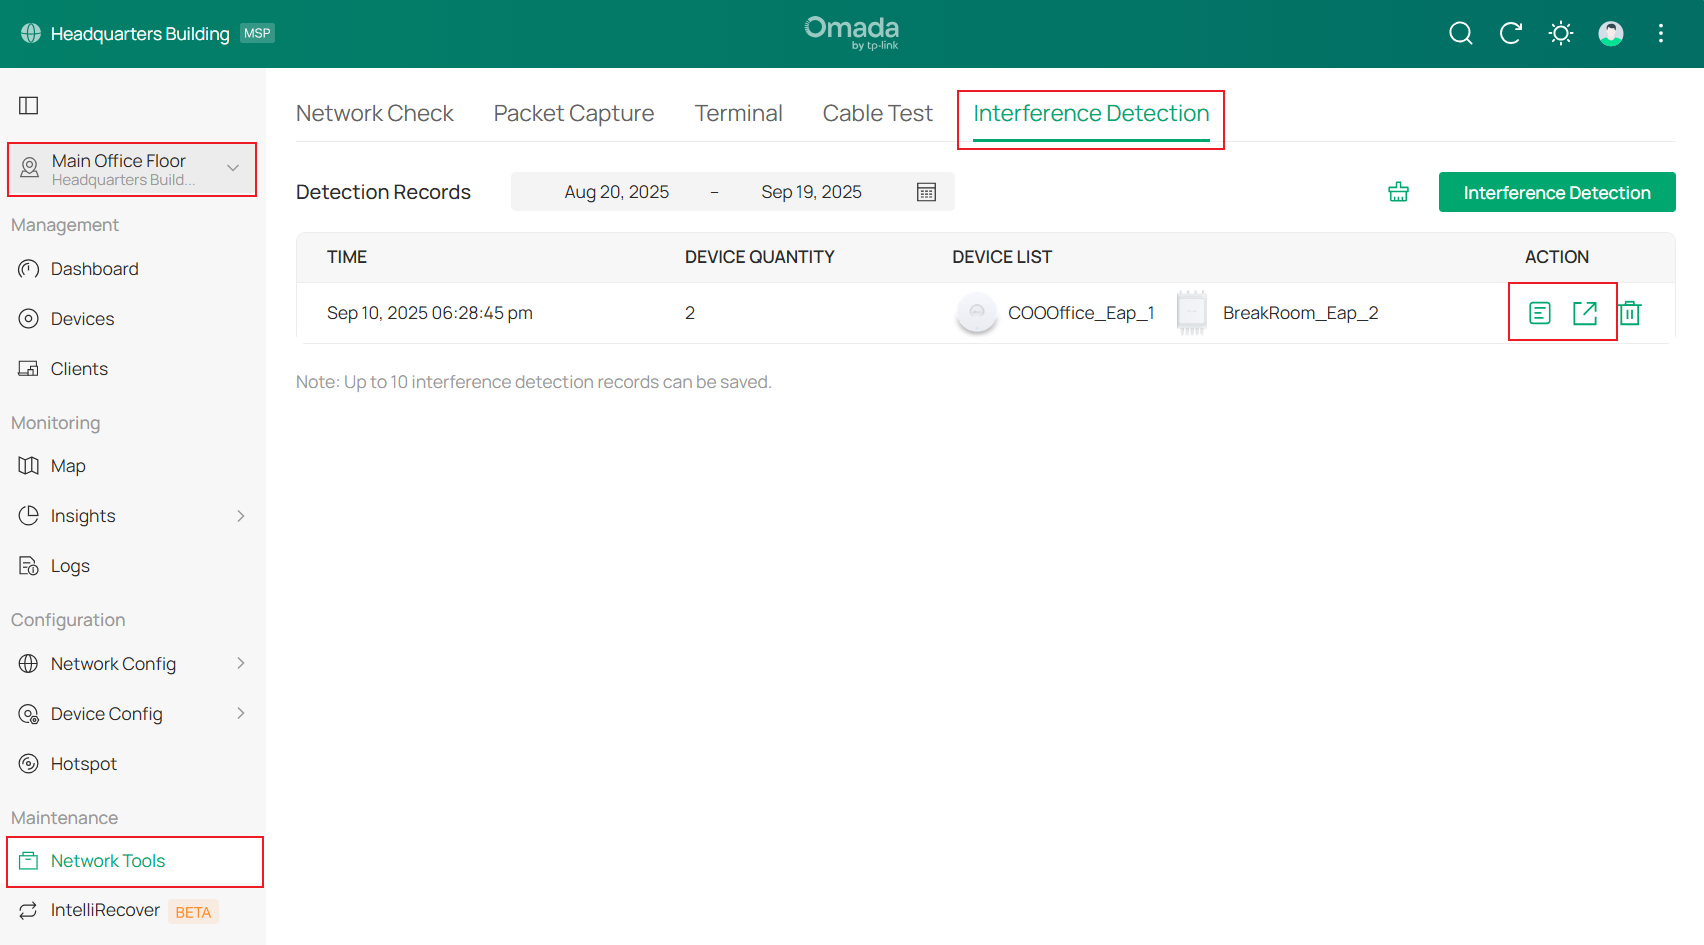
Method 2: Via Network Tools > Interference Detection
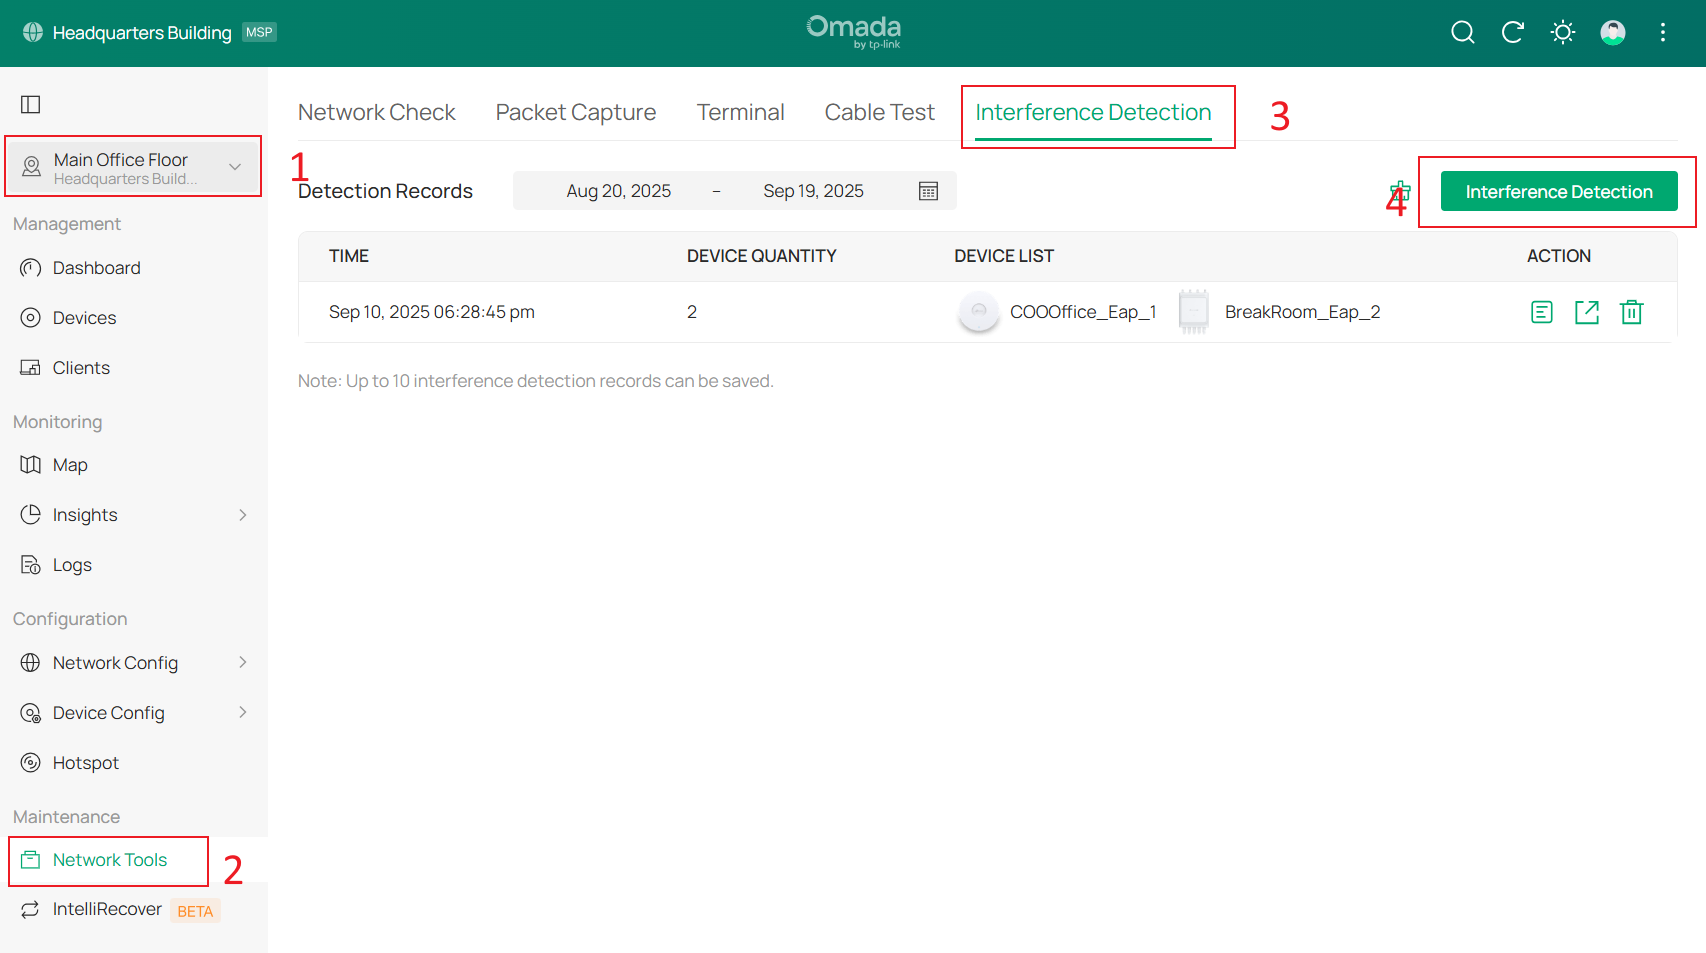
Step 1: Go to Site View > Network Tools > Interference Detection.
Step 2: Select Interference Detection from the options at the top of the page.
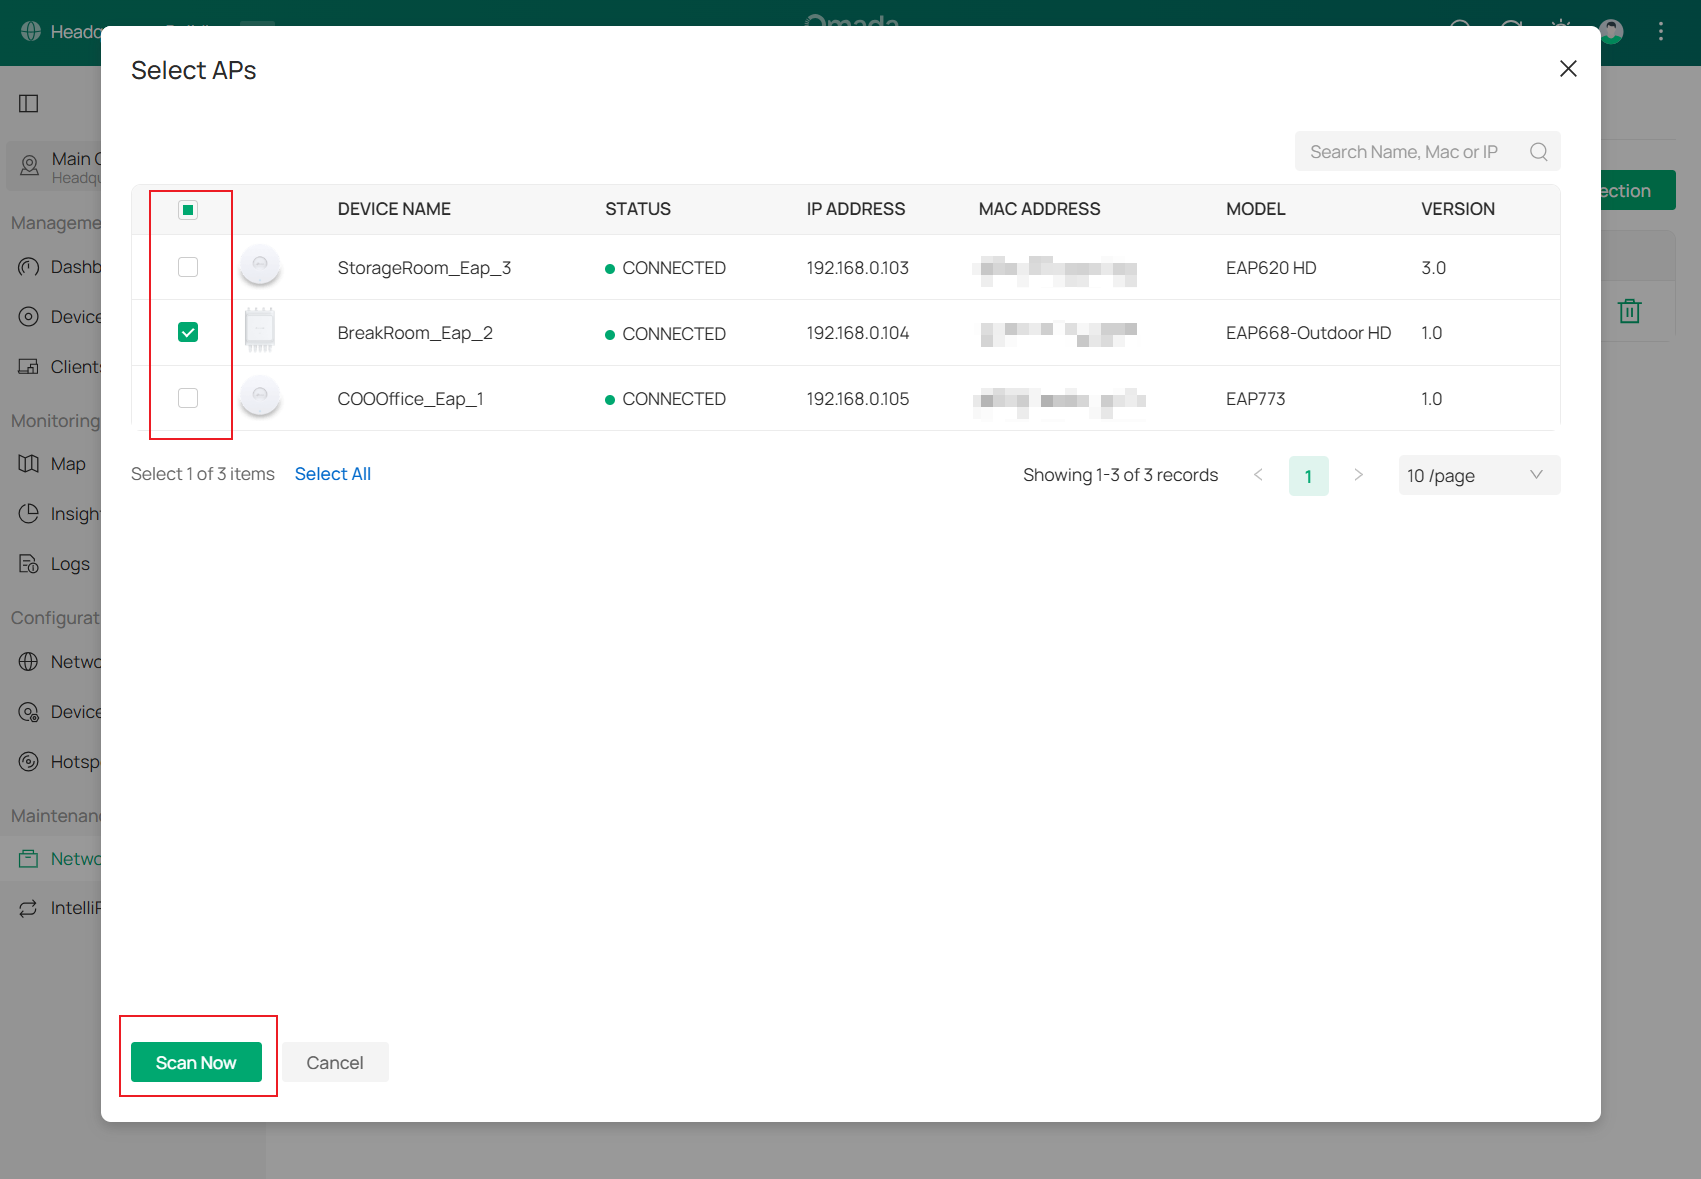
Step 3: Use the search bar to find devices by name, MAC address, or IP address for quick selection.
Step 4: Choose one or multiple Access Points (APs) and then click on Scan Now.
Step 5: Utilize the displayed information as needed for analysis or troubleshooting.
The system returns to the main function page, and a loading animation appears while the scan is in progress. Once the animation disappears, the scan is complete, and a scan record entry is created.
Verification
Go to Site View > Network Tools > Interference Detection.
Click Details to view the scan results in detail.
Use the drop-down list on the left to select between:
- All Devices – displays combined Wi-Fi interference results from all scanned devices.
- Specific AP (Access Point) – displays the scan results for a single access point
Use the frequency band toggle to switch between 2.4 GHz, 5 GHz, and 6 GHz results.
Click Export to save the results to a file.
Other Resources
How to detect Rogue Access Points on Omada Controller