Using VIGI Cameras with Third-Party NVRs
Background
VIGI Cameras are compatible with both Third-Party NVRs and VIGI NVRs. This may be necessary when a client already has an NVR in place but needs replacement cameras. To facilitate third-party management, VIGI Cameras support ONVIF Profile S — they can be added to any device that also supports ONVIF Profile S. If the third-party device does not support ONVIF, VIGI Cameras also support live streaming via the RTSP protocol.
This article goes through the steps needed to add a VIGI camera to a third-party NVR.
Configuration Steps
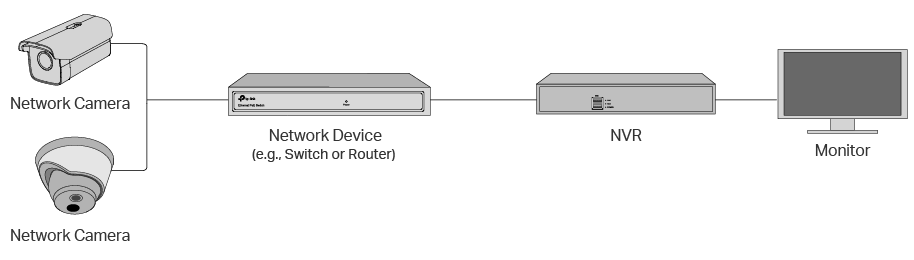
Step 1. Connect the VIGI Cameras with the third-party NVR according to the network topology below.
Step 2. Determine how many cameras need to be configured. If only a few, they can be configured through the Web Management Interface for each camera. If configuring a large number of cameras, it is recommended to use the VIGI Config Tool.
Configuration via the Web Management Interface
1. Use the IP address of the VIGI Camera to access its Web Management Interface.
The default IP address for VIGI cameras is 192.168.0.60.
2. Set the management password for the camera in the initialization page.
3. Go to Settings > Network Settings > Connect and mark down the current IP address. For some NVRs, you may need to set the IP address of the VIGI camera to be in the same network segment as the NVR for the NVR to recognize it.

Configuration via the VIGI Config Tool
1. Download the VIGI Config Tool from the TP-Link Official Website. https://www.tp-link.com/support/download/vigi-config-tool/
2. Install the VIGI Config Tool on a Windows PC and connect the PC to the same network as the VIGI Cameras.
3. Launch the application. The Config Tool will scan the network for all configurable cameras. Once the scan completes, select all cameras to configure.
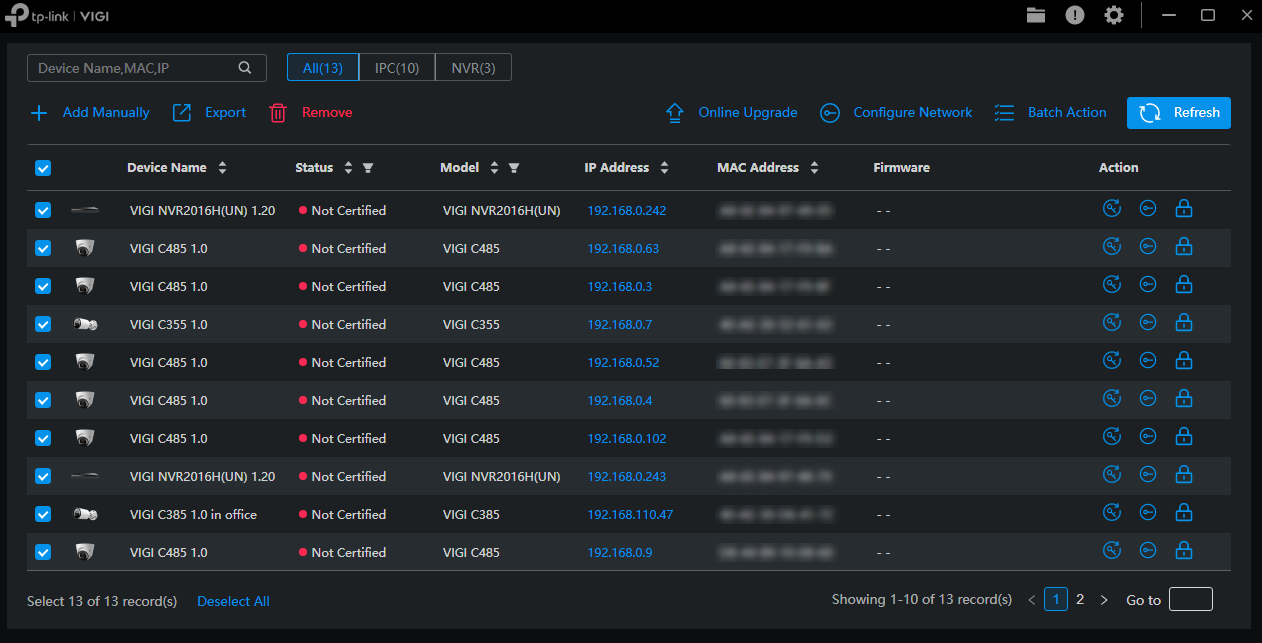
4. Click Batch Action, then Batch Initialize. Assuming all selected cameras are set to their factory default settings, you can configure their management credentials all at once.
https://static.tp-link.com/upload/faq/4201-4_20250606213321p.png

5. Once the cameras are initialized, take note of the IP addresses of each camera.


Once the camera(s) are configured, they can be added to the third-party NVR using ONVIF or RTSP.
ONVIF
To add via ONVIF, ensure that the Open Network Video Interface is enabled in the camera settings. The default ONVIF port is 80.

The third-party NVR will have its own settings to add the camera, but generally, you will need the following information:
- Management username and password of the camera (set in this step)
- Network Address of the camera
RTSP
VIGI Cameras support live streaming via RTSP, but do not support modifying settings.
The URLs for RTSP streams are as follows:
High Quality: rtsp://IP_Address/stream1
Low Quality: rtsp://IP_Address/stream2
Some software may also require the default RTSP port included in the URL to access the live stream. The default RTSP port is 554.
High Quality: rtsp://IP_Address:554/stream1
Low Quality: rtsp://IP_Address:554/stream2
Why Choose a VIGI NVR?
Managing cameras with a VIGI NVR instead of a third-party NVR enables management of VIGI devices from a single unified platform. It also allows clients to take full advantage of VIGI’s AI features such as People Counting and AI Search. Check the Other Resources section below to learn more about the features VIGI NVR and VMS have to offer.
Other Resources
How to Configure People Counting on Omada Central Controller | TP-Link
Support and Feature Differences for Omada, VIGI, and Third-Party Cameras in Omada Central | TP-Link
Product Manuals: Download Center | TP-Link