How to Change the Cloud Owner Account for Omada Controllers?
Background:
A Cloud-Based Controller enables cloud access by default and automatically sets up the cloud Owner.
An on-premise controller automatically sets up the cloud Owner if you have enabled cloud access and bound the controller account with a TP-Link ID during setup. The username and password is the same as the TP-Link ID associated with the account. This article introduces how to change the cloud owner for Omada Controllers.
This Article applies to:
All Omada SDN Controllers.
Overview
Omada Controllers are categorized into two main types: Omada On-Premises Controller and Omada Cloud-Based Controller.
Omada On-Premises Controller: Includes the Omada Software Controller, Omada Hardware Controller (OC200, OC220, OC300, OC400), and Omada Integrated Gateway (ER7212PC).
Omada Cloud-Based Controller: Includes Omada Cloud Standard and Omada Cloud Essentials.
Please follow the appropriate steps below for your controller type.
Omada Cloud-Based Controller
A Cloud-Based Controller enables cloud access by default and automatically sets up the cloud Owner. The cloud owner account is the TP-Link ID you used to register the controller.
Step 1: Login via the owner account
Make sure to log in to the cloud-based controller via the owner account; otherwise, you will not have permission to proceed with the following steps.
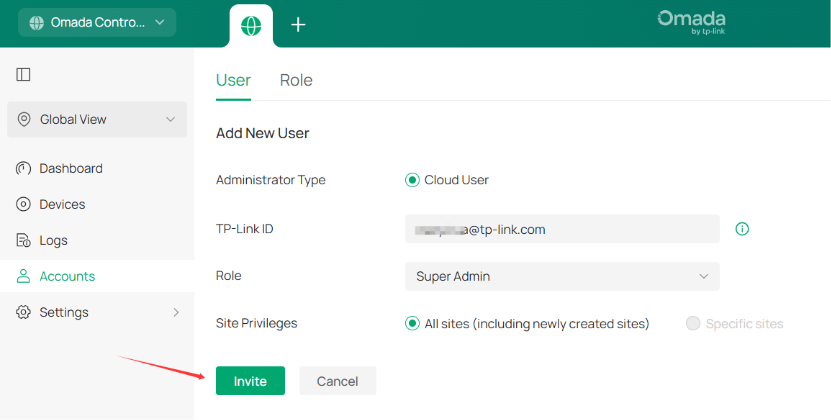
Step 2: Invite the new account as a “Super Admin” Account
Navigate to Global View > Accounts > Add New User and invite the new account with the “Super Admin” role.
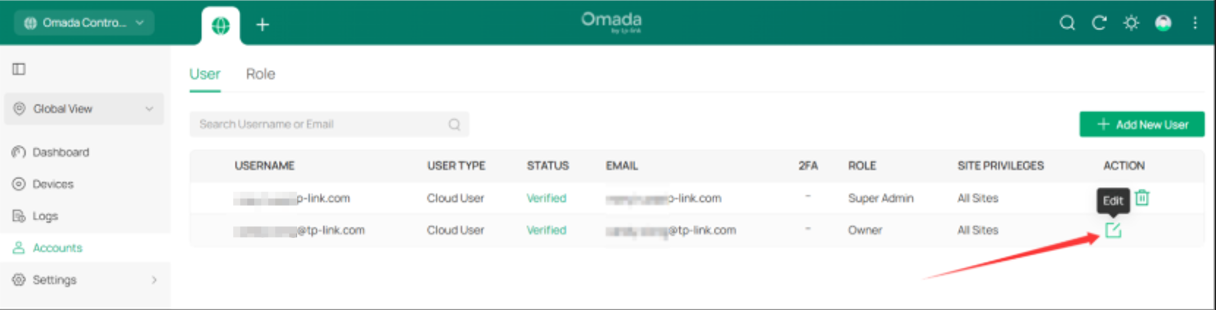
Step 3: Transfer the Owner Account
Choose the Global View, Accounts > Edit the Owner Account.
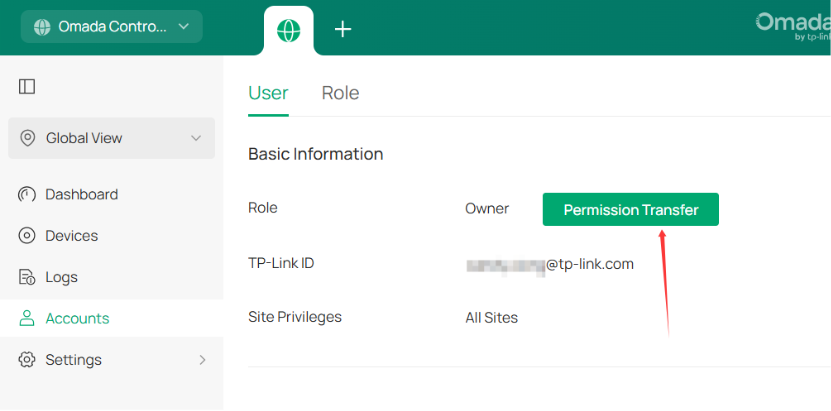
Click Permission Transfer:
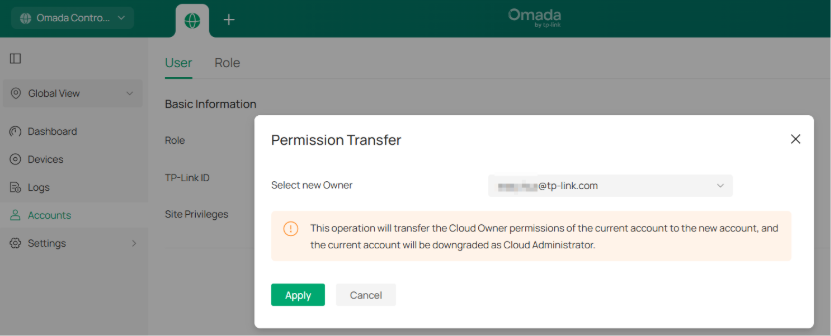
Choose the Account in Step 2, and click Apply.
Step 4: Accept the invitation.
After Step 3, an invitation email will be sent to the email address associated with the new Super Admin. Click the invitation link in the email to be redirected to the login page. To accept the invitation, please log in to the cloud platform via the new account, then click Accept Invitation.
We have now transferred the Cloud Owner permissions of the current account to the new account, and the old owner account will be downgraded to Cloud Administrator.
Omada On-Premises Controller
An on-premises controller automatically sets up the cloud Owner if you have enabled cloud access and bound the controller account to a TP-Link ID during setup. The username and password are the same as those of the TP-Link ID. Below are the steps to change the cloud owner account for an Omada on-premises controller.
Step 1: Log in to the controller locally via the local admin account
To change the cloud owner account bound with an on-premises controller, you must log in locally using a local account. If you log in with a cloud account, you will not have permission to proceed with the following steps.
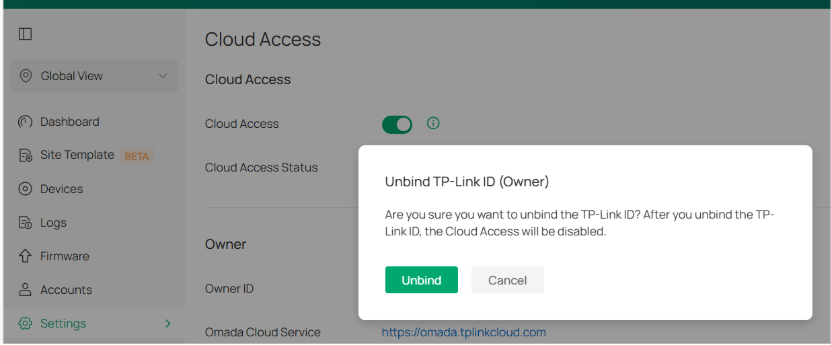
Step 2: Unbind the current Cloud Owner Account:
Navigate to the Global View > Settings > Cloud Access, and click Unbind TP-Link ID:
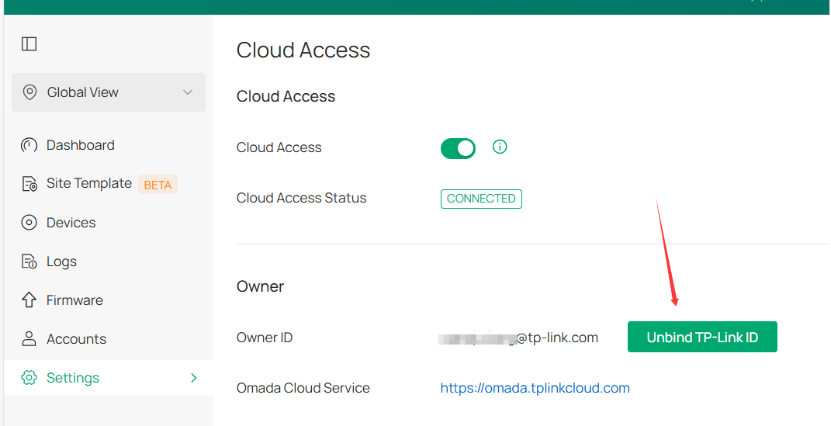
Note: Ensure the controller is connected to the internet; otherwise, this operation cannot be completed.
Step 3: Enable cloud access and bind with the new account
The cloud access should now be disabled.
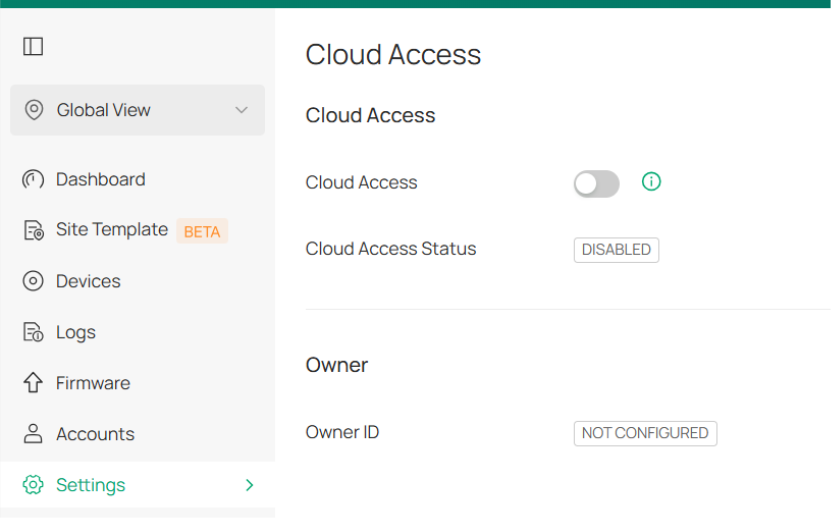
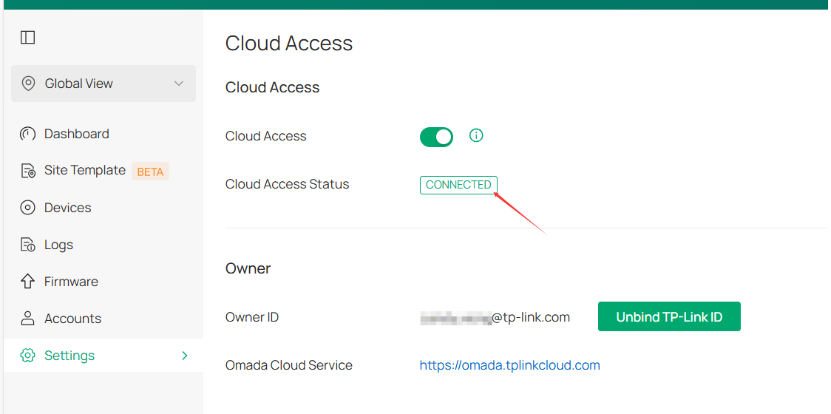
Turn on Cloud Access once again, and you will be prompted to log in and bind a new TP-Link ID.
Click Log in and Bind, then wait for a short time. Once the Cloud Access Status change to Connected, the new account should be listed on this page next to Owner ID:
We have now transferred the Cloud Owner permissions from the current account to the new account.
Recommended Threads:
General Questions about Omada Central