Sonos STP Configuration Guide in Omada Controller
Spanning Tree Protocol (STP) is a network protocol for switches designed to prevent network loops. To learn more about STP, check out the FAQ here.
This guide will show you how to configure STP on specific ports based on Sonos recommended configuration settings, provided here.
Configure STP settings to work with Sonos
Configuring a Port on a Switch for a Sonos Device
Before we begin:
- Managed Switches must have STP enabled before connecting multiple Sonos devices to the same switch. Failure to do so may cause loops and/or broadcast storms.
This guide will use the Port Profiles feature to create a template that can be applied to any switch port with a Sonos device connected. Any setting not specified can be left unchanged.
Spanning Tree Config
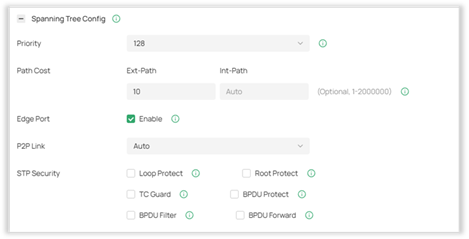
Priority: 128
Path Cost: Set to 10
Edge Port: Enable
Loop Protect: Disable
BPDU Protect: Disable
Configuring a VLAN solely for Sonos Devices
Another option for configuring Sonos devices on your network is to create a separate VLAN for Sonos Devices. There is a feature of Omada Controllers called OUI-Based VLAN. OUI-Based VLAN allows a switch to tag traffic based on the OUI of the source MAC address. Since vendors are assigned specific MAC addresses, you can use the OUI-Based VLAN feature to tag all traffic from Sonos devices with a specific VLAN.
![]() If you prefer a video guide, check out the tutorial for OUI-Based VLAN here.
If you prefer a video guide, check out the tutorial for OUI-Based VLAN here.
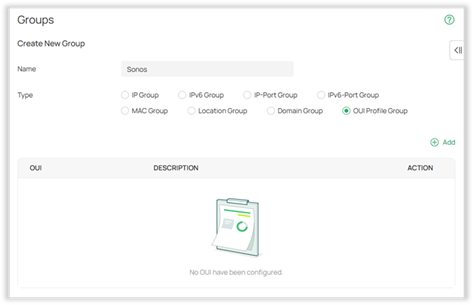
To set this up, first we need to create an OUI Profile. Head to Network Config > Profile > Groups to create an OUI Profile Group for Sonos Devices.
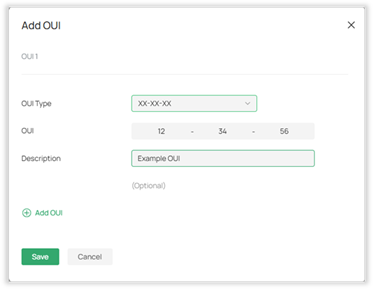
Next, add an OUI profile using the MAC address of your Sonos device. You can find this either in the Clients list of the Omada Controller or somewhere on your device.
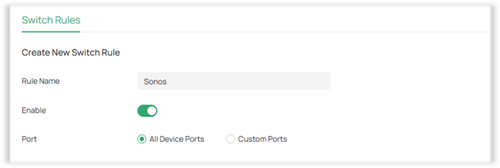
Once the profile is created, navigate to Network Config > Transmission > OUI-Based VLAN and click + Create New Switch Rule.
Enable the rule, then select all ports.
Next to OUI Based VLAN List, click + Add.
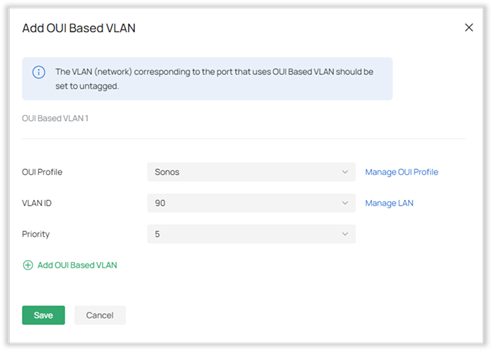
Select the OUI Profile you created before, and assign it a VLAN or make a new one by clicking Manage LAN. Set the priority to a number that is appropriate for your use case, and then click Save > Apply.
This will tag all traffic coming from the Sonos speakers with the VLAN ID 90. You can add additional OUIs to the rule if your devices do not share the same OUI.
Next, we’ll configure the VLAN to work in an Omada Network.
- Allow mDNS across the Sonos dedicated VLAN
- Allow SSDP/UPnP across the Sonos dedicated VLAN
- Configure Multicast and Unicast settings on the desired SSID(s)
mDNS Settings
For more information on mDNS settings, check out the FAQ here: mDNS Configuration
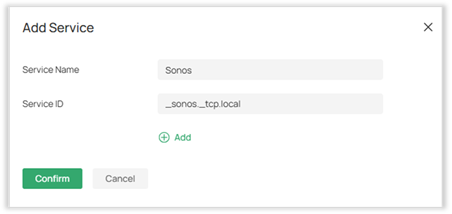
To configure mDNS to work with Sonos, first, create a new Bonjour Service in Network Config > mDNS > Bonjour Service.
Click + Create New Bonjour Service, then add the following service.
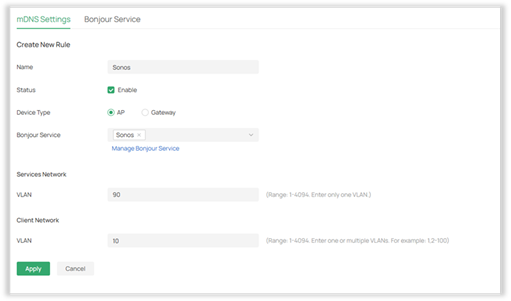
Next, create a new mDNS rule. Set Device Type to “AP” and add the Bonjour Service you created above. Then, set the Service Network to the VLAN ID you created for the Sonos devices, and the Client Network to any VLAN ID that needs to access them. Click Apply when finished.
SSDP/UPnP Settings
Go to Device Config > Gateway > UPnP. Enable UPnP, then select your WAN interface, and select the Sonos network as well as any networks that need to access the devices. Click Apply once the settings have been set.
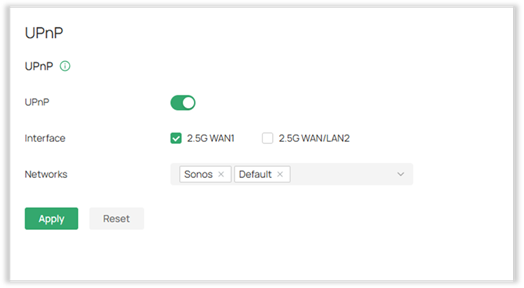
![]() UPnP increases performance, but may introduce some security risks to the network. Consider setting the Sonos Recommended Firewall Rules as an alternative.
UPnP increases performance, but may introduce some security risks to the network. Consider setting the Sonos Recommended Firewall Rules as an alternative.
Multicast and Unicast Settings
On the settings page for the SSID the Sonos devices will be connected to, ensure the following settings are applied.
Under Multicast/Broadcast Management:
- Disable Multicast-to-Unicast Conversion on both IPV4 and IPV6
- Disable ARP-to-Unicast Conversion
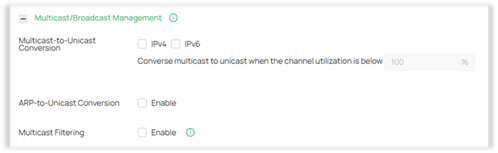
Click Apply once the settings are entered.
Thank you to community user Dsunder for your configuration guidelines in this forum post.