How to Check Clients' Voucher Remaining Time and Traffic on Clients Device?
How to Check Clients' Voucher Remaining Time and Traffic on Clients' Devices?
Background
Portal authentication provides an authentication service to clients who only need temporary access to the network, such as customers in a restaurant or supermarket. To access the network, these clients need to open the authentication login page and enter the correct login information to pass authentication. With the authentication type set to Hotspot > Voucher, customers can authenticate using a unique credential code generated by Omada for a specific duration. You can print the voucher codes from the Controller and distribute them to your customers. This helps you link your customers’ network access to your business. Additionally, administrators can allocate specific internet time or traffic for different voucher groups. This article primarily discusses how to view the remaining available time and traffic from the client side.
This Article applies to:
Omada SDN Controllers v5.15.24 and above.
Configuration
Step 1: Create a Hotspot portal
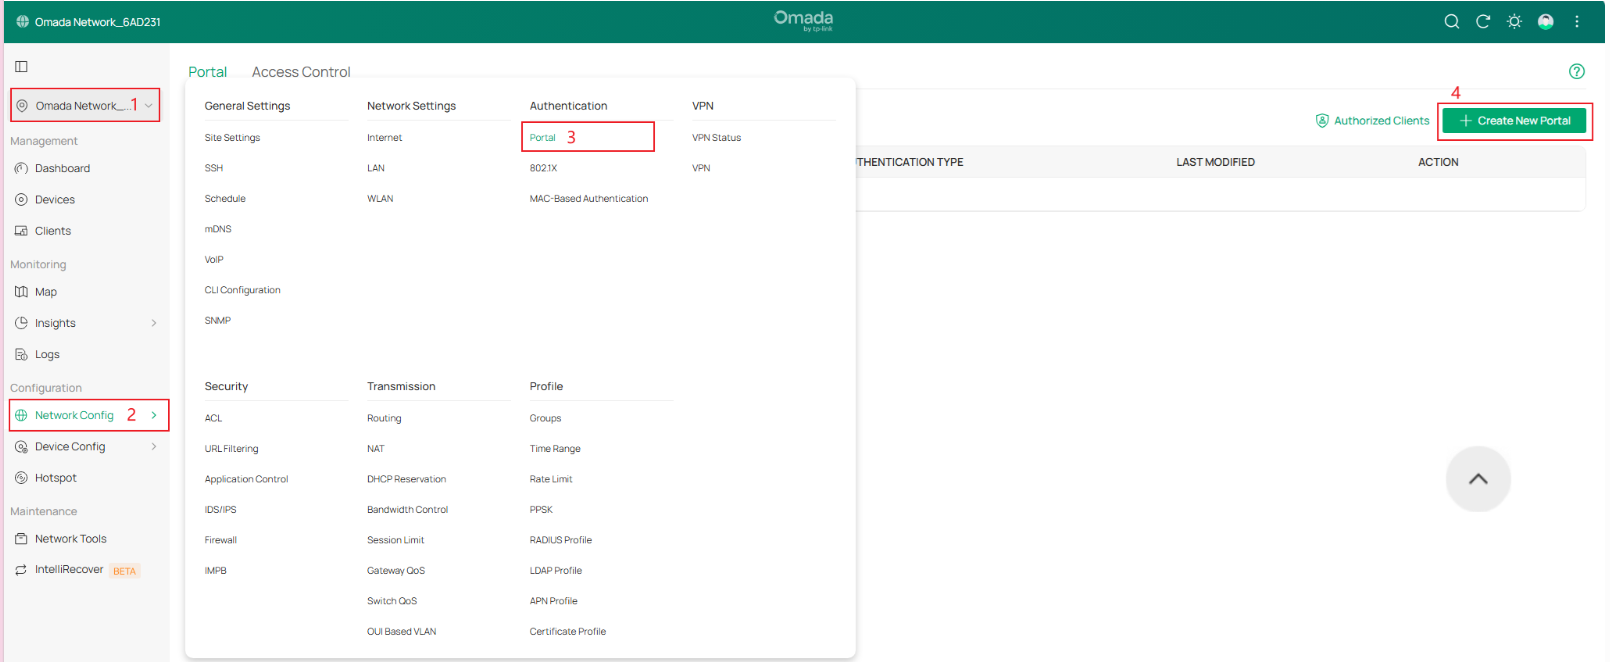
1. Log in to the Controller via a web browser. In Site View, Network Config > Authentication > Portal, click “Create New Portal”.
2. In the Create New Portal section, set the Portal Name and select the SSID & Network to configure Portal authentication on the Basic page.

3. Go to the Authentication interface, select the Authentication Type. Choose it as Hotspot > Voucher.
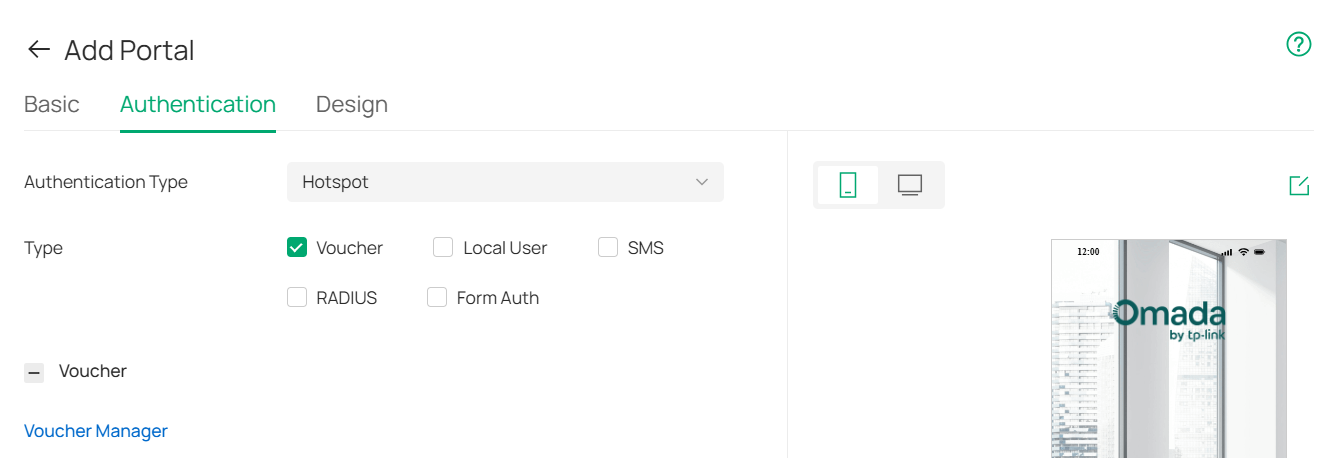
The remaining configuration of custom login interfaces, etc., should be done by following the controller interface settings. This will not be discussed here.
Step 2: Create Voucher Groups
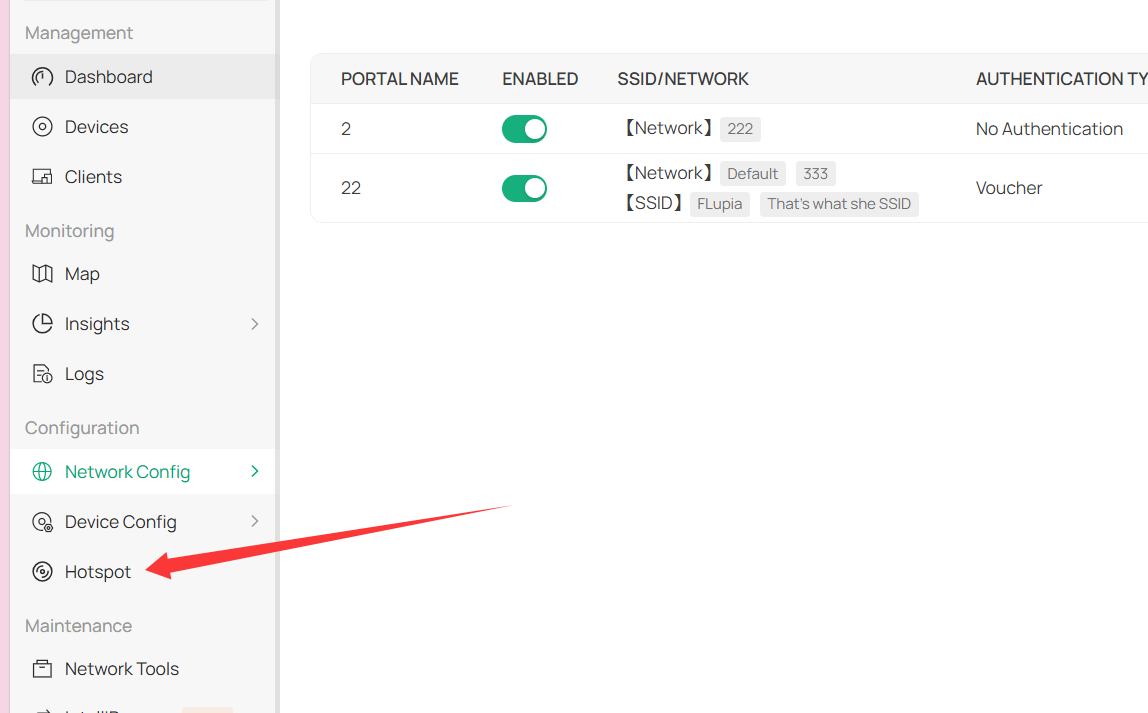
1. Click Hotspot to go to the Hotspot manager page.
2. Choose Vouchers > Voucher Groups > Create Voucher Groups, fill in the parameters on this page.
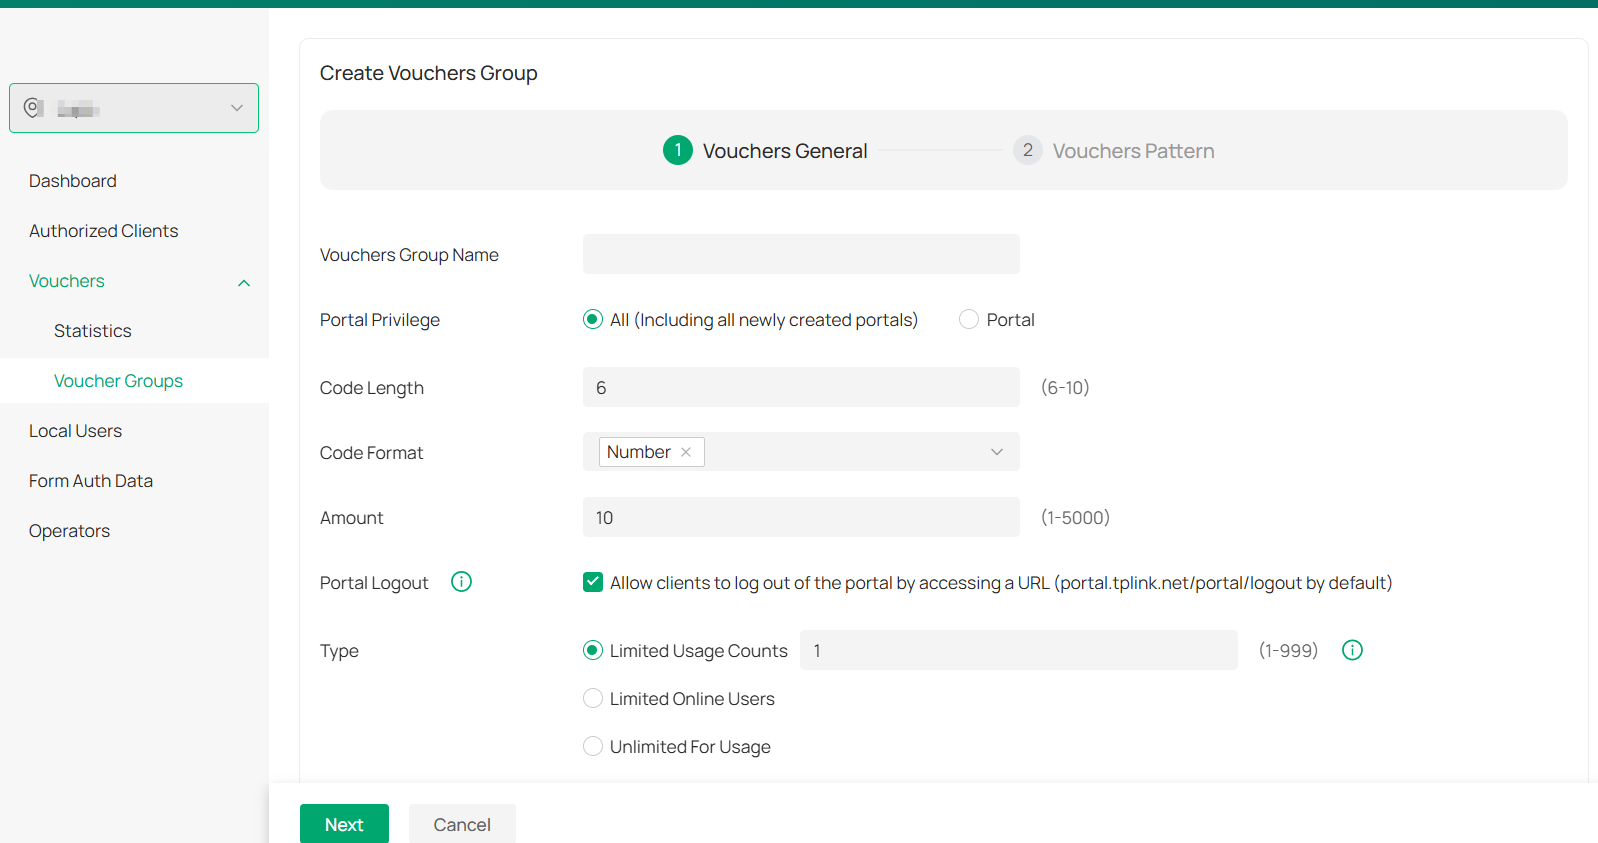
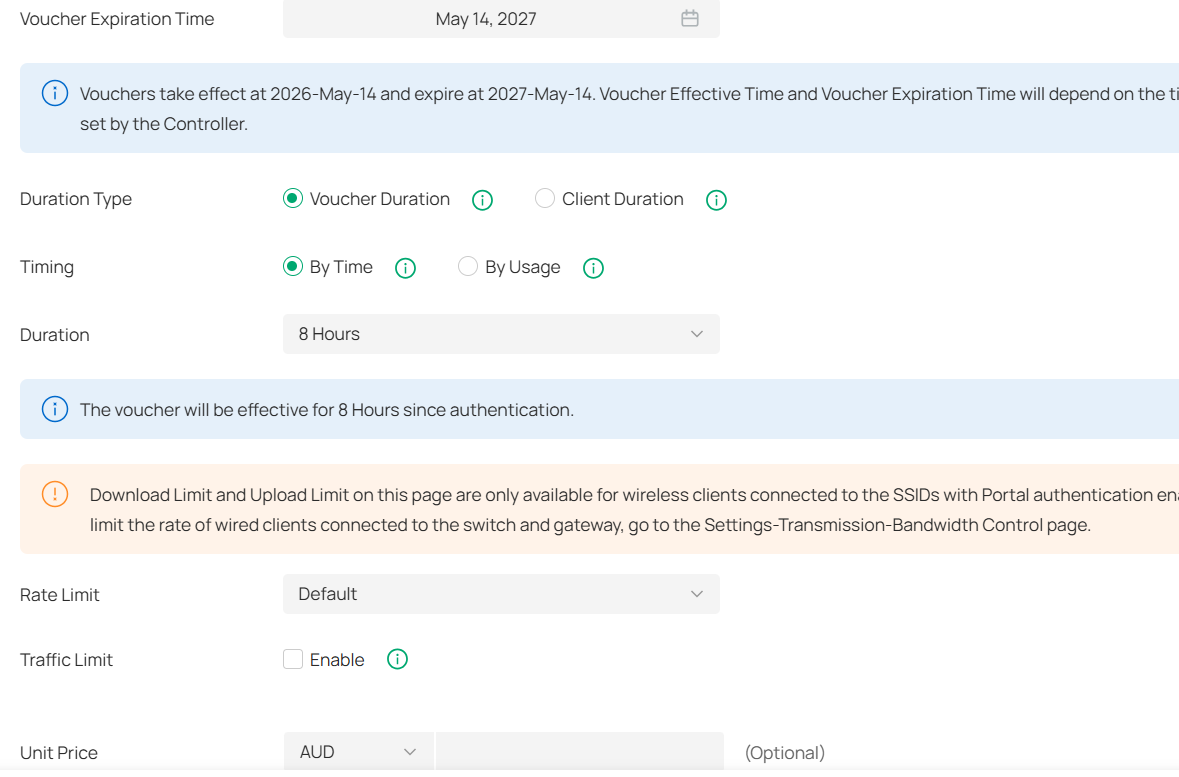
On this page, you can allocate specific internet time or traffic for different voucher groups according to your needs.
Step 3: Check the remaining time and traffic from the clients' side
After authentication, the following information will show up on the login access page.

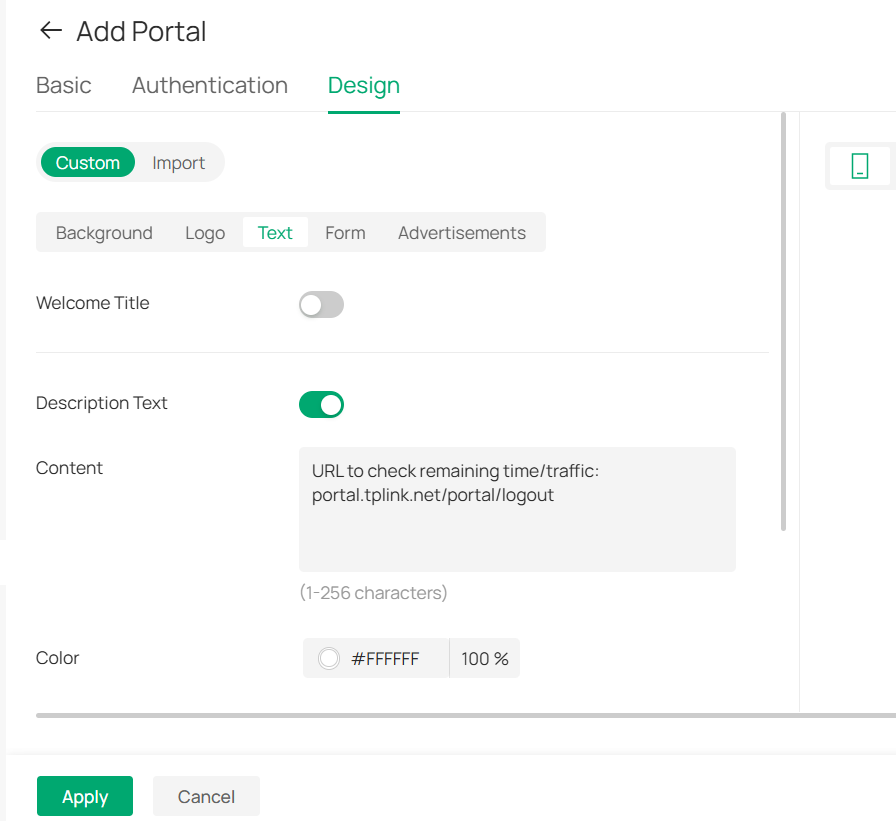
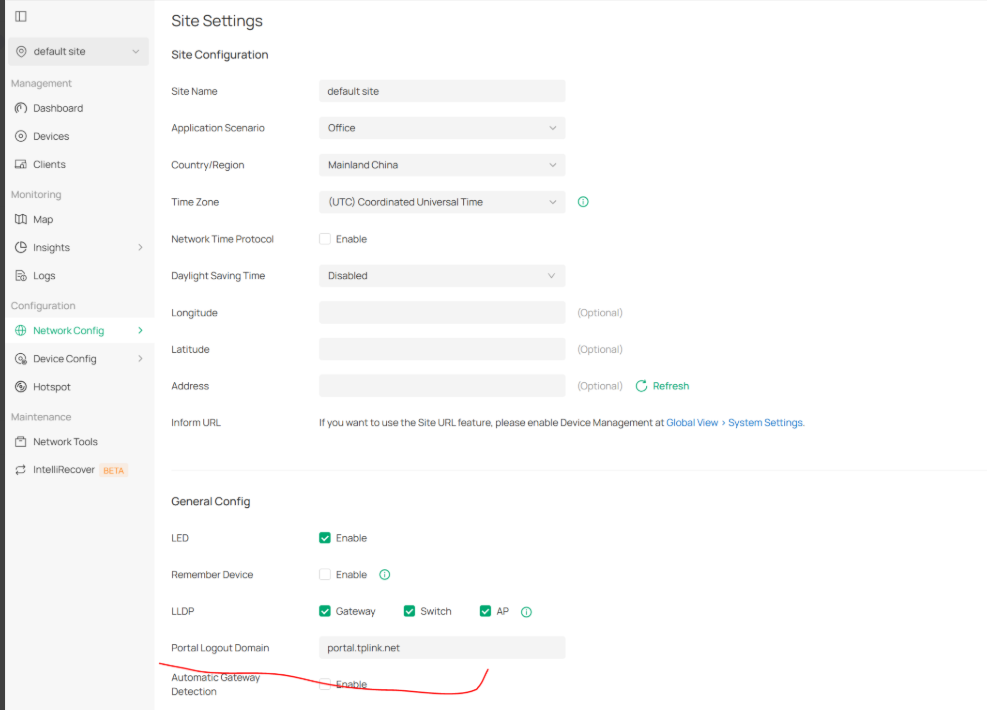
And it can be accessed again anytime by browsing the portal logout page. The portal logout URL defaults to portal.tplink.net/portal/logout.
The administrator can change it on Site Settings page:
If administrators want clients to check their remaining data themselves, the administrator can print this URL on the voucher interface and remind users. Like below: