Configuration Guide Omada Switch Configuration Guide for ProAV System (standalone mode)

- Prerequisits Prerequisits Prerequisits Prerequisits
1. This guide applies to all Omada SG2xxx, SG/X3xxx, SG5xxx and SG6xxx series switches.
2. The guide is based on configuring the switch via its built-in GUI (standalone mode).
- Login to the switch Login to the switch
DHCP client is enabled by default for all Omada switch's, that is, it get IP from DHCP server, and you can find the switch's management IP from the DHCP server. If there is no SHCP server, it will use fallback management IP, which is 192.168.0.1. The default login username/password is admin/admin, or it will ask you to set the credential when you login the switch the first time.
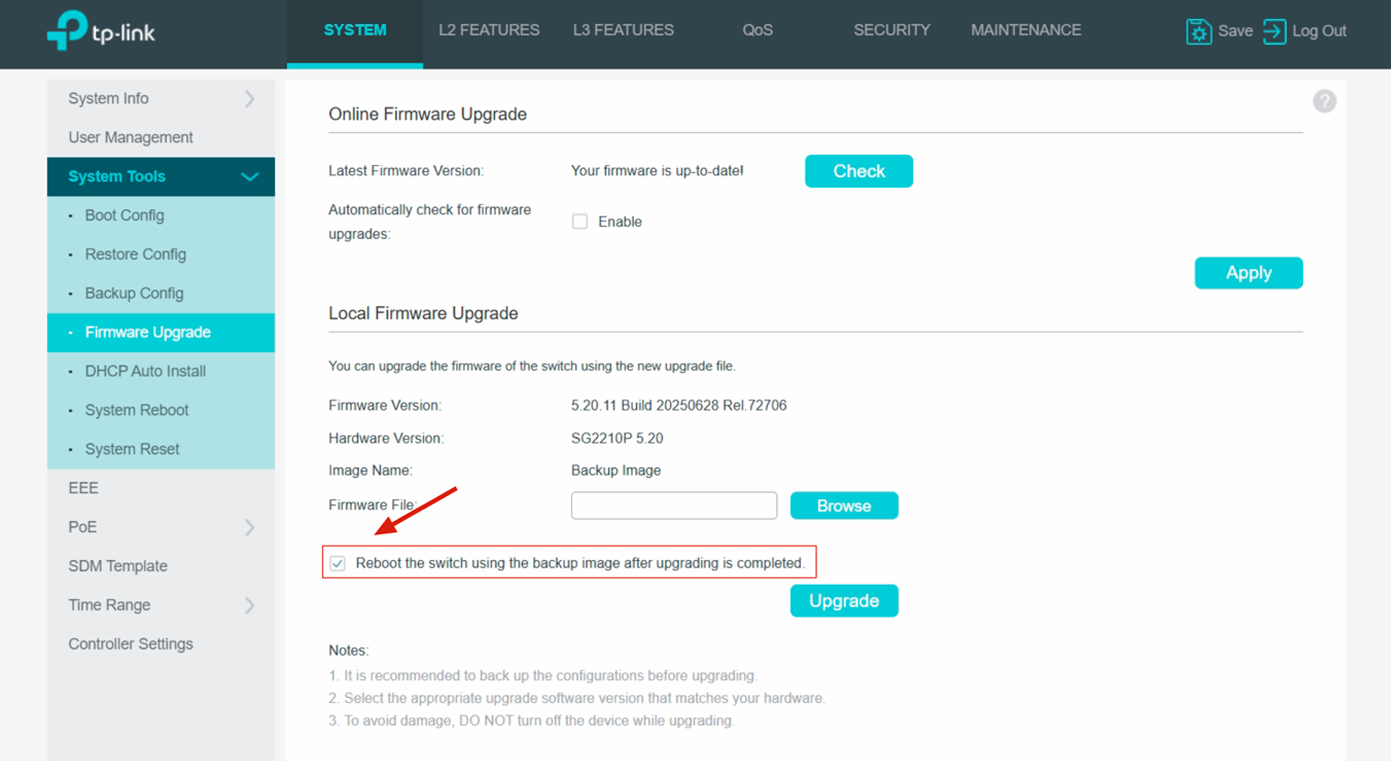
Before you use the switch, we recommend to upgrade the switch's firmware to the latest version. All Omada Managed switches have added the Online Firmware Upgrade feature from the firmware later than 2025.06 (approximately), you can do the auto cloud firmware upgrade under System -> System Tools -> Firmware Upgrade -> Online Firmware Upgrade. If your switch's installed firmware doesn't support Online Firmware Upgrade yet, you can check and download the latest Firmware from our official website https://www.omadanetworks.com/ and upgrade it manually under Local Firmware Upgrade.
Note: when you do the manual local firmware upgrade, please ensure the option “Reboot the switch using the backup image after upgrading is completed” is checked.
- Configure the QoS
There are different types of proprietary and standard ProAV protocols, like Dante, Q-LAN/Q-SYS, AES67, etc. They have slightly difference requirements for network switches, but almost all of them require QoS supports including:
a. DSCP Mapping
b. 8 Priority Queues
c. SP (Strict Priority) Mode
All Omada SG2xxx, SG/X3xxx, SG5xxx and SG6xxx series switches support these QoS features, here we will use SG2210P and Dante as example to demostrate how to configure it. The configuration starts from the switch's factory default settings.
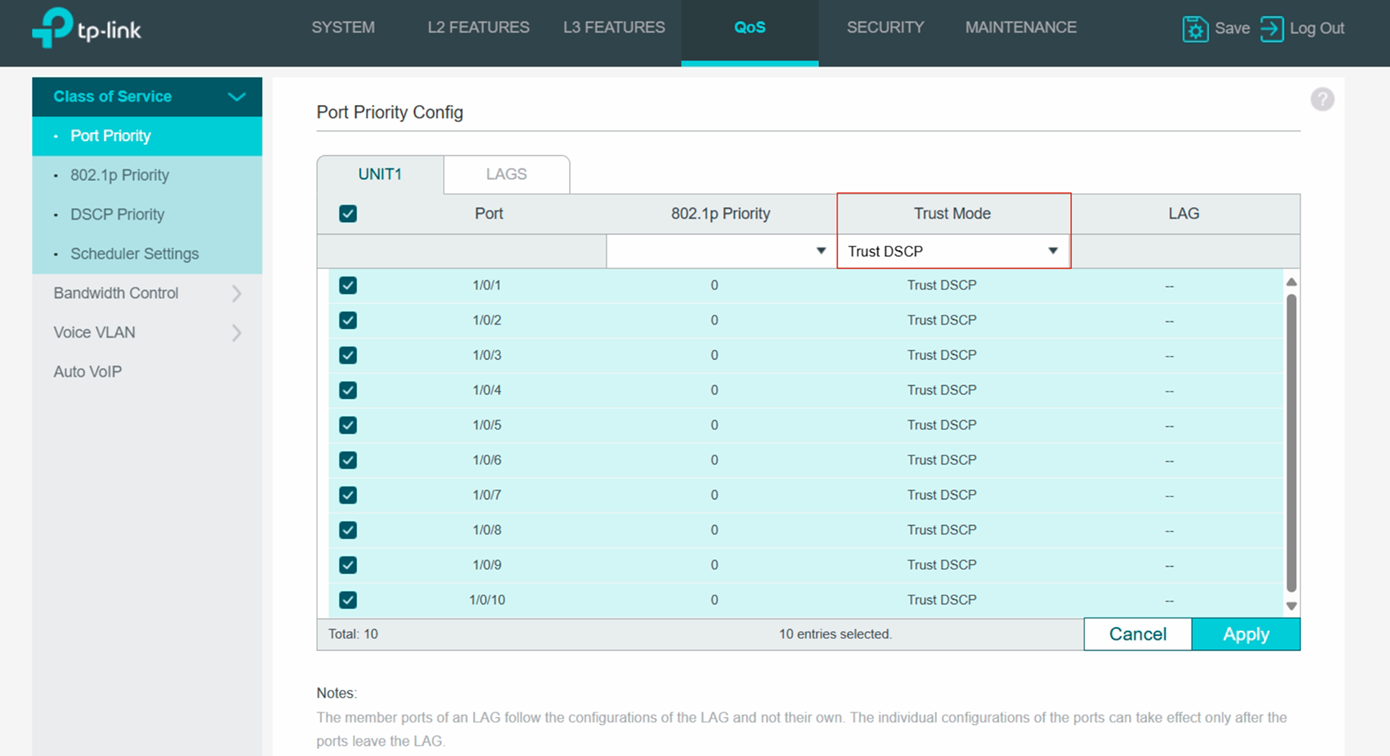
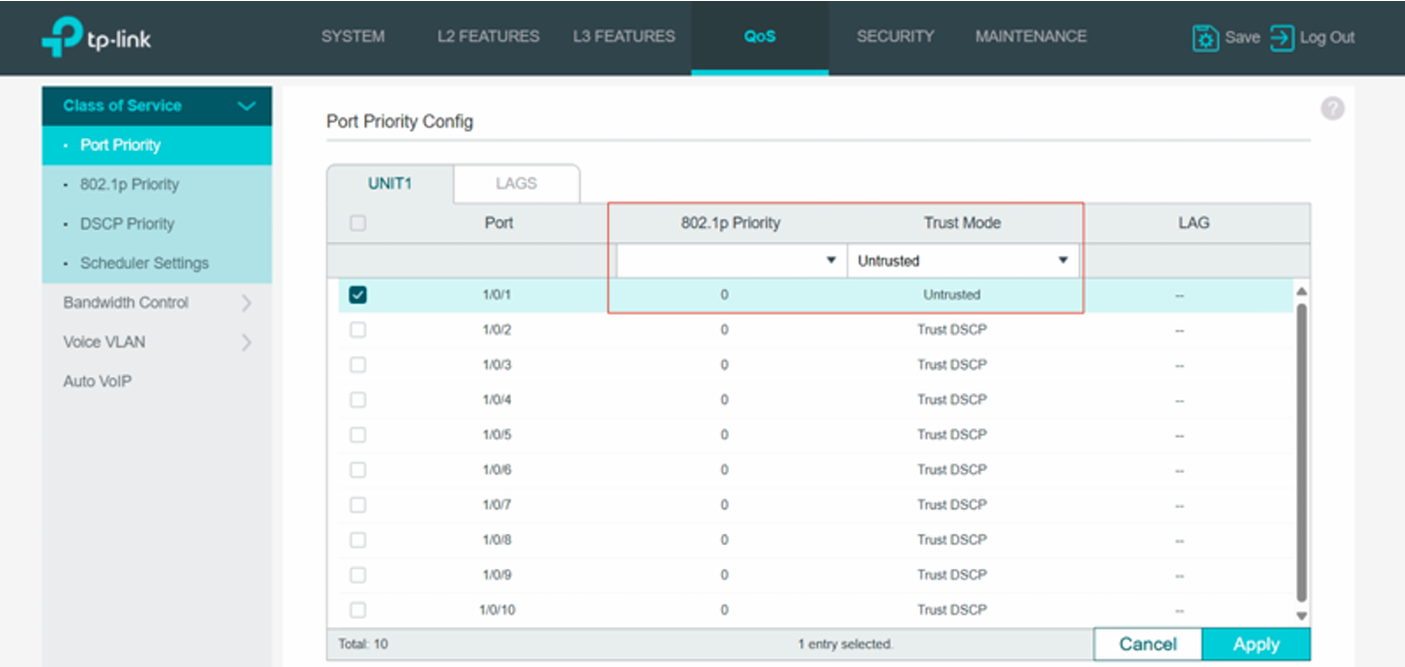
Navigate to QoS -> Class of Service -> Port Priority -> Port Priority Config, and select the ports that will connect the Dante nodes and the cascaded/uplink ports and slect Trust DSCP for the Trust Mode and click Apply. With this configuration, the switch will use the DSCP priority tag from the Dante devices instead of modifing it. For simplicity, here we choose all the ports.
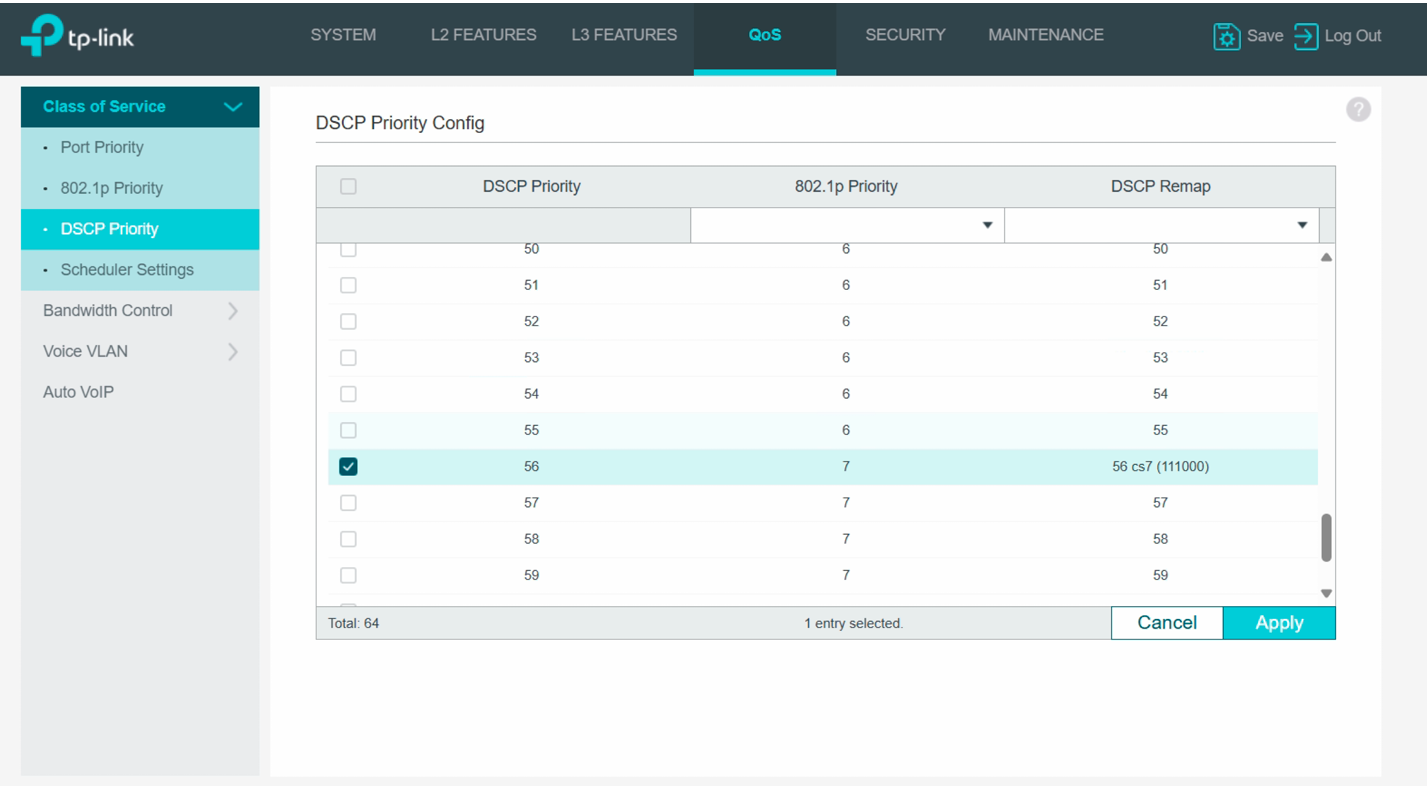
Dante requires the following DSCP mapping. DSCP 56 -> 802.1p 7; DSCP 46 -> 802.1p 5; DSCP 8 -> 802.1p 1; DSCP 0 -> 802.1p 0 (these 802.1p 0-7 are mapped to queue 0-7 one by one by default, you can also check it under QoS -> Class of Service -> 802.1P Priority -> 802.1p to Queue Mapping).
You don't need to change settings here since the switch's default settings already meet these requirements. If you need change the DSCP mapping, you can go to QoS -> Class of Service -> DSCP Priority -> DSCP Priority Config and customise here.
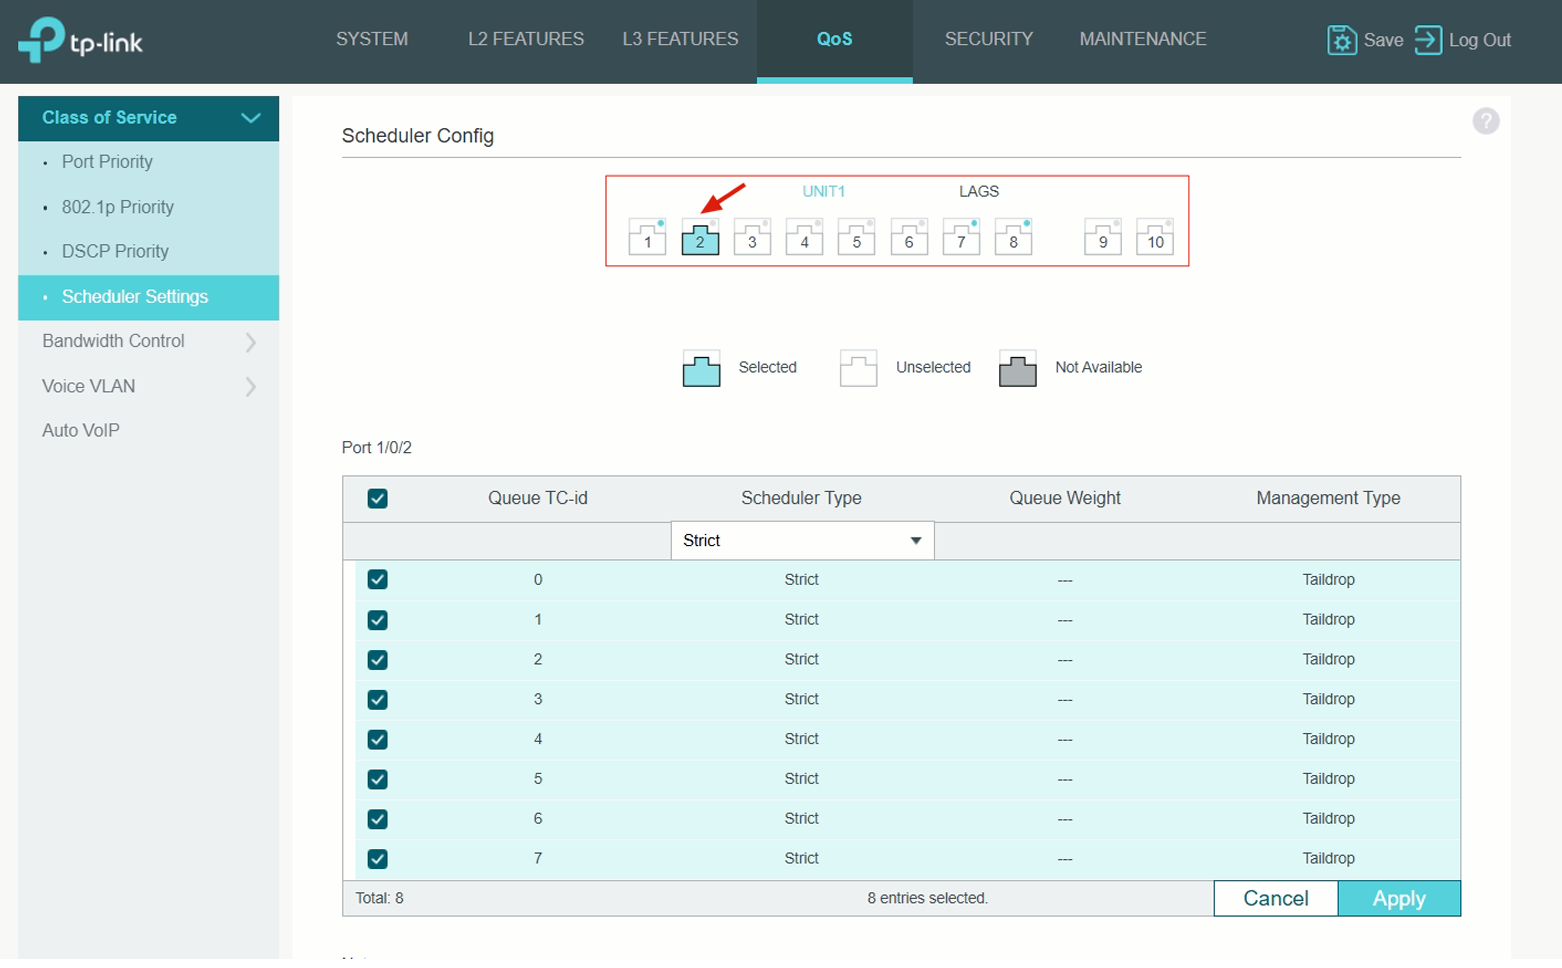
Move to QoS -> Class of Service -> Scheduler Settings -> Secheduler Config. Select the port, check all the Queues and choose Strict for Scheduler Type and click Apply.
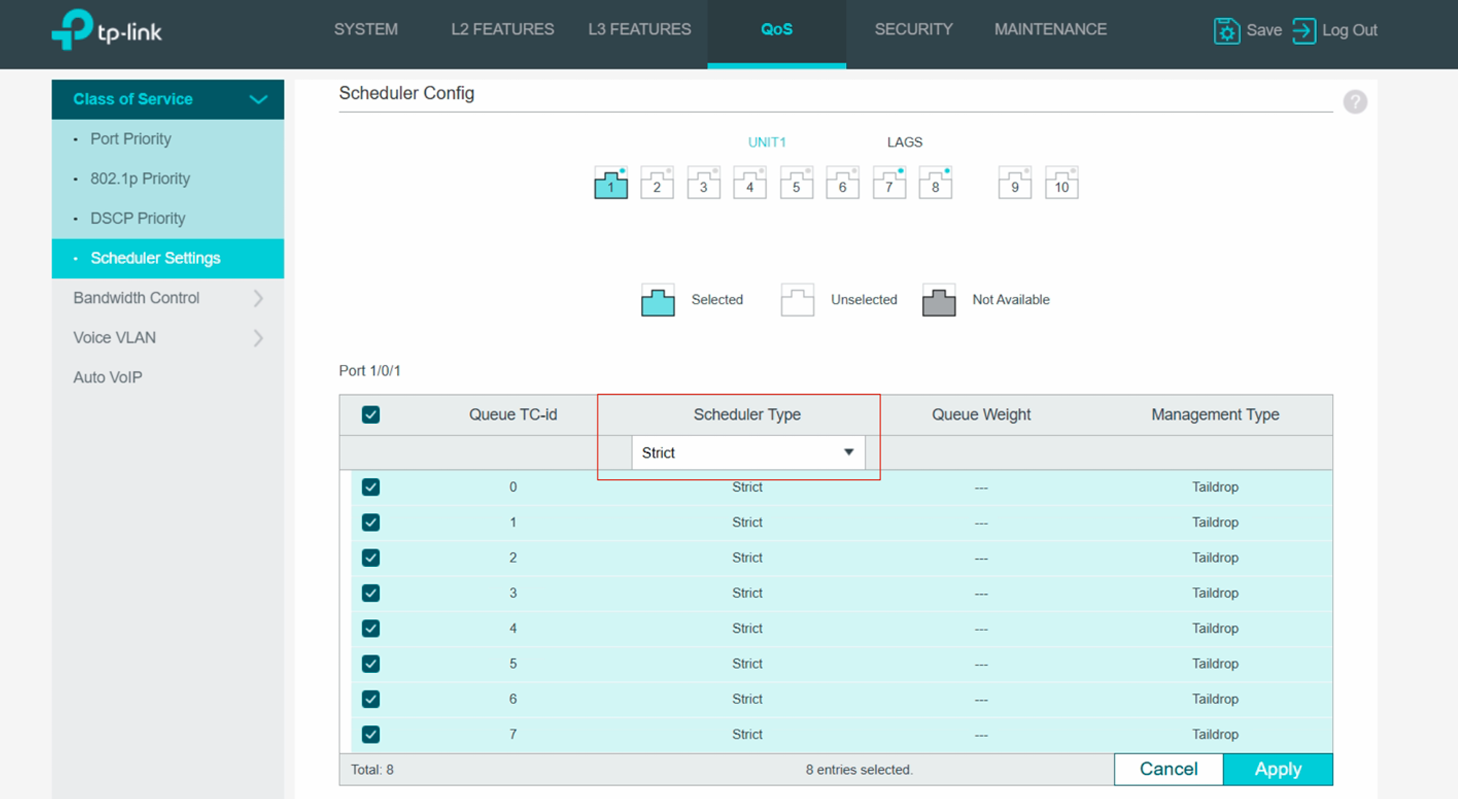
Please note you need configure all the ports one by one.
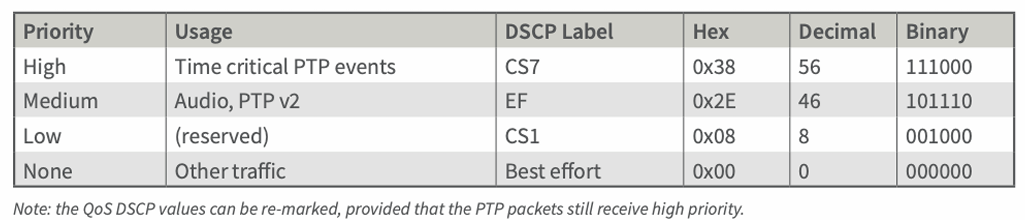
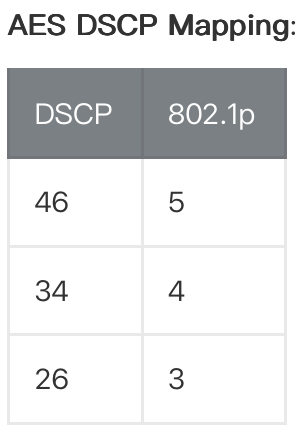
Note: other ProAV protocols have the similar QoS requirements and configurations. You generally just need to change the DSCP mapping accordingly. Here we put the DSCP mapping requirements for Q-LAN/Q-SYS and AES67.

Other QoS implementation suggestion:
Most ProAV networks generally use dedcated switches and don't share bandwidth with other traffic. But if you do need to connect other devices to the ProAV network like PC, printer, etc., it's suggested to give lower priority to these traffic. To do it, you can use the switch's Port Priority feature. Assuming you need connect a PC to port 1 of the switch, we can set the traffic coming from this port with lower priorities like priority 0 and Trust Mode as Untrusted (this is the default settting of the switch port, we point it out here just make sure you don't have the misconfiguration).
- Configure the Multicast IGMP Configure the Multicast IGMP
Most ProAV protocol use multicast for traffic transmission, especially for video over IP. It generally needs IGMP features including:
a. IGMP Querier (only need one querier on one network)
b. IGMP Snooping
c. IGMP Drop Unknown Multicast
d. IGMP Fast Leave
All Omada SG2xxx, SG/X3xxx, SG5xxx and SG6xxx series switches support these IGMP features, here we will use SG2210P as example to demostrate how to configure it.
We recommend to use VLAN to seperate different traffic and enhance the security. For the network that is dedicated for ProAV system, since there is no other traffic, you can use the default VLAN 1 for simplicity. To make the guide neat, we will just use VLAN 1 to demostrate how to configure the IGMP for proAV, and we assume all the multicast sources and the receivers are on the same VLAN, if you have multicast sources and receivers on different VLANs, it will require Multicat routing protocols like PIM-SM, which is out of the scope of this document.
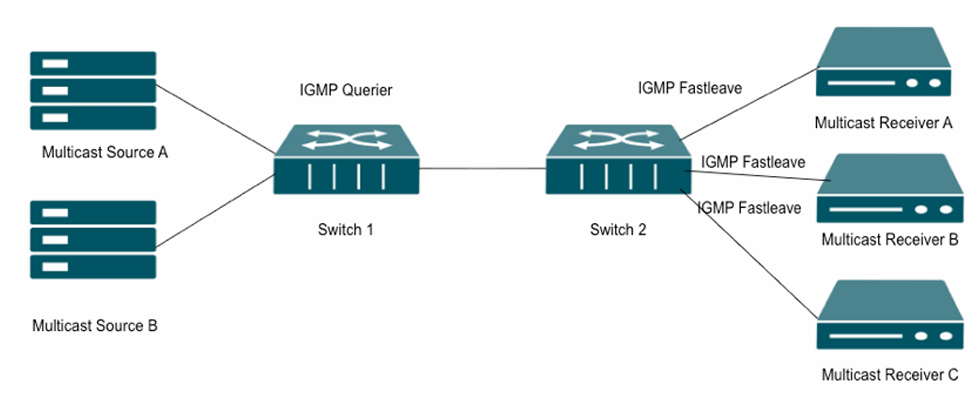
Multicast Network Design
Before demostrating the configuration, we want to clarify some concepts of IGMP simply:
a. IGMP Querier: IGMP Querier periodically sends the IGMP Querier packets to maintenance the multicast table, it can be one of the switch, the Gateway or even some server/application. It's important to know that one IGMP network should have only one IGMP Querier, and it should be as close as to the multicast sources. If you plan to use the Omada Switch as the IGMP Querier, please choose the one that is closest to the multicast sources as shown below.
b. IGMP Fastleave: Dante, Q-LAN and other ProAV protocols all suggest to enable IGMP Fastleave to ensure smooth channel switching. Please note IGMP Fastleave should only be enabled on the ports that connects the multicast receivers, you should never enable it on the uplink/cascaded ports.
Configure the IGMP Multicast on Omada Switch
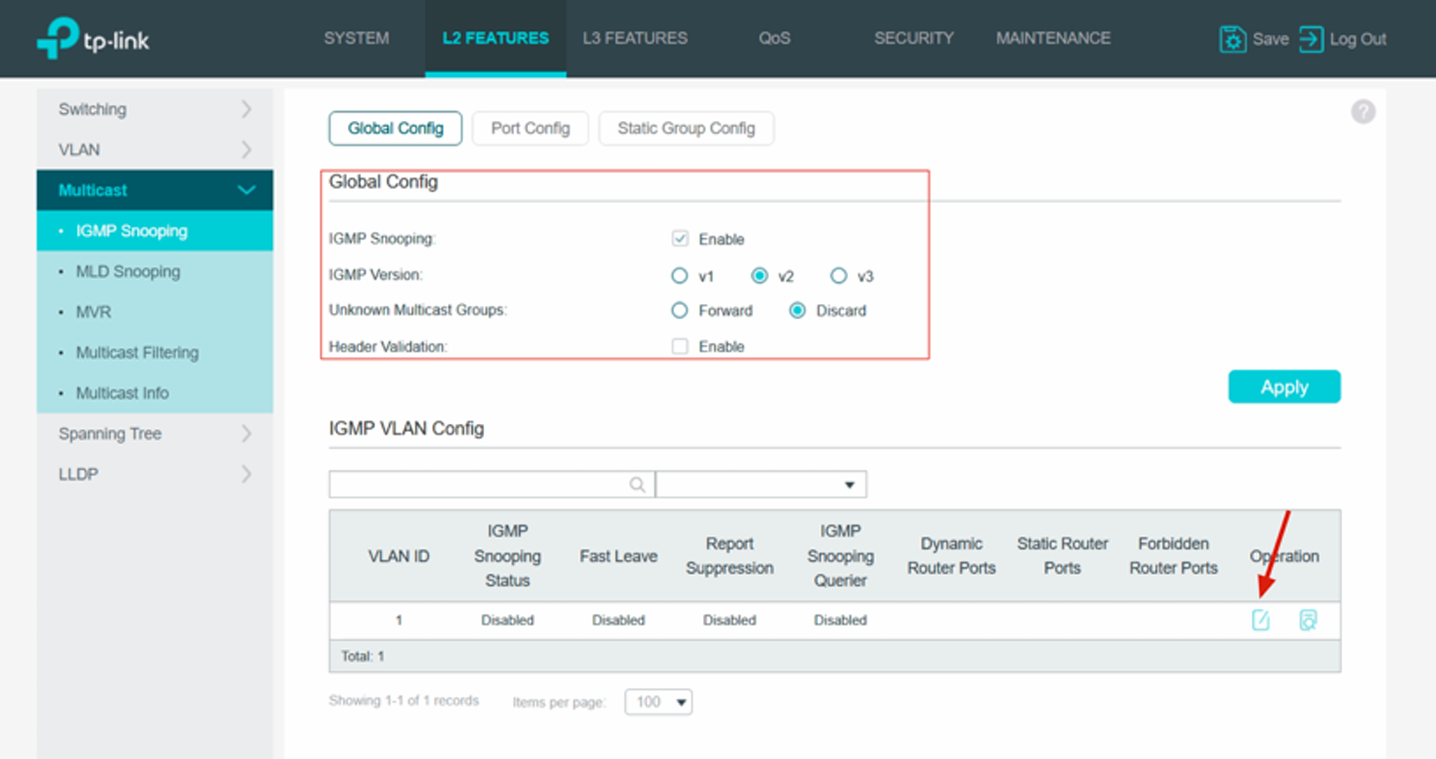
Navigate to L2 Features -> Multicast -> IGMP Snooping -> Global Config, enable IGMP Snooping, choose v2, Discard Unknown Multicast Groups and click Apply.
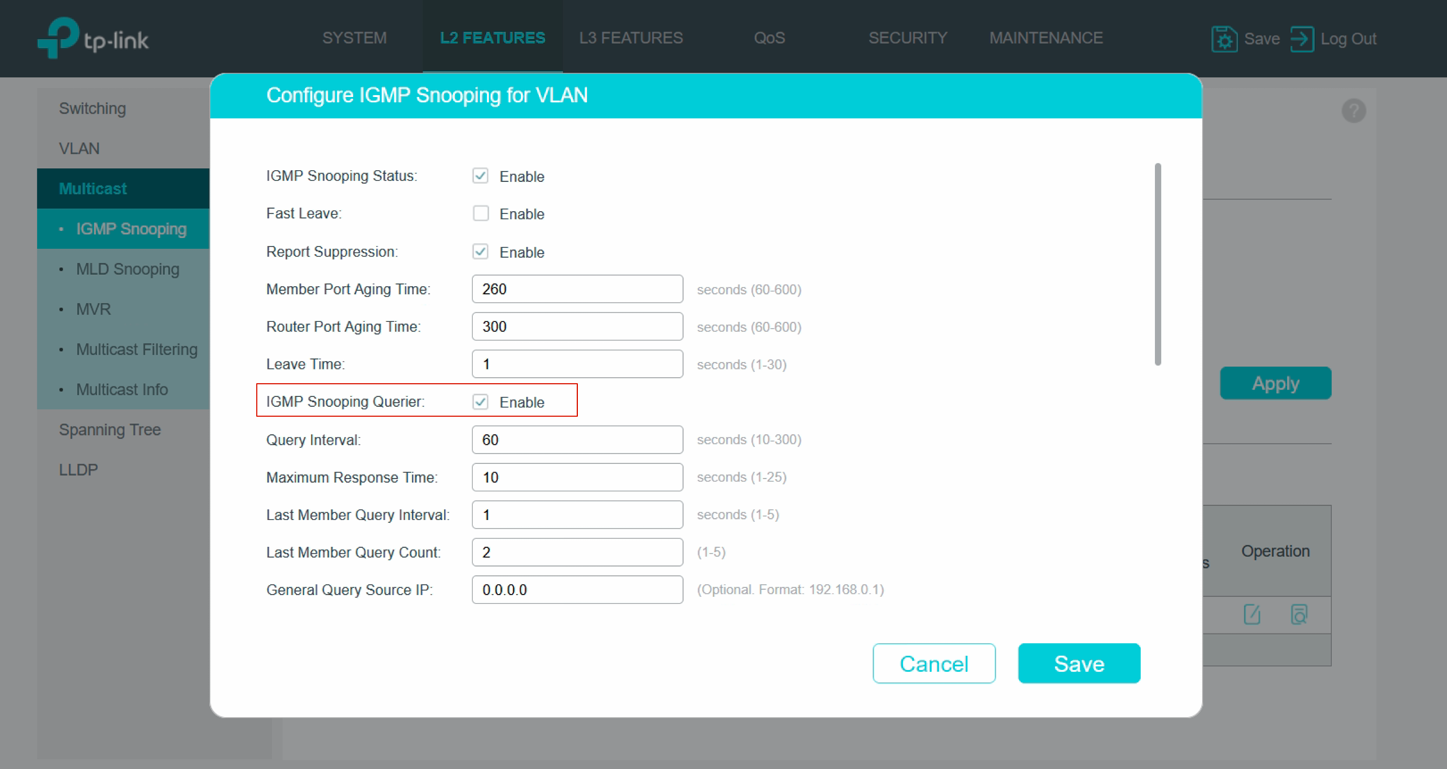
Click the edit icon on IGMP VLAN Config, check IGMP Snooping Status, keep Fast Leave unchecked here, enable Report Suppression, enable IGMP Snooping Querier only on one switch that is closest to the multicast source and keep it disabled on the other switches on the network, the default querier interval is 60s, you can lower it if needed. You can keep other settings as default ones and click Save.
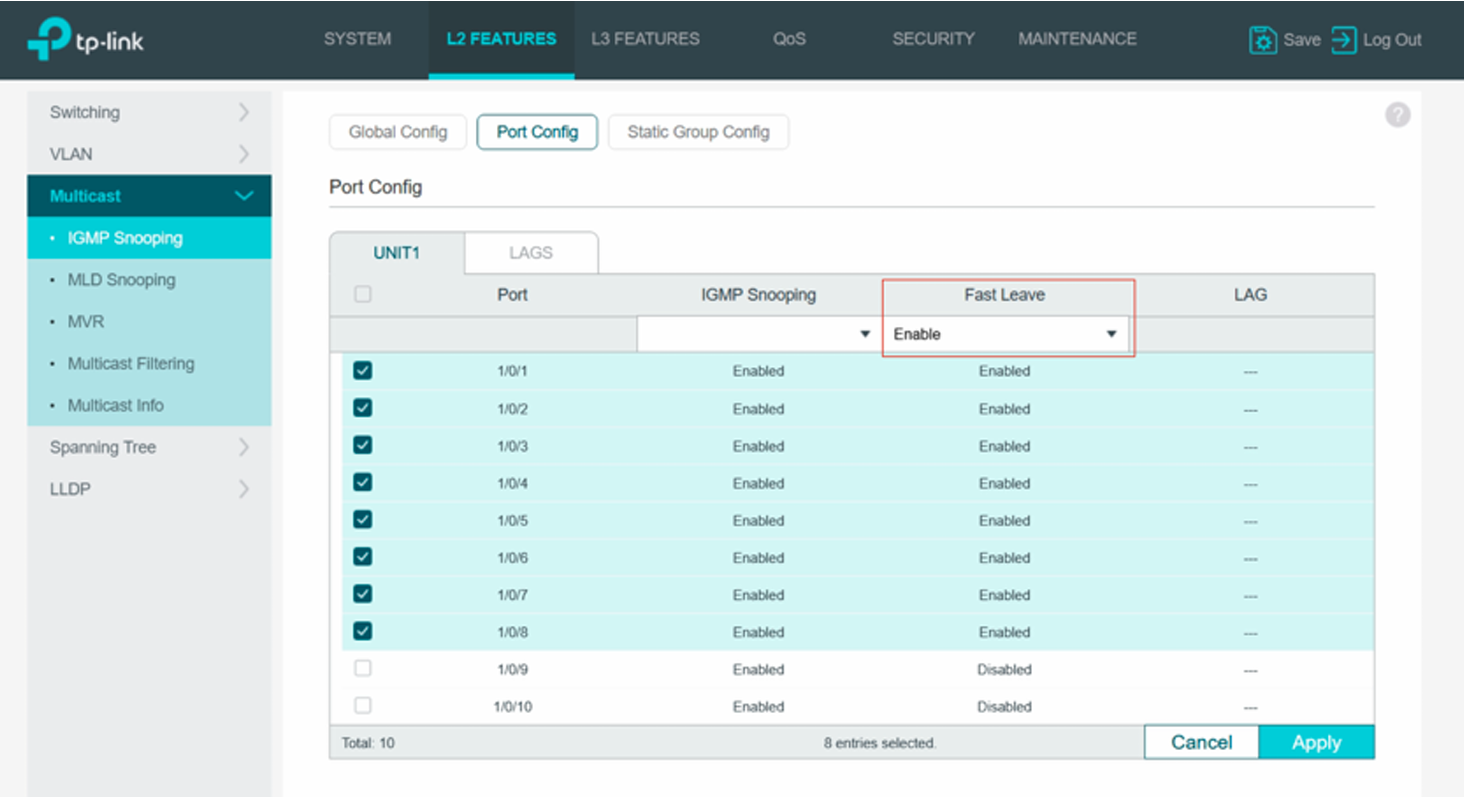
Go to L2 Features -> Multicast -> IGMP Snooping -> Port Config, select the ports that will connect to the multicast receivers, here we assume it's port 1-8, and enable Fast Leave on these ports. Keep IGMP Snooping enabled on all ports by default and click Apply.
Now you have finished the Multicast IGMP Snooping configuration.
- Other Settings
QoS and IGMP are the two most important and essential switch configurattions for ProAV system. Additionally the following settings can also benefit the ProAV installation and is recommended to do:
a. Disable STP/RSTP
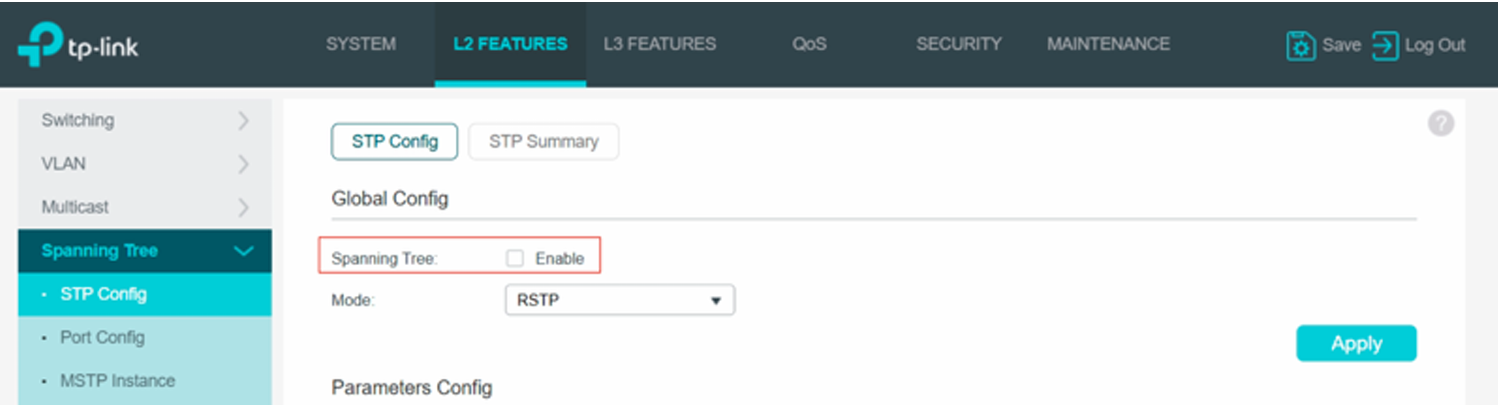
STP/RSTP can provide link redundancy and avoid loop, but it can also introduce the latency during the spanning tree re-convergence which may affect the ProAV network's performance. So it's recommended to disable it for ProAV network. To disable it, navigate to L2 Features -> Spanning Tree -> STP Config, uncheck the Spanning Tree and click Apply.
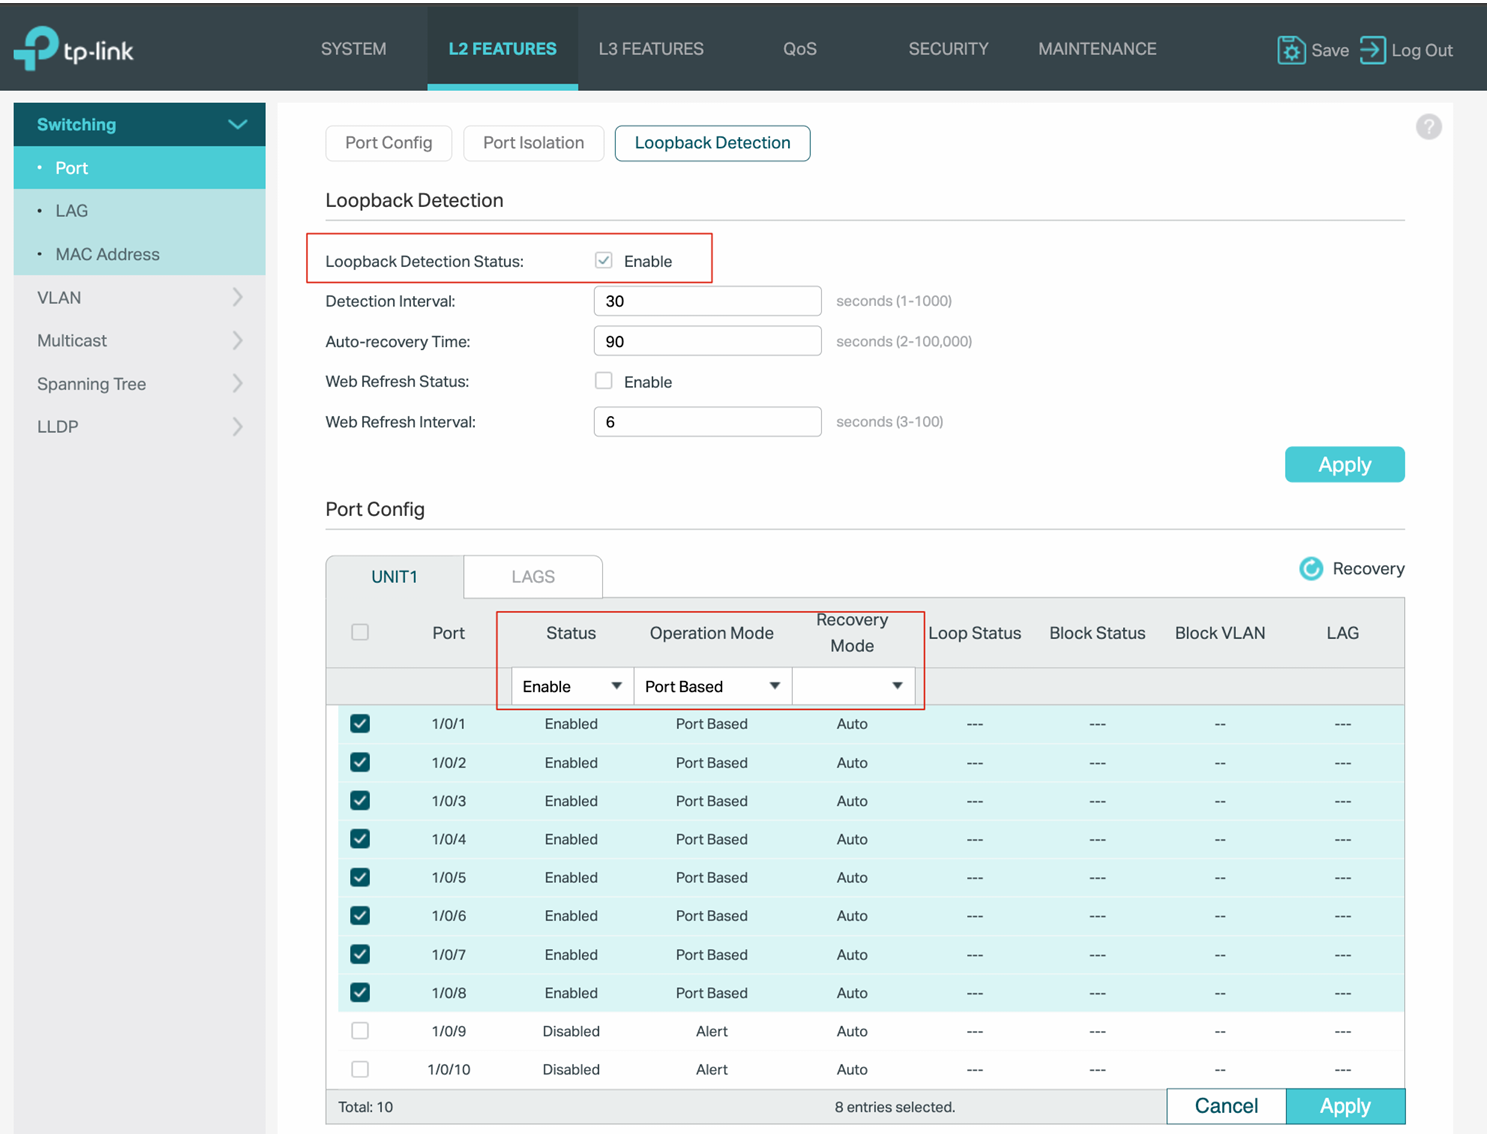
When STP is diabled, you need to ensure there is no loop on the network. If you still want to avoid the potential loop, you can enable Loopback Detection under L2 Features -> Switching -> Port -> Loopback Detection. Enable Loopback Detection Status, click Apply to save. And then choose all the access ports (it's not recommended to enable Loop Detection on the uplink/cascaded ports, because when there is false loop detection, it will block the uplink port temporarily and cause latency or even failure), enable the status and choose the Port Based Operation Mode, keep the default Auto Recovery Mode, and click Apply.
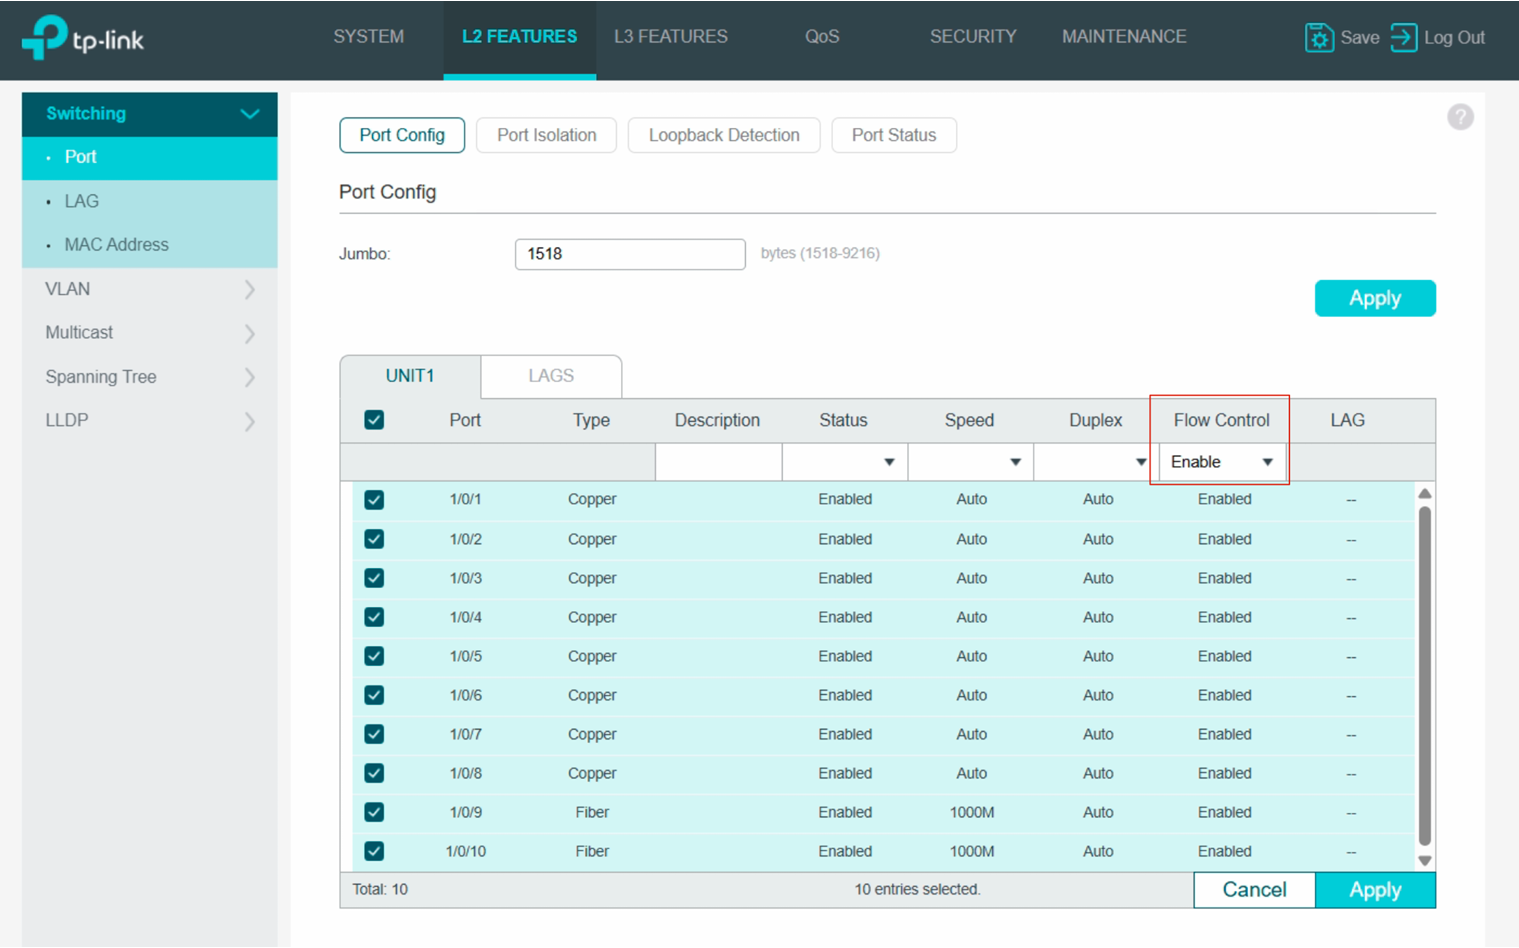
b. Enable Flow Control
Q-SYS mentions "Enabling Flow Control improves Q-SYS TSC touch screen performance and is recommended. (This applies to Gen 1 and Gen 2 touch panels only)". If you want to enable Flow Control, go to L2 Features -> Switching -> Port -> Port Config, select the ports and choose Enable for Flow Control and click Apply.
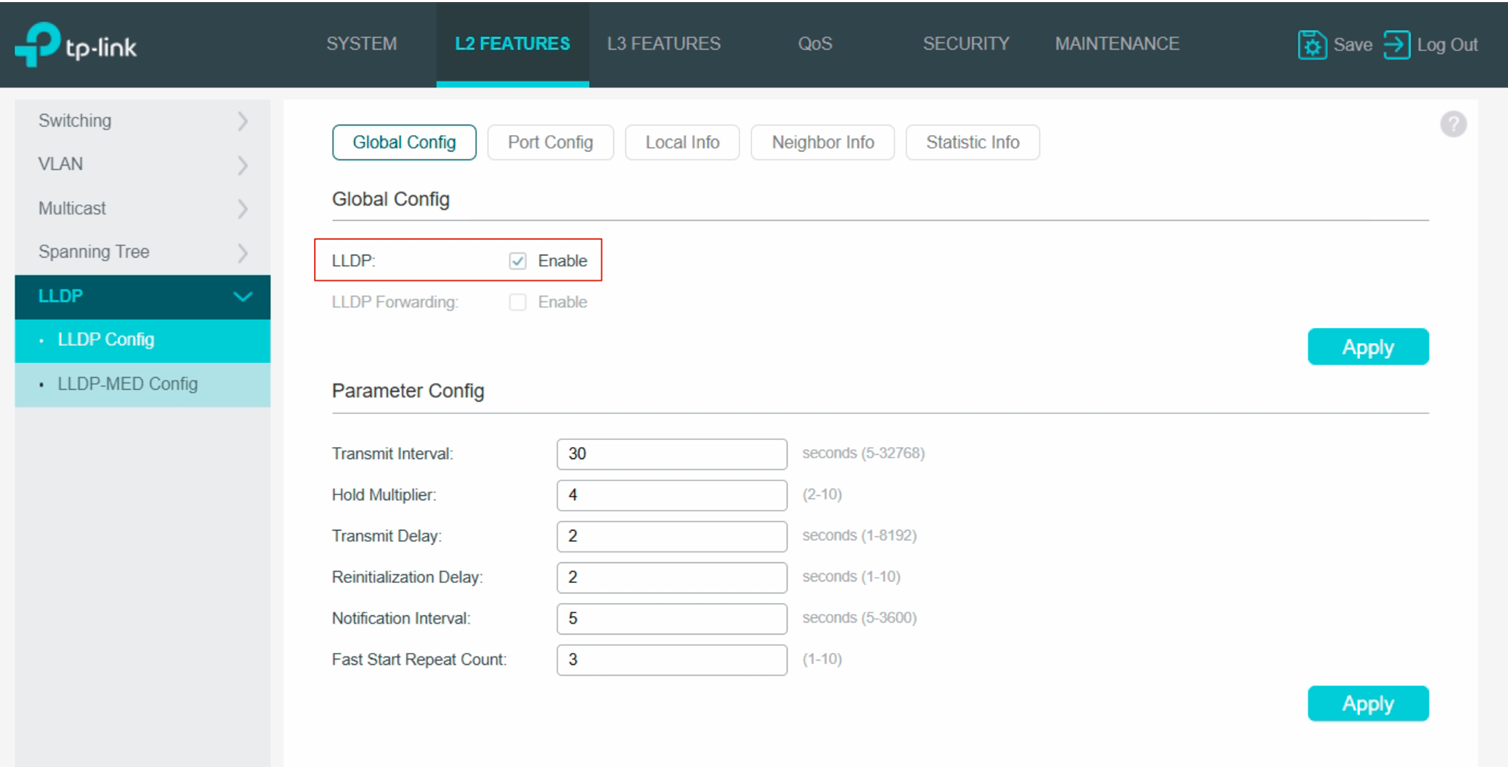
c. LLDP
Most ProAV systems suggest to enable LLDP for discovery. LLDP on Omada switches is enabled by default under L2 Features -> LLDP -> LLDP Config
d. EEE (Energy-Efficient Ethernet)
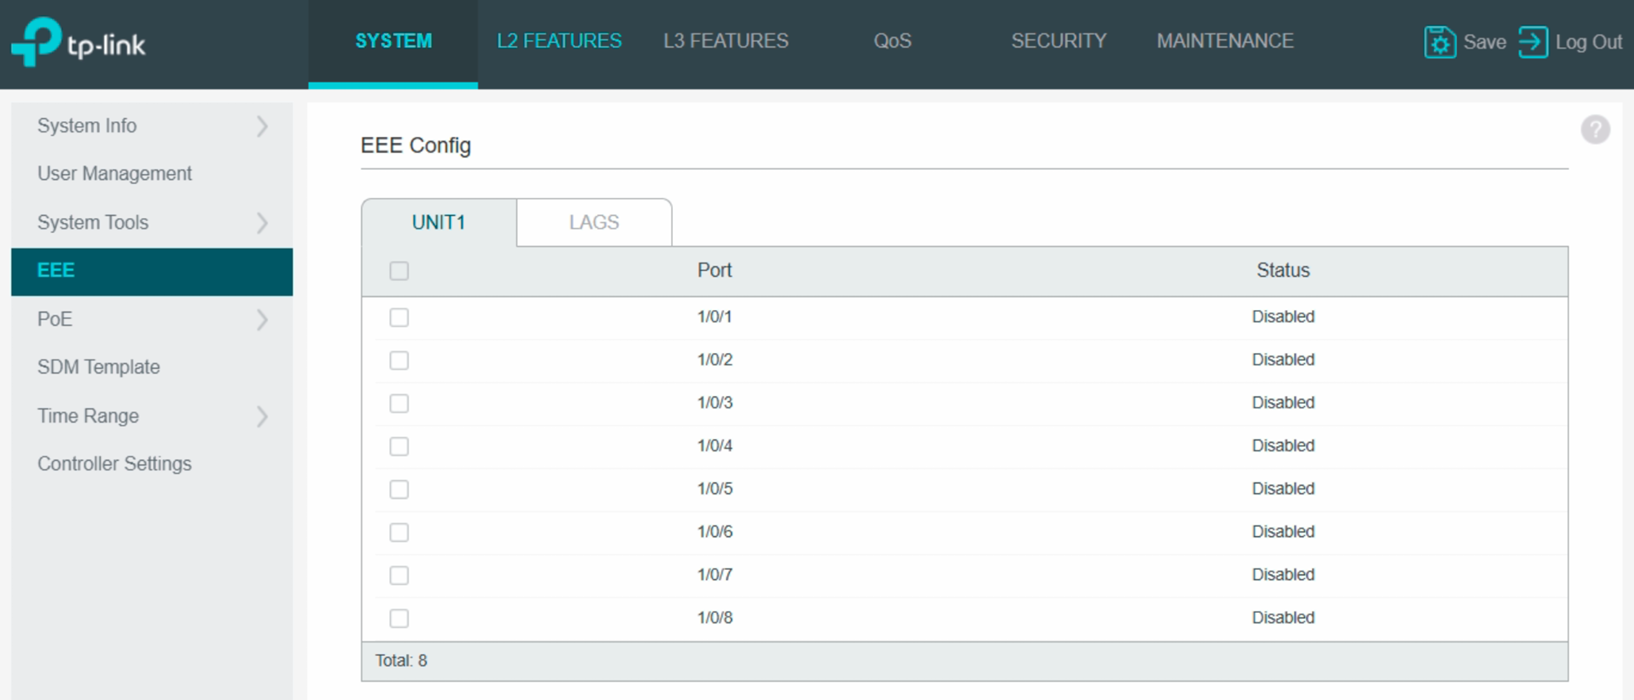
Most ProAV systems suggest to disable EEE. EEE is disabled by default under System -> EEE.
e. Jumbo Frame
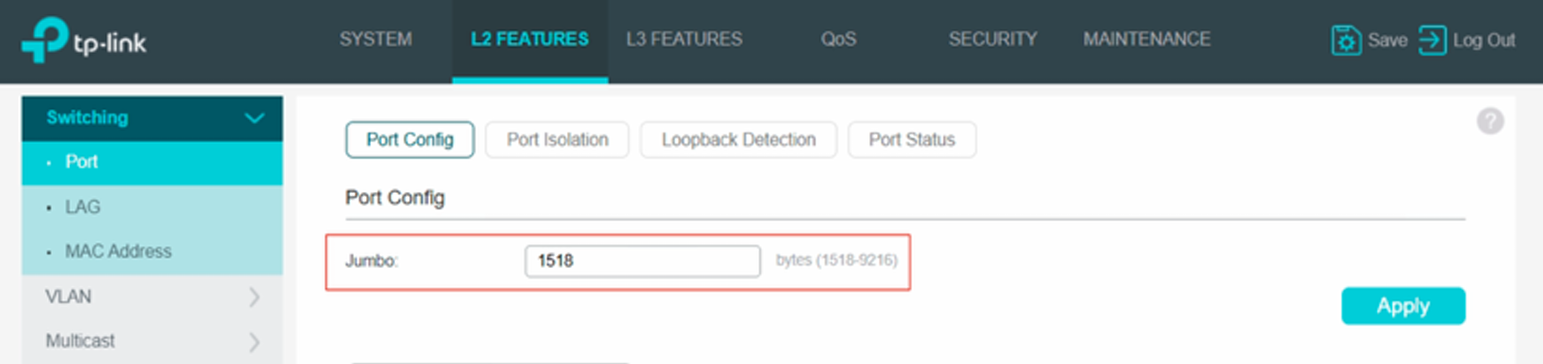
Most ProAV systems don't use Jumbo Frame and suggest to disable Jumbo Frame. Omada switches don't use Jumbo Frame, it use 1518 bytes by default. You can find it under L2 Features -> Switching -> Port -> Port Config -> Jumbo
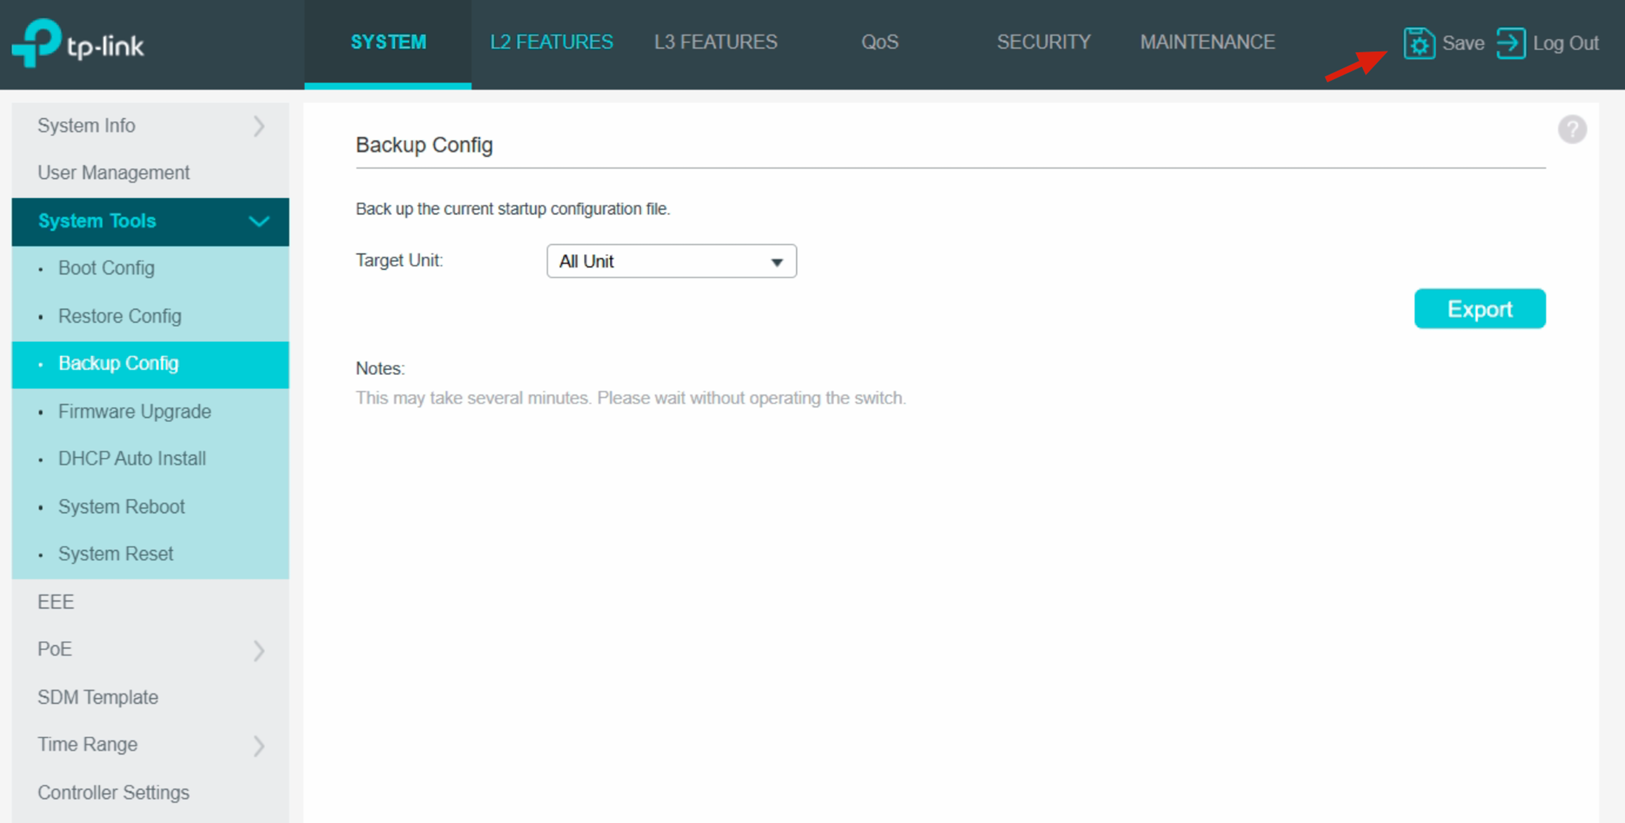
Click the Save icon on the top right corner to save the switch's configuration, and you can export and import the configuration under System -> Sytem Tools -> Backup Config/Restore Config.
Note: It's recommended to make two copy configuration file, one with IGMP Querier configured for the switch that works as the IGMP Querier, ther other without IGMP Querier configuration for other switches.
- PTP-aware switch
ProAV systems use PTP (Precision Time Protocol) for time clock synchronization between the ProAV nodes. The PTP-aware switch helps keep PTP timing accurate by compensating for queuing and forwarding delays insdie the switches. But it doesn't mean that for all the ProAV networks, you must have PTP-aware switches. So let's clarify in what scenarios you must have PTP-aware switches and in what scenarios you don't need PTP aware switches.
a. L3 Deployment
If the ProAV devices are on different L3 subnets, PTP distribution becomes trciker because PTP is not designed to cross networks without special support. In that case, PTP-Aware boundary clocks are usually required to regenerate and forward timing.
b. L2 Deployment
In a "flat" L2 LAN with light traffic (less than 20 ProAV devices, 2-3 hops), PTP packets usually experience little variation in delay/jitter. In such cases, you don't need PTP-aware switches - the network can still distribute clock accurately for ProAV protocols.
c. Different ProAV Protocols
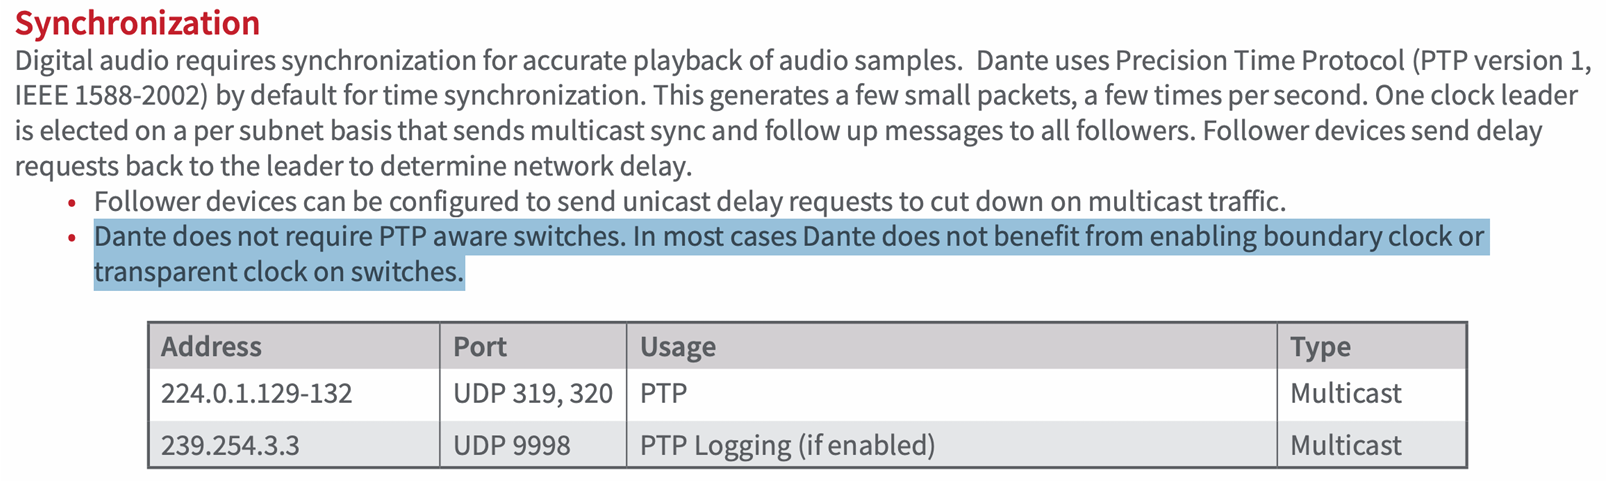
Different ProAV protocols have different implementation of PTP and different requirements for the latency/jitter as well. For Dante, it uses PTP v1. PTP v1 is not compatible with PTP v2, that means a regular PTPv2-aware switch cannot synchronize Dante endpoints and can sometimes even interfere with Dante. And Dante official document clearly states Dante does not require PTP aware switches.
Other ProAV protocols like Q-LAN/Q-SYS, AES67 use PTPv2. And for large, multi-hop or L3 networks, PTP-aware switches is ususally required. Quote from AES67 Practice Guide:

Note: Omada PTPv2-aware Switches
| Switch Model | Status |
| SG6xxx series | Support by CLI |
| S6500- series | Support by CLI |
| S7500- series | Support by CLI |