How to Edit Switch Port Configurations (Controller V6.X)
This article goes through changing switch port configurations in Omada Controller V6.0. If you have an earlier version, please check out our FAQs here: TP-Link FAQs
Port configuration location
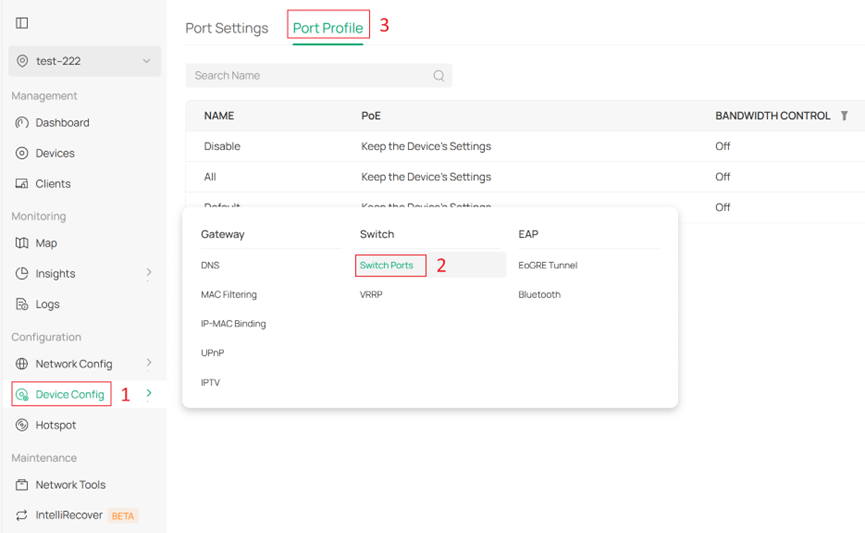
Switch Port configurations have moved in Omada Controller V6 from Wired & Wireless Networks > LAN to their own dedicated Port Profile window. There are two ways to navigate to this window.
In the Site View, navigate to Device Config > Switch > Switch Ports > Port Profile
The second method is to navigate to the specific device in Devices, opening up the device config window, and selecting Ports 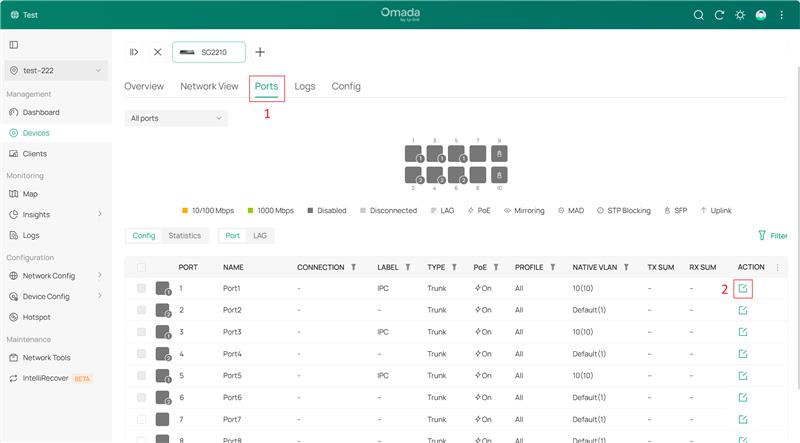

Port Profile Walkthrough
If upgrading from Omada Controller V5.15.X, your Switch Port Profile configurations have been retained.
Most configuration options from previous versions have been retained. Please find a brief description of the features you can manage in this window.
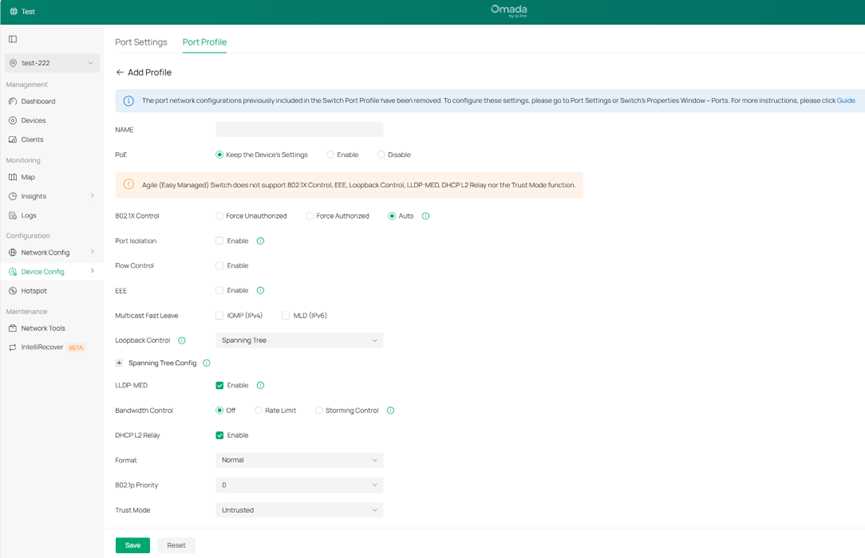
PoE: You can enable or disable PoE on this port.
Port Isolation: You can disable traffic on this port from being sent to other isolated ports. The isolated port can still send and receive traffic from other non-isolated ports.
Flow Control: You can have this port monitor if traffic is being sent or received too quickly, and send a PAUSE frame to halt the traffic on this port for a few milliseconds.
EEE: Stands for Energy-Efficient Ethernet; allows the switch to put this port into standby mode when it detects low activity.
Multicast Fast Leave: Allows for a faster response when a device leaves a multicast group.
Loopback Control: Selects the loop detection mechanism used on this port.
Bandwidth Control: Controls the percentage of total bandwidth on this port.
DHCP L2 Relay: Allows DHCP packets to be forwarded within the same broadcast domain or VLAN. Format selects the packet format for the sub-option fields of DHCP option 82. Normal sets the format to TLV (type-length-value). Private sets the format to only value.
802.1p Priority: Assigns a Quality of Service (QoS) priority level to this port.
Trust Mode: Selects the priority mode trusted by this port.
- Untrusted relies on port priority to prioritize packets.
- Trust 802.1P uses the PRI value defined in the 802.1Q Tag.
- Trust DSCP uses the Type of Service field in the IP header to determine priority.
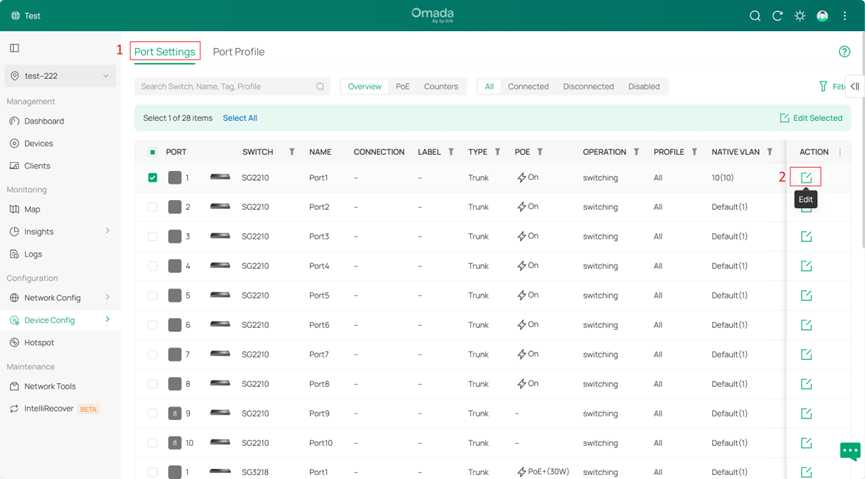
Port Settings Walkthrough
Omada V6.0 added the Port Settings view, which allows an overview of all switch ports. The Port Settings View also allows search, sorting, and advanced filtering options. This section will briefly go over the editing options for ports in this window.
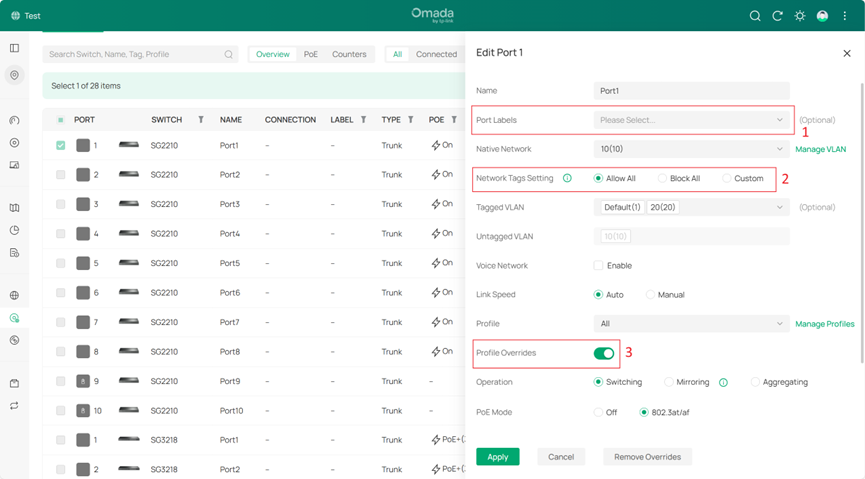
Port Labels allow you to label each port to indicate the use of that port (ex: uplink, security camera, PC, etc.). You can also filter by label, shown later in this document.
Network Tags allows you to control what VLANs are allowed on this port.
- Allow All sets the Native Network as the only Untagged VLAN, with every other VLAN automatically added to Tagged VLANs.
- Block All sets the PVID as the only Untagged VLAN and removes all Tagged VLANs.
- Custom allows you to customize the Tagged and Untagged VLANs as you see fit. The PVID is set as Untagged under "Custom" and cannot be changed.
When a switch port only allows the PVID to pass, the port is displayed as an "Access" port. Otherwise, it is displayed as a "Trunk" port.
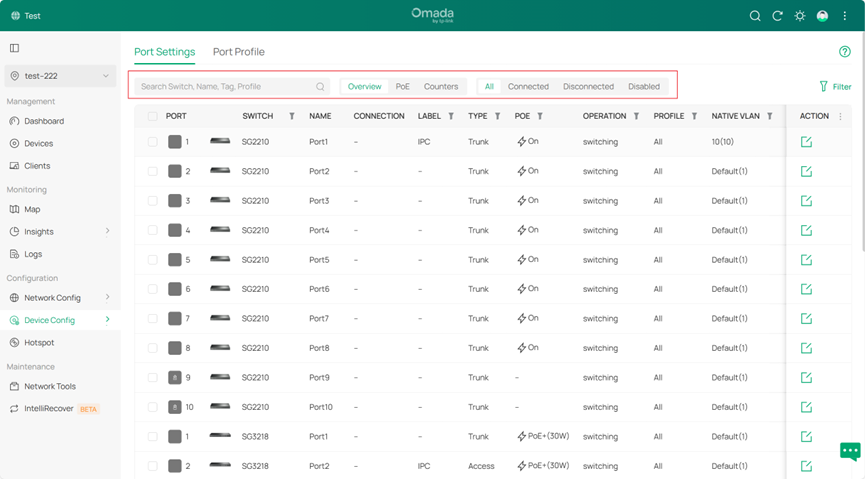
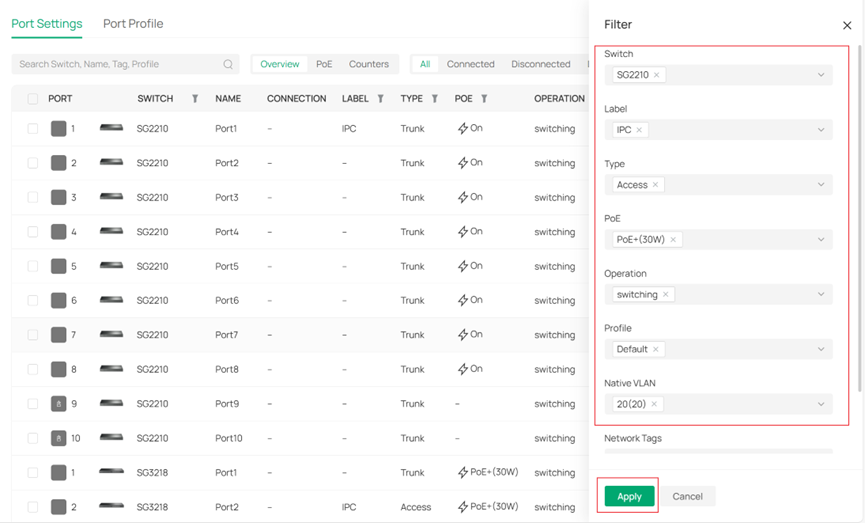
Filtering in Port Settings
Port Settings allows you to filter by various criteria. For example, you can filter by Connected status on the bar shown below.
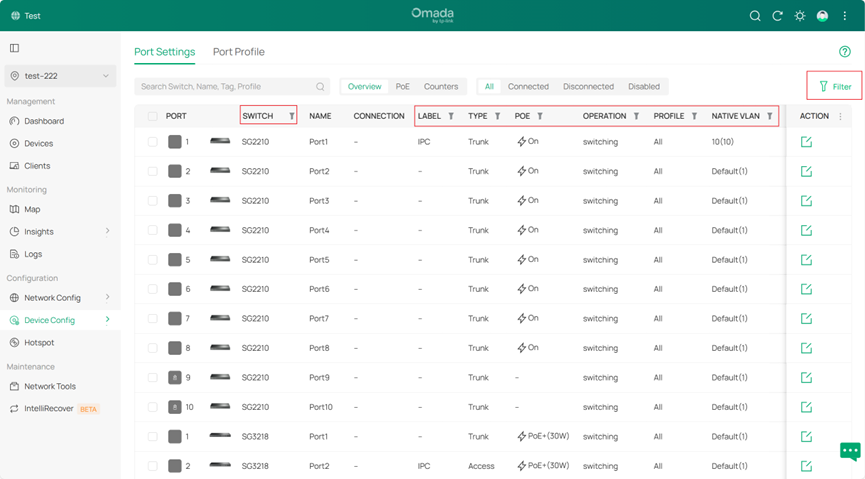
You can also filter by the columns at the top of the table, such as Switch, Label, Type, etc. You can set the criteria either via the filter icon next to the category or select multiple filter rules at once with the Filter button on the right side of the screen.
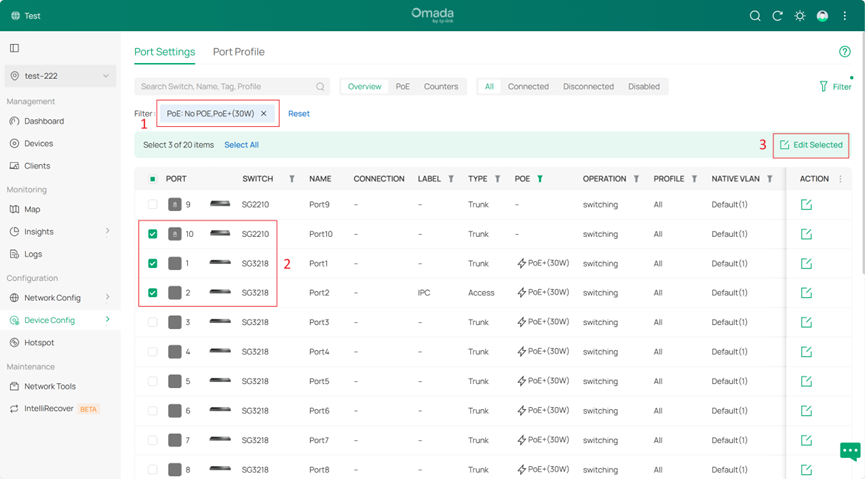
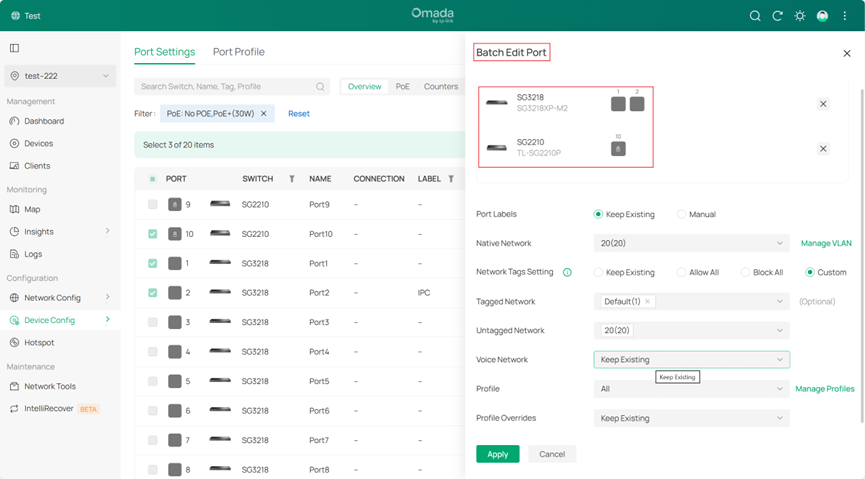
Batch Editing Ports on Different Switches
Omada V6.0 also supports batch editing ports across different switches. You can use this in tandem with the filtering feature to simultaneously configure ports across multiple switches, as shown below.
Switch Details Window
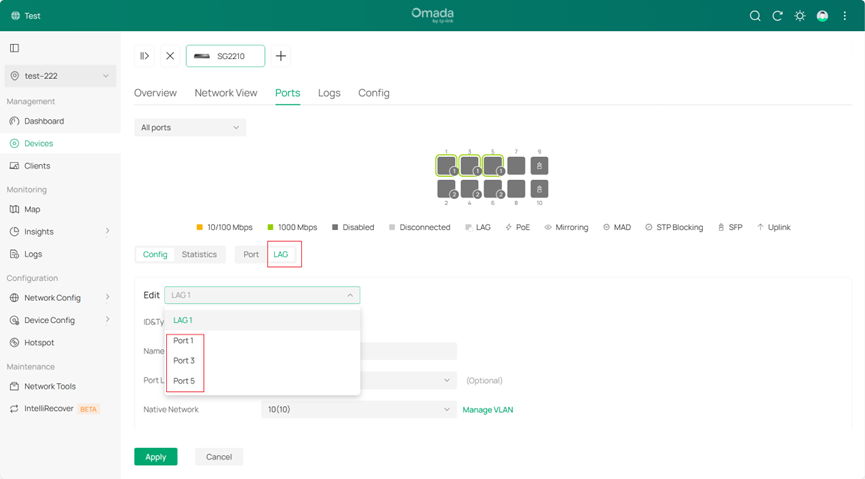
The switch details window supports sorting and filtering of ports or LAGs. It can also show the traits of a specific VLAN across the ports. If you select a specific VLAN, the interface will show whether that VLAN is Native, Tagged, or Untagged on every port, designated with specific colors as shown in the picture below.
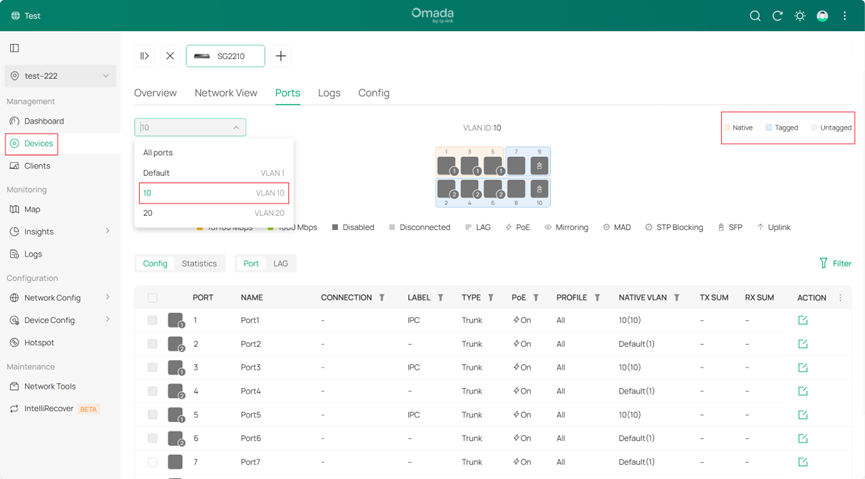
In the Ports option of the device details page, you can select multiple ports for simultaneous editing by clicking individual ports or dragging the mouse over the ports you wish to edit.


You can edit the individual ports of a LAG configuration as well. However, this configuration will not apply until the LAG that contains the port is deleted.