Troubleshooting Guide for On-Premises Controller Showing Offline on Omada Cloud Website
Issue Description
Omada On-Premises Controllers appear as “Offline” on the TP-Link Omada Cloud Management Portal, resulting in the inability to manage the controller remotely.
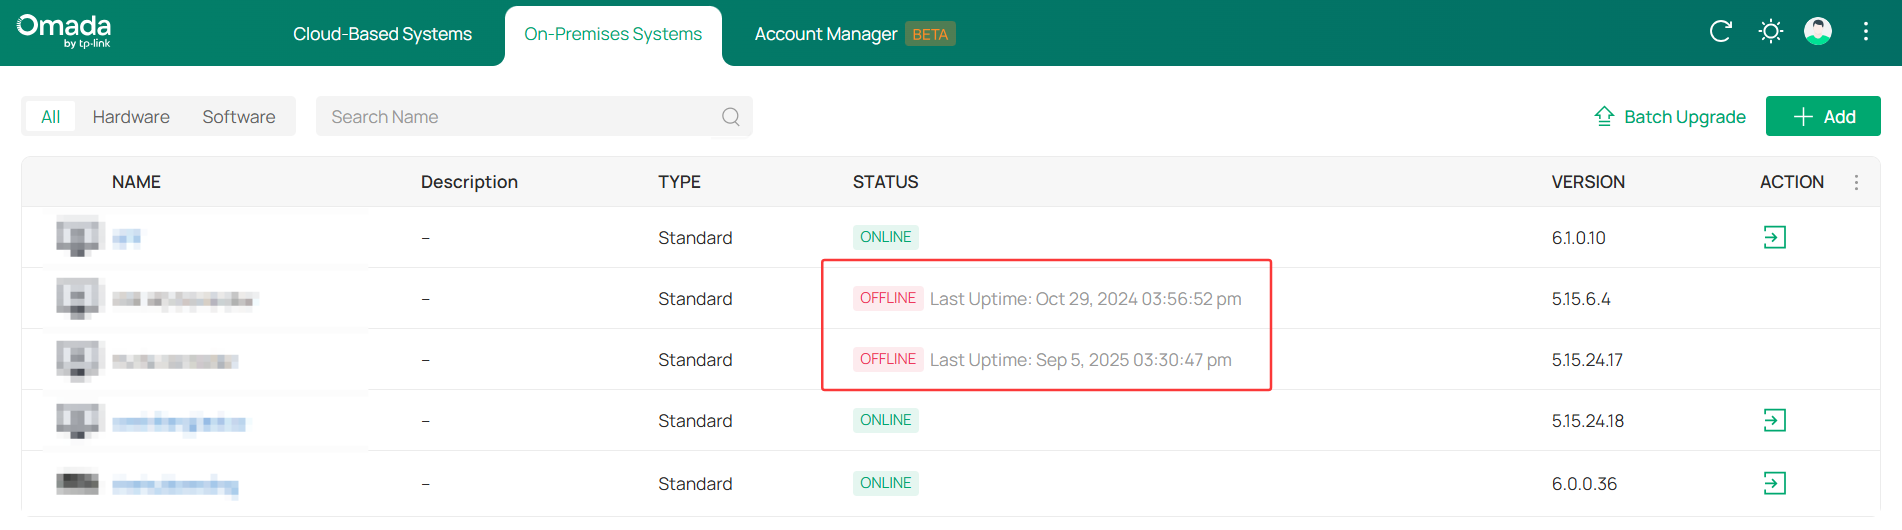
The Omada Cloud Platform redirects to the Cloud-Based Systems tab by default. If the controller is not showing on the cloud management portal, please make sure you are looking at the correct tab, On-Premises Systems.

Background and Common Causes
The controller showing “Offline” indicates that the cloud platform server cannot establish a reliable connection with your controller. This is usually caused by a failure in one or more of the following areas:
- Lcoal Network Issue: The controller itself is powered off, network cables are loose, or the connected switch/router port has failed, causing the controller to lose its local network connection.
- Outbound Internet Issue: The local network where the controller resides cannot access the internet. This could be due to the upstream router failing to establish a PPPoE/WAN connection, a faulty WAN port, or a broadband line interruption.
- Network Configuration and Policy Issue: Incorrect firewall settings, security policies, or routing configurations within the local network may be blocking the connection between the controller and TP-Link’s cloud servers. This is a very common cause, especially in enterprise or tightly controlled network environments.
- Controller Software State Anomaly: The controller firmware has a defect, the configuration file is corrupted, or the cloud service process has stalled.
- Account Binding and Cloud Session Issue: Synchronization errors or expired sessions exist in the binding information between the controller and the TP-Link ID account.
- TP-Link Cloud Service Issue (Rare): Temporary maintenance or regional failure of the cloud platform servers.
- Hardware Defect of the Hardware Controller.
Troubleshooting Steps
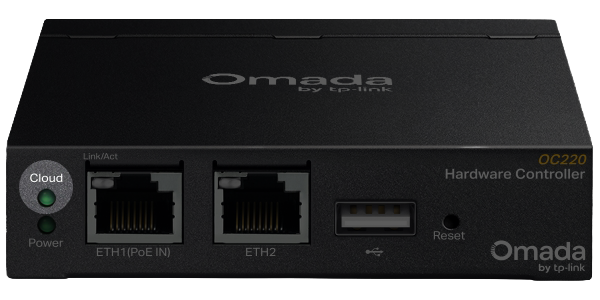
Step 1: Check the Device Cloud Service Status LED (For Hardware Controllers)
- Action: Observe the status of the Cloud LED indicator.
- Scenarios and Actions:
- LED Off: Indicates the device is not connected to the internet or cloud services. First, ensure the controller’s local network connection is functioning correctly (Ethernet cable, switch port, router LAN port) and that the network can access the internet.
- LED Solid/Flashing: Indicates the device has attempted or successfully connected to cloud services.
Step 2: Check Local Network Accessibility
- Action: On a computer within the same local network as the controller, try accessing its local web management interface by entering the controller’s local management IP address into a browser.
- Scenarios and Actions:
- Cannot Access: Indicates a connection or addressing issue for the OC200 within the local network. Check physical connections, switch/VLAN configurations, and verify that the Controller has a valid IP address (can be viewed in the router’s DHCP client list).
- Can Access Normally: Indicates the Controller is running and its local network connection is normal. The issue may lie with the internet egress or the cloud communication link.
Step 3: Check Internet Connectivity of the Controller’s Network
- Action: Check the controller's external network connectivity by plugging a computer directly into the ethernet port of the Controller.
- Scenarios and Actions:
- Computer Cannot Access Internet: The root cause is that the local network hosting the controller cannot access the internet. Check the router’s internet connection (WAN settings), firewall rules (whether they block cloud service-related ports/IPs), DNS server settings, or if there are ISP-level network restrictions.
- Computer Can Access Internet Normally: Indicates the network where the controller resides has internet egress capability. The issue may be limited to the controller itself or specific cloud communication policies. Proceed to Step 4.
Step 4: Rebind the TP-Link ID
- Action: Please refer to the following guide: How to Change the Cloud Owner Account for Omada Controllers
- Purpose: To clear potential cloud session or binding information errors.
Step 5: Reset the Hardware Controller
Please ensure you back up your configuration before proceeding with the following steps. Failure to do so may result in a loss of network configuration.
- Action:
- In the Controller’s local web management interface, navigate to the system settings or maintenance section and back up the current configuration file to your computer.
- Locate the Reset button on the device. Using a paperclip or similar tool, press and hold it for approximately 5-10 seconds until the indicator lights flash, restoring the device to factory default settings.
- After the device reboots, reconfigure basic account settings and attempt to rebind it to your TP-Link ID.
- When the device comes back online, you can try restoring the configuration from a backup file.
- For Software Controllers, uninstall the software and reinstall.
- Purpose: To rule out problems caused by internal software configuration errors or data corruption on the device.
Step 6: Check and Adjust Network Policies
- Action: If your network environment has firewalls or advanced routing policies:
- Ensure no firewall rules are blocking the Controller’s IP address (or the entire subnet) from accessing the internet.
- Ensure no policies are blocking outbound connections to TP-Link cloud server IP addresses and ports (specific ports and addresses require reference to official documentation or consulting support).
Which ports do Omada SDN Controller and Omada Discovery Utility use? (above Controller 5.0.15)
Step 7: Try Firmware Recovery (for Hardware Controllers)
- Action:
- Download the latest stable firmware file for your controller from the official TP-Link website.
- Refer to the guide to attempt a firmware upgrade via the local web interface or use a firmware recovery tool (e.g., TFTP method) to refresh the firmware. How to use the Recovery Mode to recover the firmware for the Omada Hardware Controller
- Purpose: To repair potential firmware corruption or known software bugs.
Step 8: Contact Technical Support
- Action: If the problem persists after completing all the above steps.
- Information to Prepare: When contacting TP-Link official technical support, have the following information ready for quick troubleshooting:
- Controller model and hardware version.
- Current firmware version.
- Detailed network topology diagram.
- The troubleshooting steps (1-7) you have attempted and their results.
Recommendations:
- Before performing a factory reset or router reset, always confirm that important configuration data has been backed up.
- When changing network device settings, it is recommended to make only one modification at a time to facilitate problem isolation.
Other Resources
What's New in Omada Controller V6.0?
Omada SDN 6.0 Configuration Guide