Install and setup for a novice
 This thread has been locked for further replies. You can start a new thread to share your ideas or ask questions.
Install and setup for a novice
Posts: 3
Helpful: 0
Solutions: 0
Stories: 0
Registered: 2018-02-23
2018-02-23 00:53:12
Posts: 3
Helpful: 0
Solutions: 0
Stories: 0
Registered: 2018-02-23
Install and setup for a novice
2018-02-23 00:53:12
Tags:
Model :
Hardware Version :
Firmware Version :
ISP :
Hi, I am trying to install and setup a cpe210 for wifi coverage for the garden and patio area, but am a novice when it comes to setting it up. I have read the documentation. I have an existing LAN installed. Can I find a document that will take me through the setup slowly?
Cheers
#1
Options
- Copy Link
- Subscribe
- Bookmark
- Report Inappropriate Content
Thread Manage
Announcement Manage
9 Reply
Posts: 4334
Helpful: 1047
Solutions: 173
Stories: 3
Registered: 2015-12-05
Re:Install and setup for a novice
2018-02-24 00:26:25
CPEs are best for long-range, directional wireless links. Why didn't you choose the EAP110-Outdoor instead, which fits perfectly as an AP for a garden and is easy to set up?
༺ 0100 1101 0010 10ཏ1 0010 0110 1010 1110 ༻
0
We appreciate your feedback. Feel free to let us know more. Log in to submit feedback.
0
We appreciate your feedback. Feel free to let us know more. Log in to submit feedback.
#2
Options
- Copy Link
- Report Inappropriate Content
Thread Manage
Announcement Manage
Posts: 3
Helpful: 0
Solutions: 0
Stories: 0
Registered: 2018-02-23
Re:Install and setup for a novice
2018-02-24 22:00:29
R1D2 wrote
CPEs are best for long-range, directional wireless links. Why didn't you choose the EAP110-Outdoor instead, which fits perfectly as an AP for a garden and is easy to set up?
OK thanks I will exchange for this model, will this new model's wireless signal penatrate into the house also?
Cheers
0
We appreciate your feedback. Feel free to let us know more. Log in to submit feedback.
0
We appreciate your feedback. Feel free to let us know more. Log in to submit feedback.
#3
Options
- Copy Link
- Report Inappropriate Content
Thread Manage
Announcement Manage
Posts: 3
Helpful: 0
Solutions: 0
Stories: 0
Registered: 2018-02-23
More Issues
2018-02-26 01:46:32
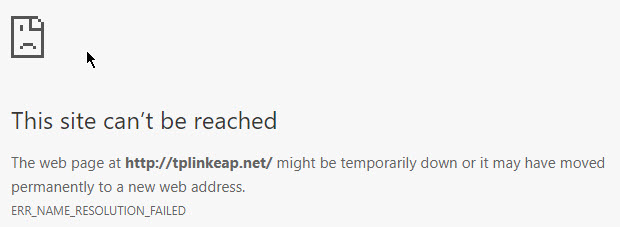
I have now bought the EAP110 Outdoor unit but as part of the setup for a single AP the instructions state to use a browser and go to
http://tplinkeap.net but all I get is an error message. Can anyone advise please.
0
We appreciate your feedback. Feel free to let us know more. Log in to submit feedback.
0
We appreciate your feedback. Feel free to let us know more. Log in to submit feedback.
#4
Options
- Copy Link
- Report Inappropriate Content
Thread Manage
Announcement Manage
Posts: 4334
Helpful: 1047
Solutions: 173
Stories: 3
Registered: 2015-12-05
Re:Install and setup for a novice
2018-02-26 05:50:10
Stonelynk wrote
OK thanks I will exchange for this model, will this new model's wireless signal penatrate into the house also?
Depending on where you mount the EAP110-Outdoor and depending on possible obstacles between the EAP and your devices it will cover an indoor area to a certain amount, too.
I have now bought the EAP110 Outdoor unit but as part of the setup for a single AP the instructions state to use a browser and go to http://tplinkeap.net but all I get is an error message. Can anyone advise please.
tplinkeap.net is a so-called "configuration domain", which should make initital connections to APs easier.
But those configuration domains almost ever introduce more problems than what they intended to solve:
- If the domain is given up by the former registrant (TP-Link) or being cut off the net b/c the owner did forgot to pay the bill, browsing to this domain will lead you to nowhere in best case.
- If a third party registers this domain after it became free again, it could do evil things you don't expect when browsing to this domain.
So, never use configuration domains, they are completely useless if not accessible and they can even be dangerous in some cases.
In fact, tplinkeap.net is dead since January, 26th for reasons unknown to me.
That said, here is how you configure your EAP using its IP address to be able to integrate it into your network. This will always work::
1. Look up your network address (you should know it anyway) and choose a free, unused IP to assign to your EAP permanently. For example, if your network's IP is 192.168.10.0 and your Internet router uses 192.168.10.1, changes are that 192.168.10.2 - or whatever IP - might be unused by another device.
2. Connect the EAP (more precisely: the LAN port of the EAP's PoE adapter, if any) directly to your laptop's or PC's Ethernet port.
Do not connect the EAP to a switch or the router for now.
3. Set your laptop's IP address to a static IP in the 192.168.0.0 network. For example set it to 192.168.0.5.
4. Now browse to http://192.168.0.254/, which is the EAP's IP address if set to factory defaults. If the EAP was just turned on, give it some time until the web UI can respond (30-60 seconds should be enough).
5. Log into the web UI, go to network settings and assign the EAP the free, unused IP selected in step 1. Note that when applying the new IP you will lose the connection to the EAP for now until your laptop is changed back to normal settings. Don't power off or reboot the EAP meanwhile until setup is finished.
6. On your laptop, revert back its IP settings to your network (e.g. 192.168.10.x or whatever you used before).
7. Connect the EAP to your switch or router and access its web UI under the new IP just assigned.
The EAP is now integrated into your network and you can proceed with setup. If for some reason the EAP doesn't respond under its default IP 192.168.0.254 in step 4, make sure to set it to factory defaults, check wether the IP of your laptop is in the same subnet and try again.
It's that easy.
༺ 0100 1101 0010 10ཏ1 0010 0110 1010 1110 ༻
0
We appreciate your feedback. Feel free to let us know more. Log in to submit feedback.
0
We appreciate your feedback. Feel free to let us know more. Log in to submit feedback.
#5
Options
- Copy Link
- Report Inappropriate Content
Thread Manage
Announcement Manage

Posts: 1
Helpful: 0
Solutions: 0
Stories: 0
Registered: 2018-02-28
Re:Install and setup for a novice
2018-02-28 17:02:20
Yes, you're right R1D2 cause i'm using it right now, and it's working fine.
0
We appreciate your feedback. Feel free to let us know more. Log in to submit feedback.
0
We appreciate your feedback. Feel free to let us know more. Log in to submit feedback.
#6
Options
- Copy Link
- Report Inappropriate Content
Thread Manage
Announcement Manage
Posts: 2
Helpful: 0
Solutions: 0
Stories: 0
Registered: 2018-03-05
Outdoor CPE 220 will not communicate with other CPE 220
2018-03-05 10:33:27
Hi, my brother just purchased a remote camera system to put in his calving barn. I've been trying to set up the system but cannot get the CPE's to communicate.
Also after I adjust the TCP/IP and then try to type in the address 192.168.0.254 all I get is an "cannot find address" page
Very very very frustrating. What am I doing wrong?
Also after I adjust the TCP/IP and then try to type in the address 192.168.0.254 all I get is an "cannot find address" page
Very very very frustrating. What am I doing wrong?
0
We appreciate your feedback. Feel free to let us know more. Log in to submit feedback.
0
We appreciate your feedback. Feel free to let us know more. Log in to submit feedback.
#7
Options
- Copy Link
- Report Inappropriate Content
Thread Manage
Announcement Manage
Posts: 4334
Helpful: 1047
Solutions: 173
Stories: 3
Registered: 2015-12-05
Re:Install and setup for a novice
2018-03-05 22:55:10
Roselawn wrote
Also after I adjust the TCP/IP and then try to type in the address 192.168.0.254 all I get is an "cannot find address" page
Very very very frustrating. What am I doing wrong?
Did you follow the recipe in post #5 step by step? It is absolutely the same procedure for a CPE. If the CPE does not respond if connecting to 192.168.0.254, try a reset to factory defaults (press the RESET switch for ~7 sec.). Then try again, but give the CPE some time after reboot to initialize its web UI service.
༺ 0100 1101 0010 10ཏ1 0010 0110 1010 1110 ༻
0
We appreciate your feedback. Feel free to let us know more. Log in to submit feedback.
0
We appreciate your feedback. Feel free to let us know more. Log in to submit feedback.
#8
Options
- Copy Link
- Report Inappropriate Content
Thread Manage
Announcement Manage
Posts: 2
Helpful: 0
Solutions: 0
Stories: 0
Registered: 2018-03-05
Re:Install and setup for a novice
2018-03-06 01:35:48
R1D2 wrote
Did you follow the recipe in post #5 step by step? It is absolutely the same procedure for a CPE. If the CPE does not respond if connecting to 192.168.0.254, try a reset to factory defaults (press the RESET switch for ~7 sec.). Then try again, but give the CPE some time after reboot to initialize its web UI service.
Yes I did, but I cannot get the web page to open. One more question; there are lights on the side of the CPE Transceivers that indicate the following; power available, data present, data being used (my words). Then there are a set of lights that indicate signal strength. The first three came on when I plugged the units in but there has never been any indication of signal strength. Will those lights come on only after you have assigned an IP to the unit?
I will tell my brother to try the reset (I'm not there right now) but he is not very tech savy. I'll have his son take a look at the system once he gets there this weekend.
Thanks for the help!
0
We appreciate your feedback. Feel free to let us know more. Log in to submit feedback.
0
We appreciate your feedback. Feel free to let us know more. Log in to submit feedback.
#9
Options
- Copy Link
- Report Inappropriate Content
Thread Manage
Announcement Manage
Posts: 4334
Helpful: 1047
Solutions: 173
Stories: 3
Registered: 2015-12-05
Re:Install and setup for a novice
2018-03-06 06:47:36
The signal strength LEDs will turn on as soon as the wireless adapter is turned on. If set to factory defaults, the wireless adapter remains off until you changed the username/password of the web UI for the first time. What's more, a CPE in AP mode will always show full signal strength using the LEDs (makes sense, it's an AP), while a CPE in client mode shows actual signal strength of the AP once they have connected to the AP.
༺ 0100 1101 0010 10ཏ1 0010 0110 1010 1110 ༻
0
We appreciate your feedback. Feel free to let us know more. Log in to submit feedback.
0
We appreciate your feedback. Feel free to let us know more. Log in to submit feedback.
#10
Options
- Copy Link
- Report Inappropriate Content
Thread Manage
Announcement Manage
Posts: 3
Helpful: 0
Solutions: 0
Stories: 0
Registered: 2018-02-23
2018-02-23 00:53:12
Posts: 3
Helpful: 0
Solutions: 0
Stories: 0
Registered: 2018-02-23
Information
Helpful: 0
Views: 968
Replies: 9
Voters 0
No one has voted for it yet.
Tags
Related Articles
VLAN Help for Novice
723
0
Report Inappropriate Content
Transfer Module
New message