Configuration Guide How to Set a Static IP on Omada Switch

Background:
This post provides a configuration guide to set a static IP on your Omada switch.
This Article Applies to:
Omada L2+ and L3 switches.
Configuration Steps:
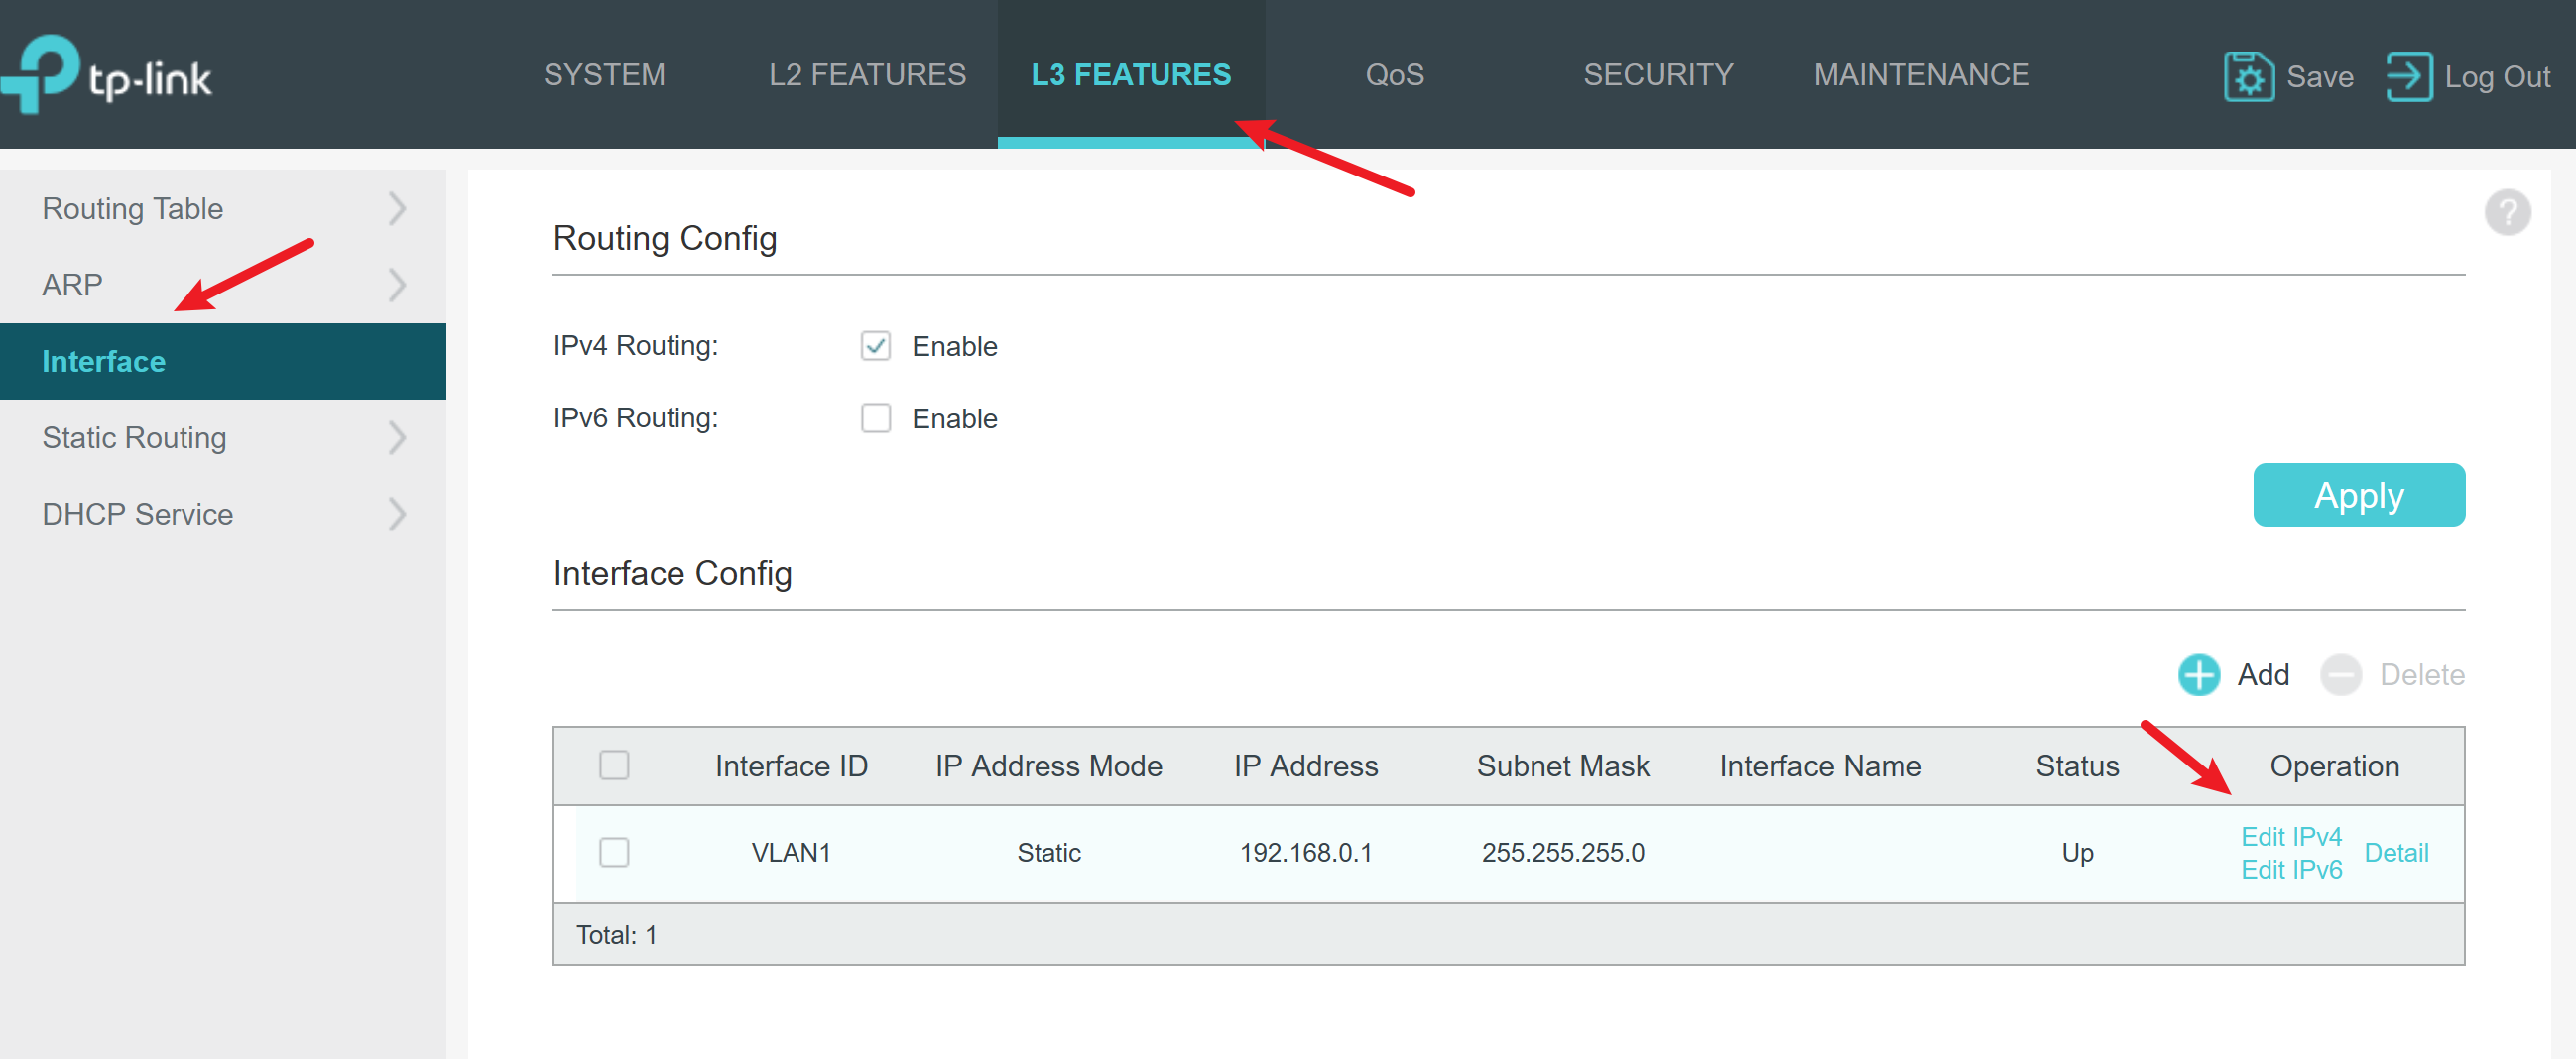
In standalone mode:
1. Visit the device IP, follow the path below.
You can edit the IPv4, VLAN ID 1 interface.
2. Set the proper IP per the demand.
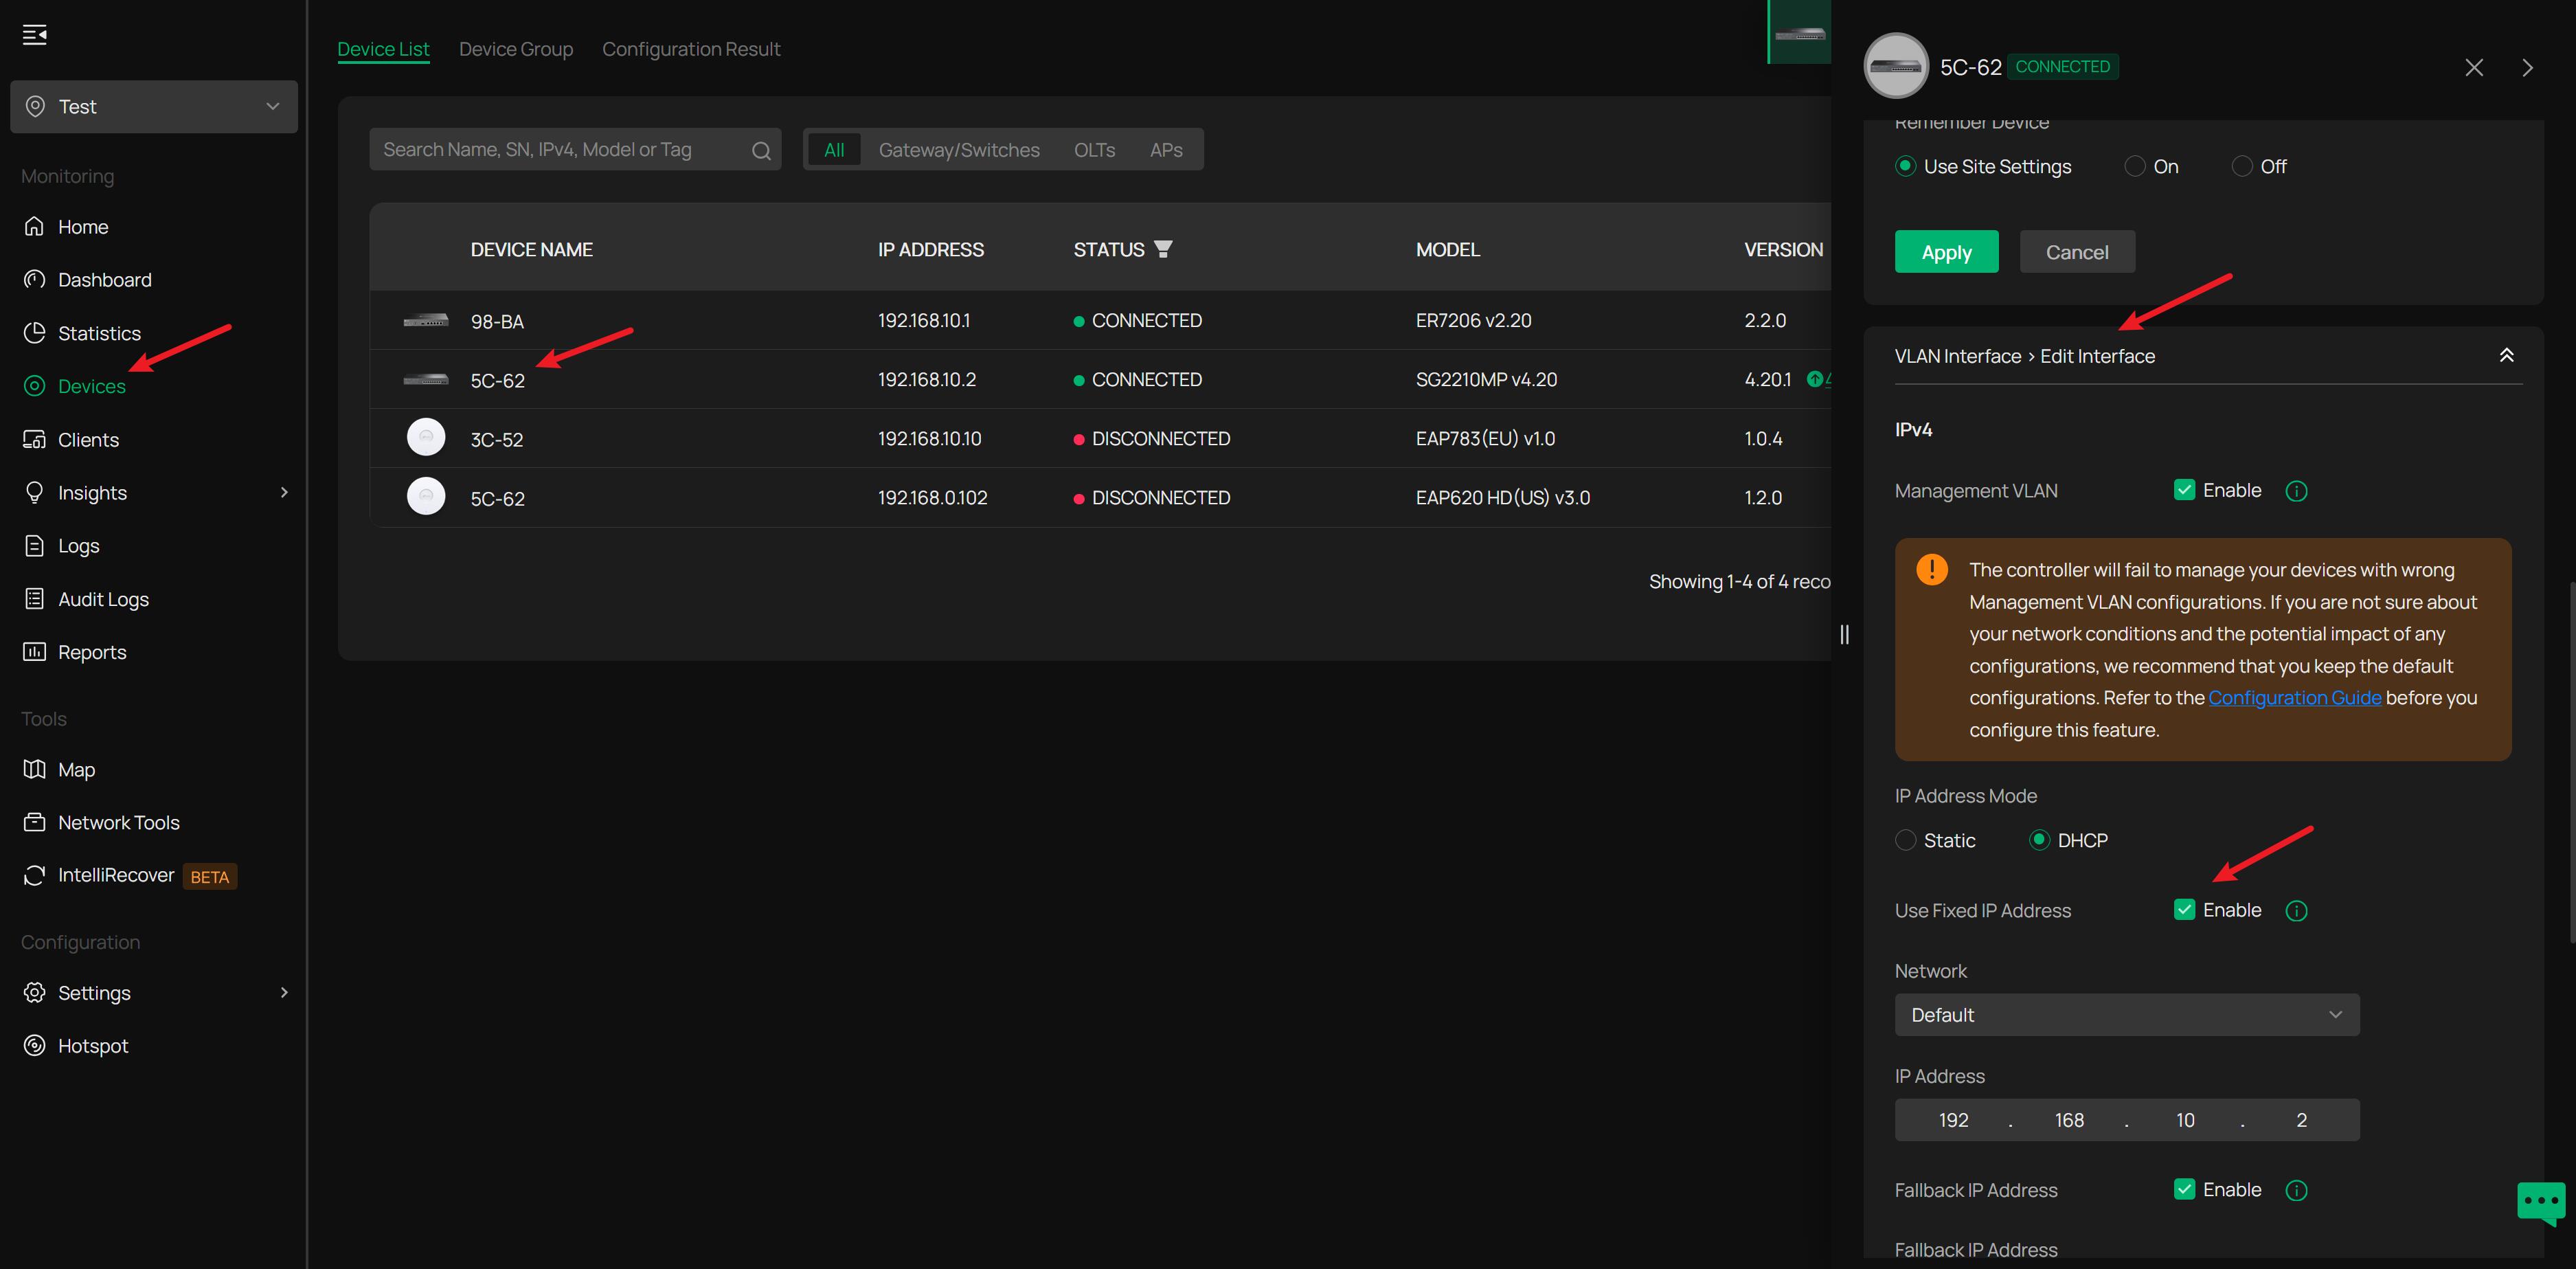
In Controller mode:
After your adoption is complete and successful, the switch will display as Connected in the Device page.
On the pop-up side panel, click the VLAN Interface, and you can set the fixed IP address to your switch.
This will automatically generate an IP-MAC Binding on your router.
If you don't have an Omada router, make sure you set the DHCP reservation or IP-MAC binding on your third-party router or DHCP server.
Note:
The step for the controller mode is universal to all Omada switches.
Update Log:
Sep 3rd, 2025:
Release of this guide.
Recommended Threads:
Howto - A Guide to Use Forum Effectively. Read Before You Post.
Feedback:
- If this was helpful, welcome to give us Kudos by clicking the upward triangle below.
- If there is anything unclear in this solution post, please feel free to comment below.
Thank you in advance for your valuable feedback!
------------------------------------------------------------------------------------------------
Have other off-topic issues to report?
Welcome to > Start a New Thread < and elaborate on the issue for assistance.