Story Tips for Cancelling Unfinished/Delayed Automation Actions (e.g., Disable Alarm Before It Triggers)

Many of us have encountered moments when we need to disable our home automation (alarm) settings temporarily, or perhaps we trigger an automation only to realize we no longer want it to run. The tips provided in this article may be helpful for you, so let’s take a look!
Step One: Give Automation a Buffer Time
If you want to “change your mind,” you need to act before the process is complete. Once an automation trigger is activated, all the associated actions will execute immediately unless you insert a Delay command. By adding a delay action, you create a buffer period that allows you to decide whether to proceed with the automation or cancel it.

For instance, in the following automation setup, you have a one-minute window to cancel the automation after the front door is opened. If you don’t take action within that minute, the hub will sound an alarm as scheduled.
- [When] Front door contact sensor is opened
- [Then]
- Delay 1 Minute [Buffer time: how long do you need to react before the following action triggers?]
- Ring Tapo hub
It's essential to position the delay action before the action you want to postpone. If any actions are placed before the delay, they will execute immediately once the automation trigger is activated.
For instance, in the following automation setup, when the front door is opened, the living room light will turn on and change to red right away, while the hub will ring after a one-minute delay.
| [When] Front door contact sensor is opened [Then]
|
Step Two. Configuring Automation Cancellation
When an automation is disabled, its unfinished delay actions will all be canceled. To disable an automation, you can do it either manually through the Tapo app or by using other Tapo smart devices, such as a smart button.
Utilizing Other Tapo Smart Devices (Recommended)
A smart button or even an idle smart plug can serve as an effective tool for manually canceling or temporarily disabling automation. Position these devices in convenient, easily accessible locations, such as near the entrance.
Personal Recommendation: Use a smart button (Tapo S200B or Tapo S200D)! The smart button supports four different gesture controls - single tap, double-tap, rotate clockwise, and rotate anticlockwise. This makes a smart button capable of triggering four separate automations.
Create another automation rule that triggers the cancellation based on the status changes of a Tapo smart device.
For example:
|
For temporary cancellations, you can also incorporate a delay.
For example:
| [When] the smart button is double-tapped [Then]
|
Using the Tapo App or Widget
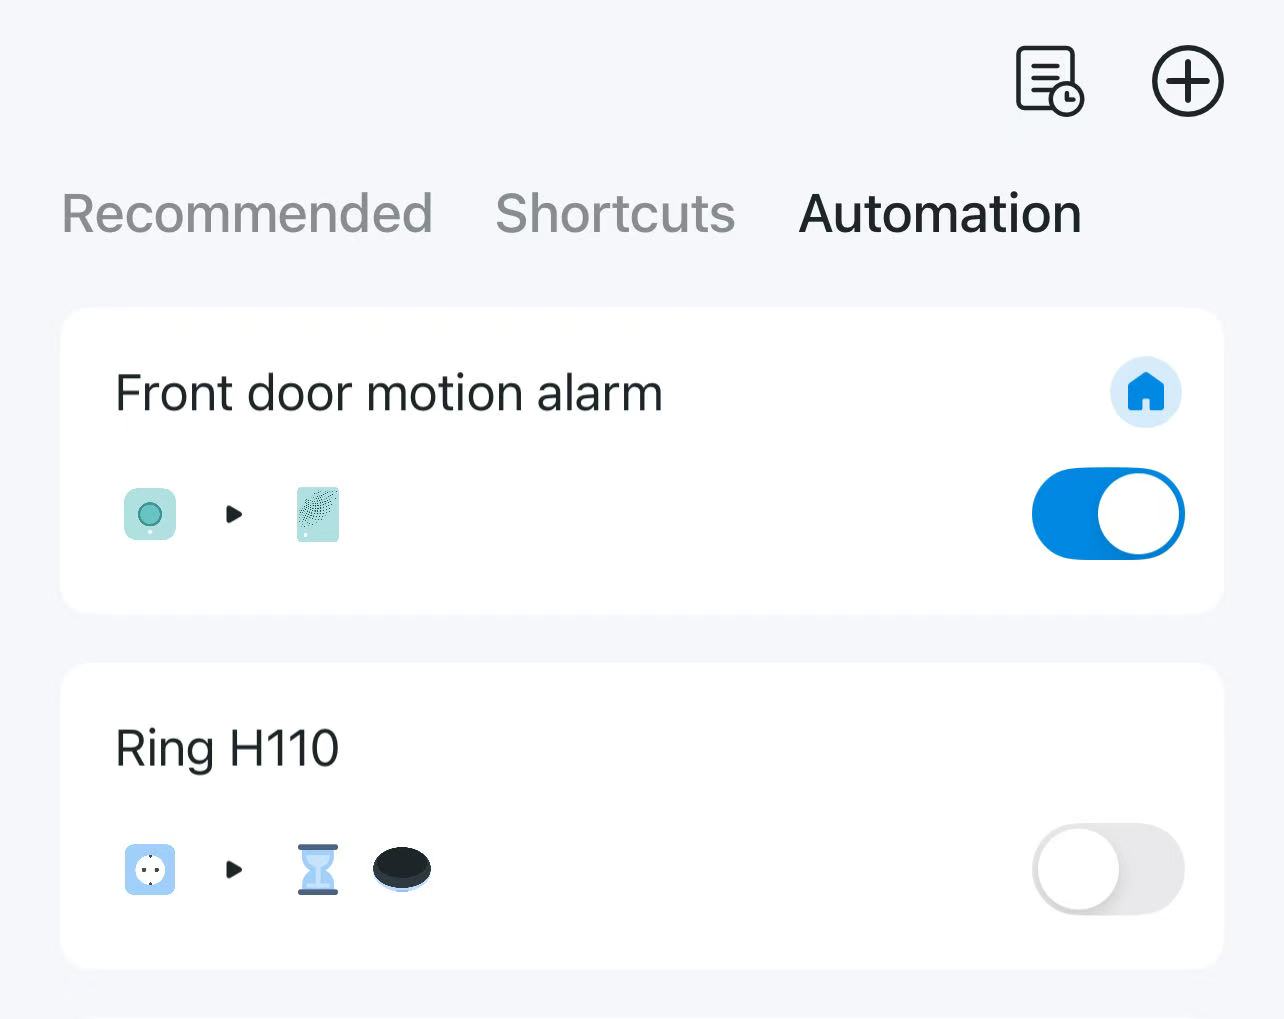
Method 1: Directly disable the automation in the app
Open the Tapo app, navigate to the Smart tab, find Automation, and toggle it off.
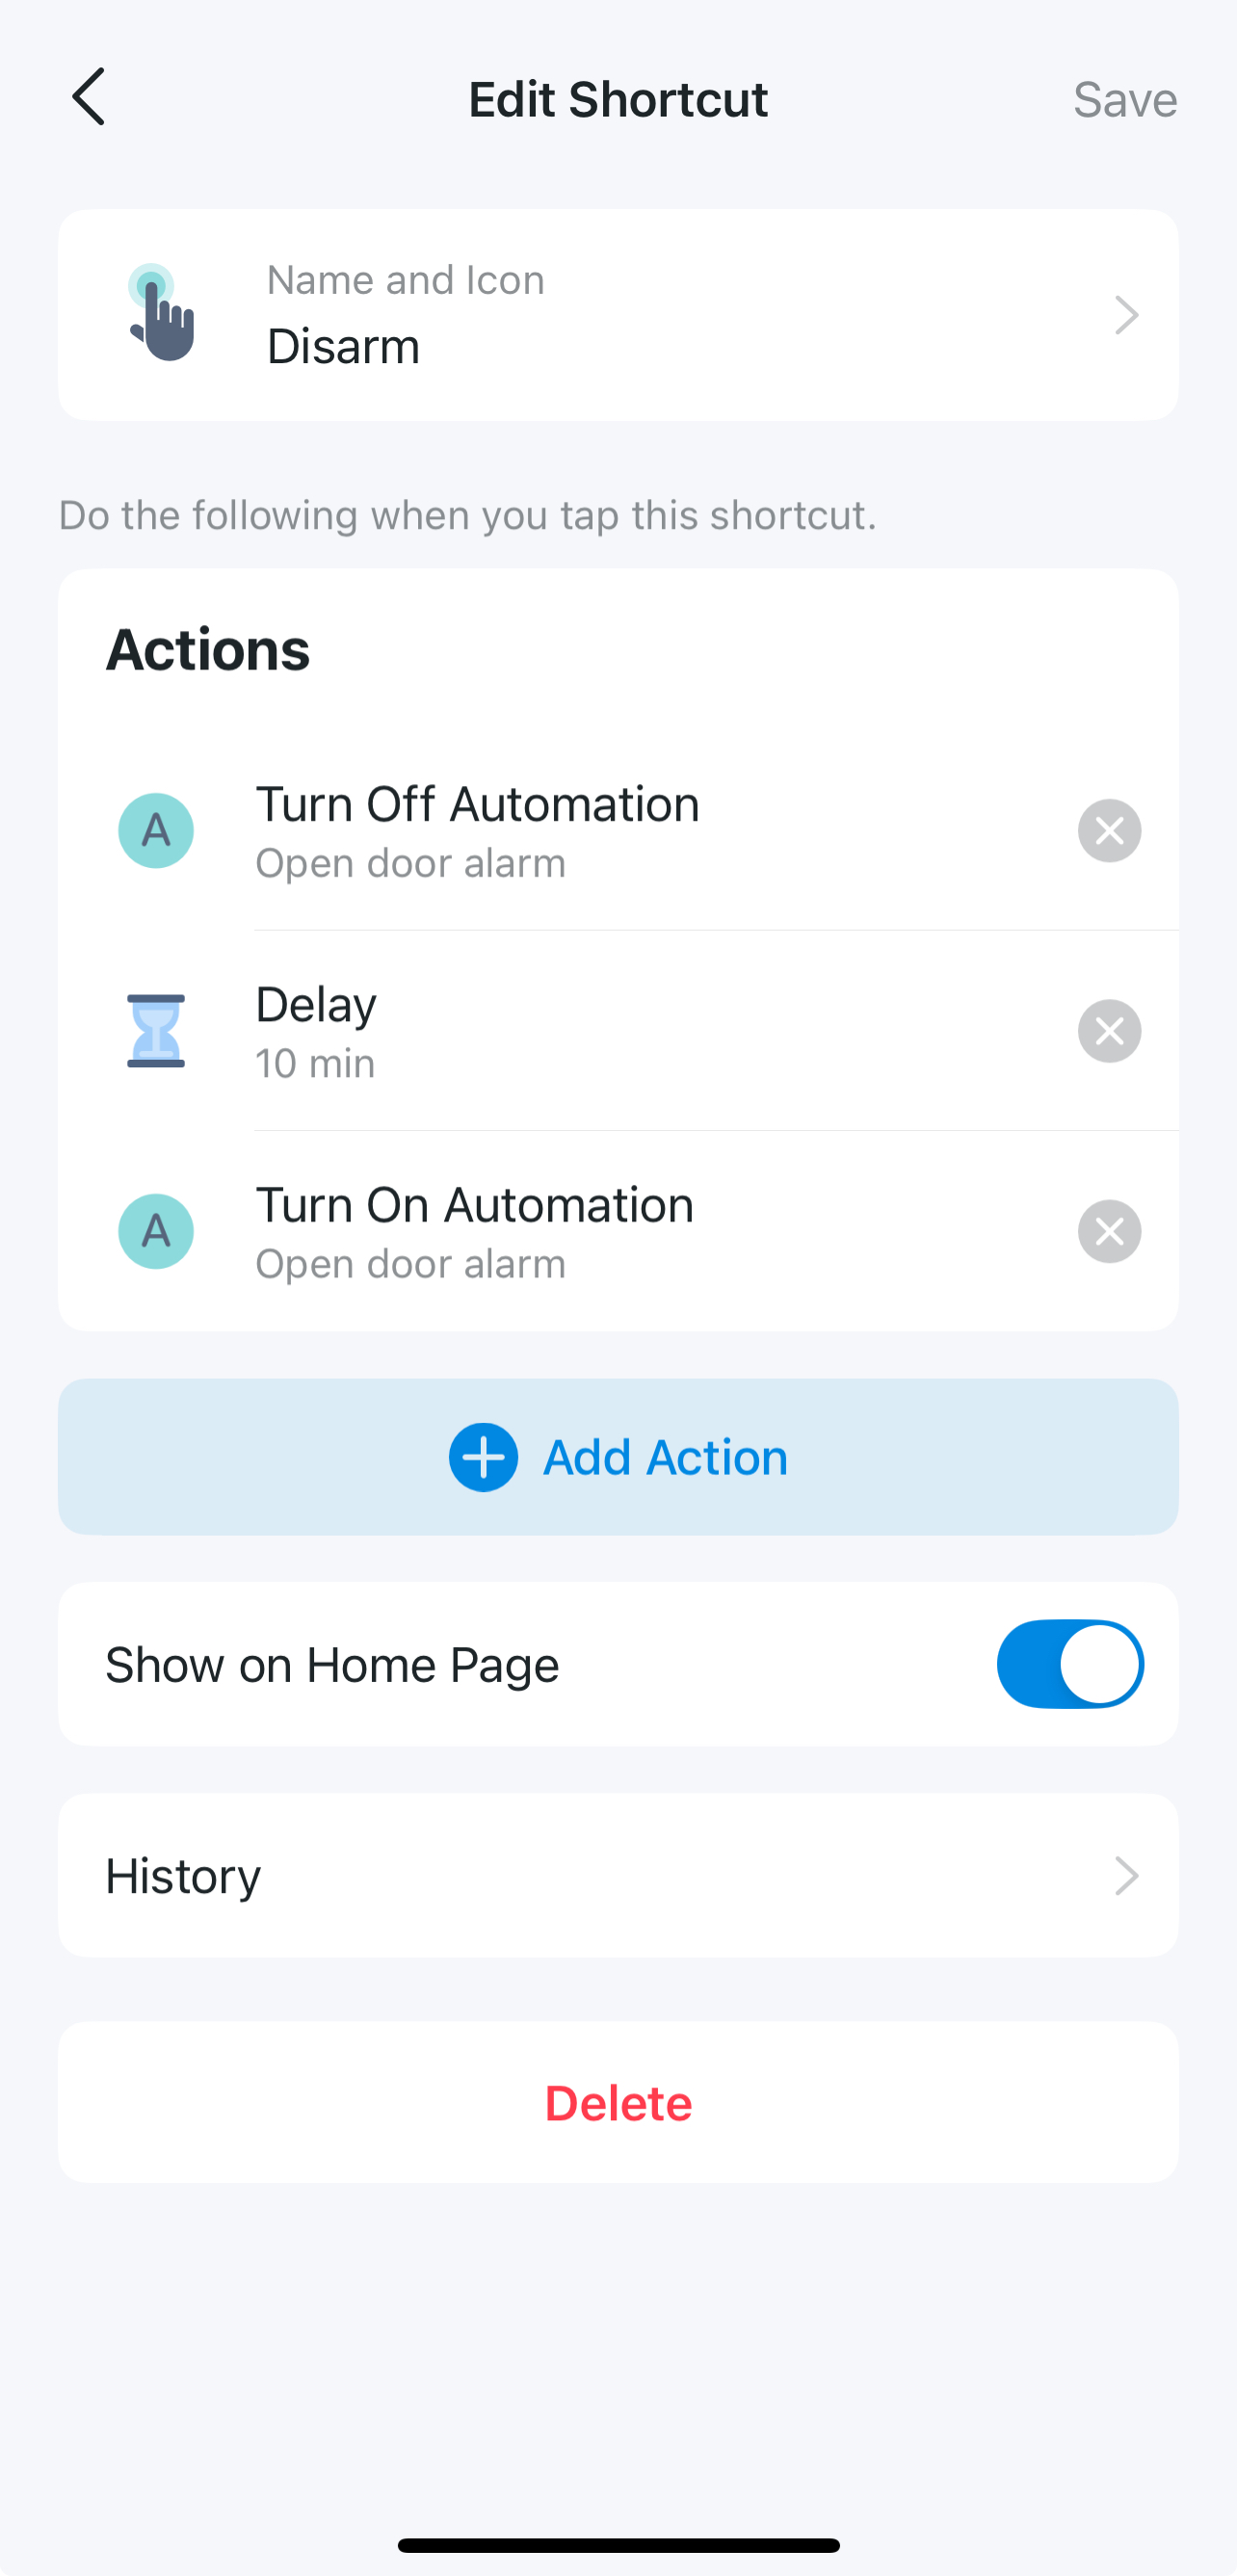
Method 2. Use a Shortcut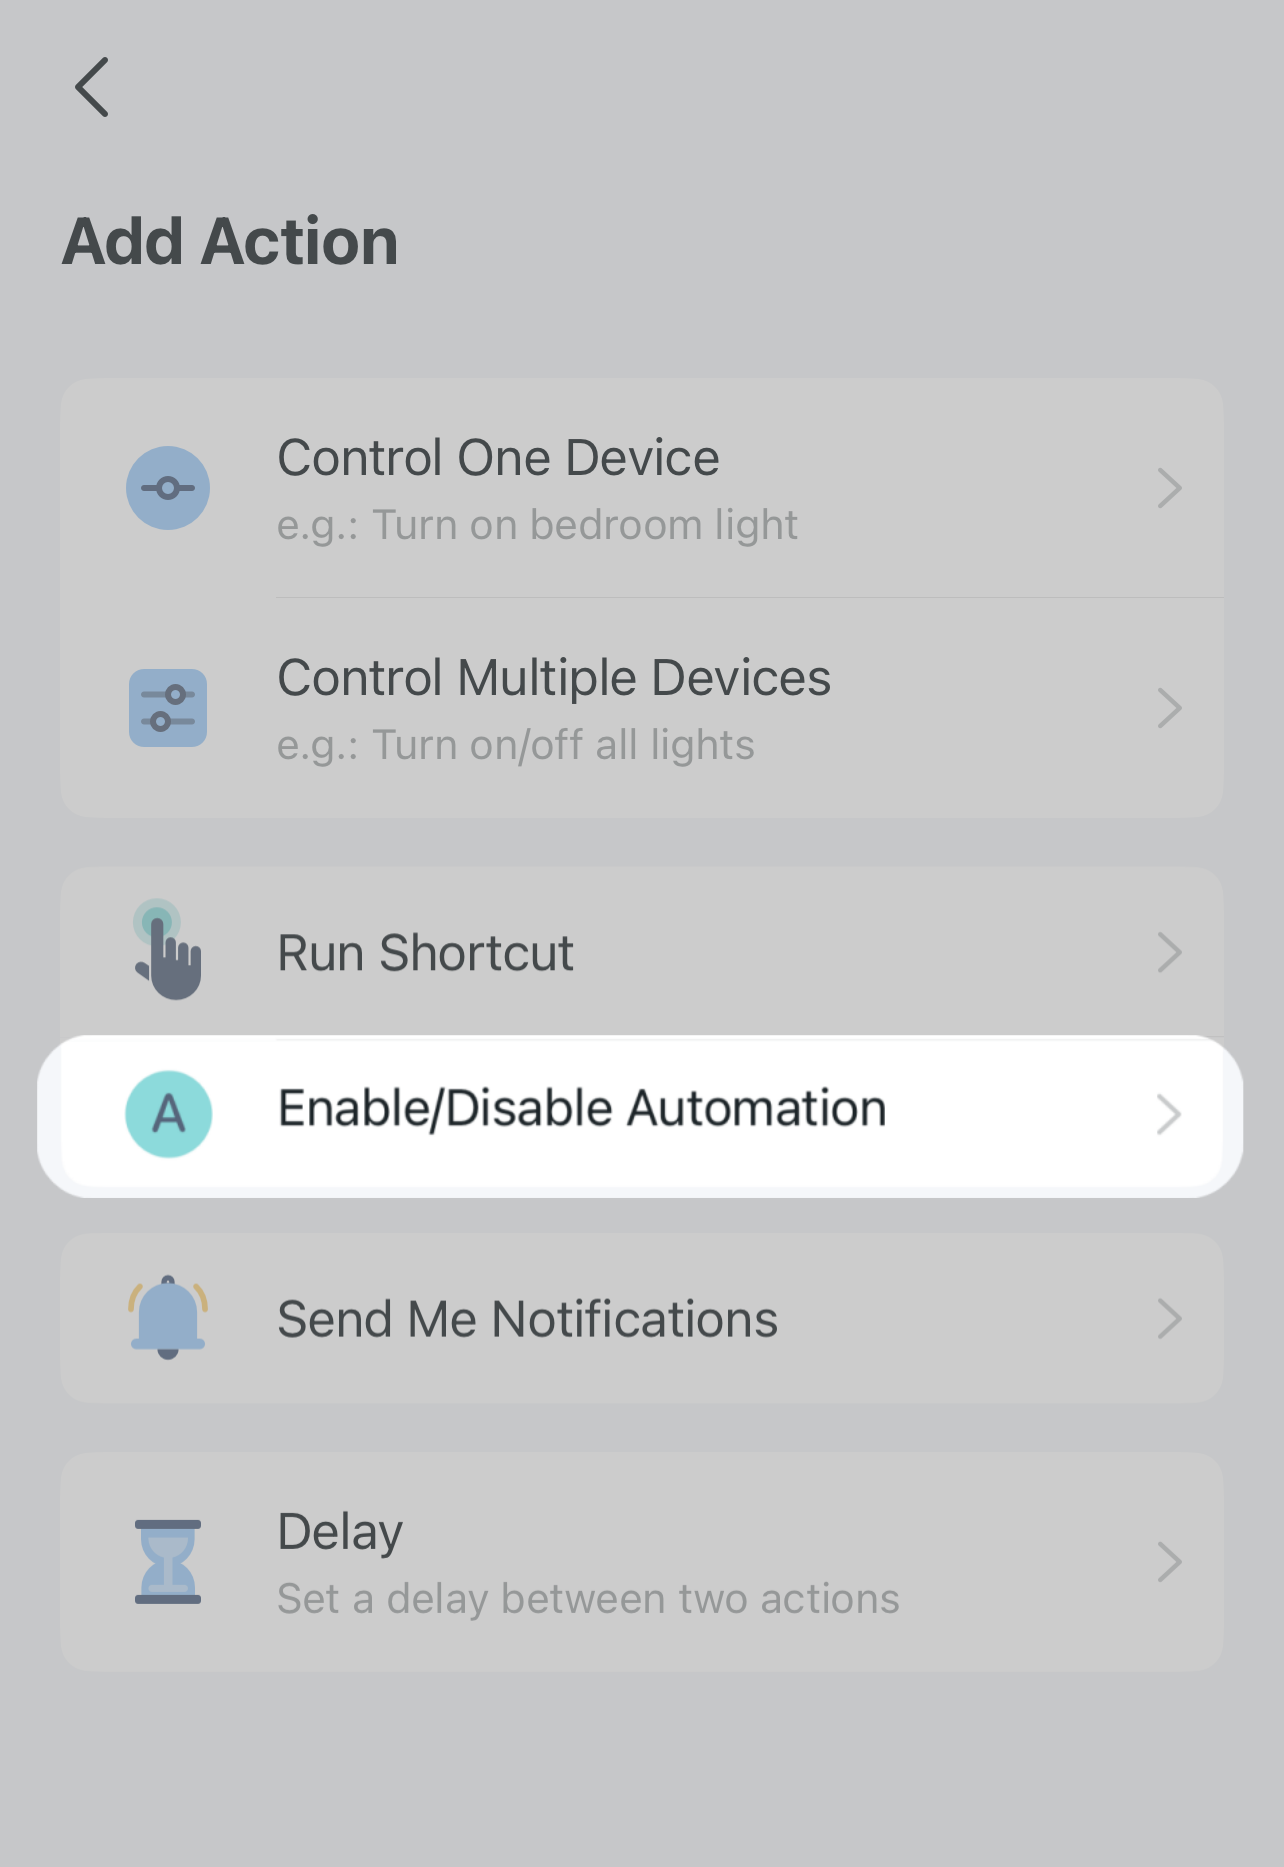
a. Enable or disable automation with a shortcut: With one click on the Tapo shortcut, one or several automations will be enabled or disabled instantly.
b. For temporary cancellations, create a shortcut containing: 1. Disable automation, 2. Delay xx time, 3. Enable automation.
Method 3. Using a Widget
1. Follow the guides in Method 2, create a shortcut to disable the automation.
2. Add a Tapo [Shortcut] widget to your phone's home screen for easy control. How to use Widgets to control your Tapo Devices and Tapo Shortcuts
How do you like it? Leave a comment and share your thoughts if you have more ideas!