MacOS - Cannot Access Internet After Configuration
Problem Description:
If you have set up the wireless router and successfully connected to the wireless network, but you cannot access the Internet, please try the solutions below:
Step 1:
Please check whether the Wi-Fi connection of your computer is under Using DHCP to obtain IP address and there is no manually configured DNS server.
.png)
.png)
If the IP is 169.254.xxx.xxx, please click Renew DHCP Lease to get IP address again. If you still do not get a proper IP, please make sure you have the DHCP function of your router enabled. You can login http://tplinkwifi.net through Ethernet cable to check and enable if necessary.
Step 2:
Log in the web management page of the router. Open the web browser and input the default access in the address bar. The default access is on the label of the device. Here we take http://tplinkwifi.net as an example:
Type the username and password in the login page, the default username and password are both admin.
Step 3:
After logged in, check the WAN part on the Status page, if it displays an IP address, then the router is successfully configured and connected to the Internet:
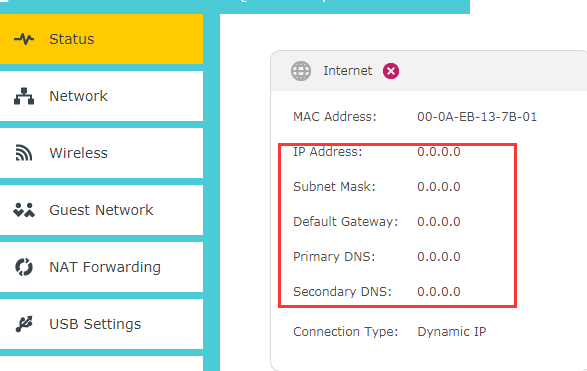
If there is no IP address, please check the physical connection or call Service Provider to check the line.
Step 4:
If there is IP address on the WAN part of the Status page, please open the Terminal on your MAC to check whether you can ping a public IP address (like 8.8.8.8). If you can not then, please release/renew the WAN IP address.
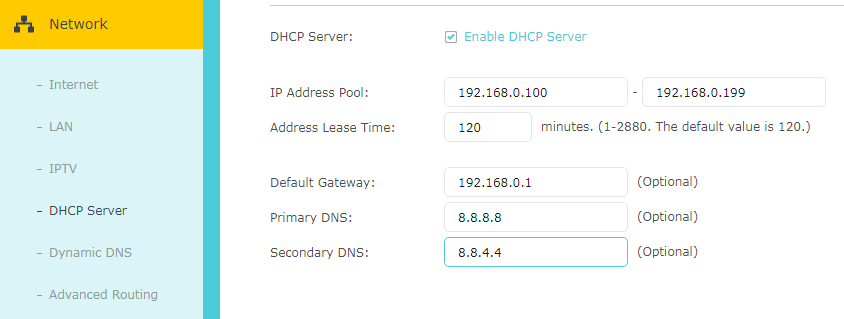
If you can, please check whether you can open any website. If not, the issue be may caused by DNS server. Please go to DHCP->DHCP Settings page and type in 8.8.8.8 for primary DNS, 8.8.4.4 for secondary. click Save.
Reboot the router:

Step 5:
After rebooted, please try the Internet again. If you still do not have a connection, please call or mail TP-Link for help.