Configuring Onboard Drivers for Network Adapters

Configuring Onboard Drivers for Network Adapters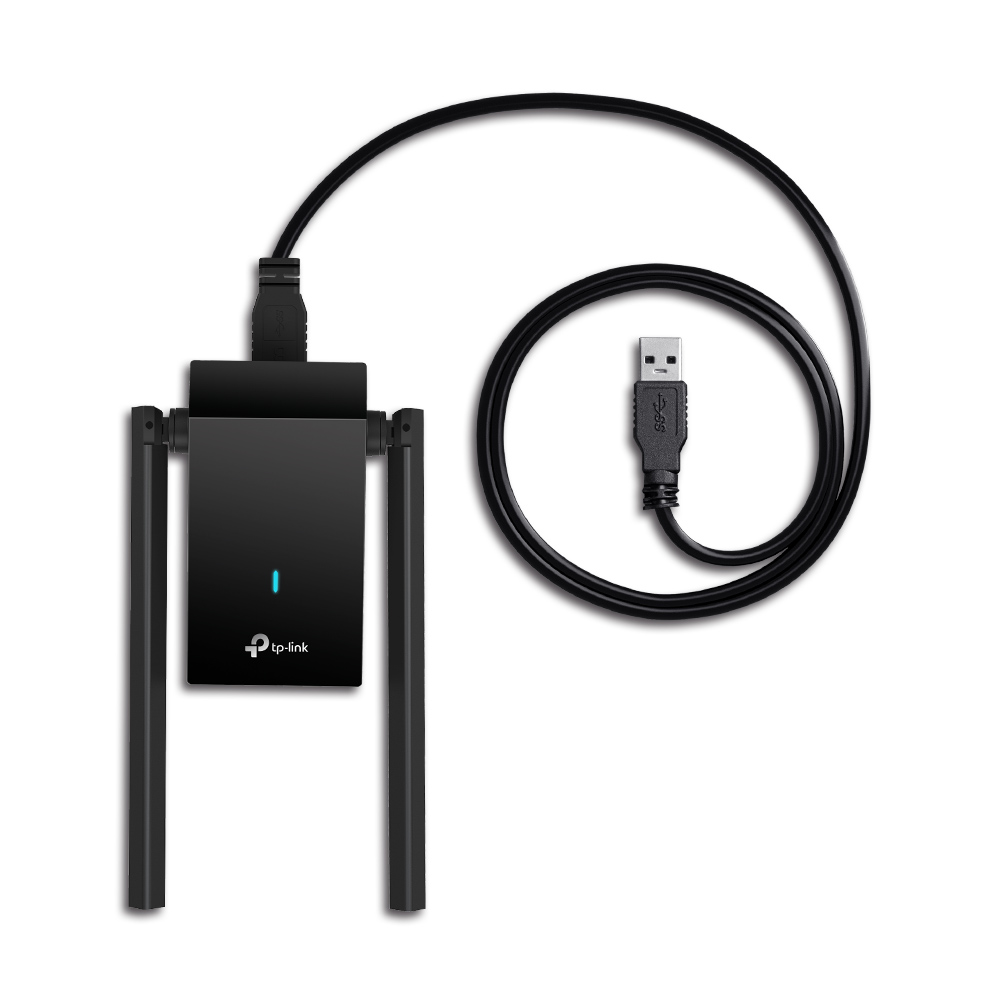
Compatibility: Archer TX20U Plus
Note: The Onboard Drivers provided only officially support Windows 10 and Windows 11.
Guided Setup:
Step-by-Step Instructions:
Step 1:
Please Unbox Your New Device and Remove Any Parts from the Box. This will most often include the adapter, the cord, and a Quick Install Manual.
Step 2:
Plug USB Into Back of Device
The New Archer TX20U Plus uses a Micro-B USB 3.0 to connect to the back of the adapter.
Step 3:
Plug the USB-A end into your Windows Computer
After attaching the cable to the adapter, please plug the other end of the cable into your Windows PC
Step 4:
If you encounter any issues with the installation process, the driver can be uninstalled from the Device Manager Menu,
After plugging in the device, a window should pop up on your screen, much like one would if a CD or flash drive were inserted. On this screen, launch "SetupInstall.exe"
Step 4a:
If the window did not open on its own, the device will appear as a drive in the "This PC" section on the left of any file explorer window.
Step 5: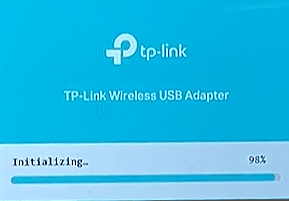
Approve the Security Warning Message. TP-Link Drivers are not Digitally Signed, but are completely safe to use. After accepting the security message, a window should open indicating the driver is being installed.
Step 6:
Connect to Your Wi-Fi Network and Enter the Password
If You Are Still Unable to Connect to Your Network, Follow Our FAQ here: Connecting to a Secured Network
Join the Discussion Regarding our Newest Archer Product Releases on the Forum Here: Announcing the Archer TX20U Plus