Connecting a Tapo Camera to a NAS or NVR
Connecting a Tapo Camera to a NAS or NVR
Note:This article applies to TC60, TC70, Tapo C100, Tapo C200, Tapo C310.
The Tapo camera supports the standard ONVIF protocol (Profile S) as well as RTSP protocol, so it can work with third-party NVR or NAS devices that also support the standard ONVIF protocol.
If you want to manage and view the camera on a third-party NVR or NAS device, you are suggested to contact the NVR or NAS support or visit their official website to find the instructions to add the camera on your NVR or NAS devices (different NVR or NAS devices may have different configuration methods). This article will show you some basic parameters that it may require to connect the Tapo camera to your NVR or NAS device. You will use all of the information and settings in this guide to add your camera to an NVR or NAS.
Note: When recording to a NAS or NVR, recordings will not be recorded to the SD Card, therefore it is recommended to remove the SD card from the camera.
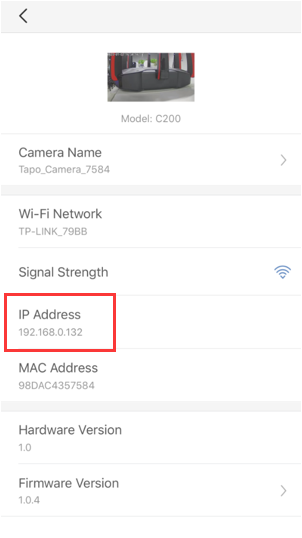
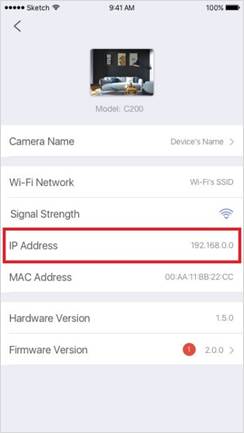
1. The IP address of the camera.
The IP address of the camera is assigned by your host router and you can find it on your host router’s DHCP list or on the Tapo app (Camera Settings -> Navigate to the camera details page). For detailed instructions, please refer to https://www.tp-link.com/en/support/faq/2616/
2. The ports for standard ONVIF and RTSP protocols..
ONVIF Service Port: 2020
RTSP Service Port: 554
3. The username/password of the camera
You can create your own username/password on the Tapo app.
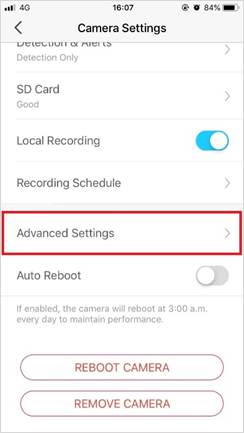
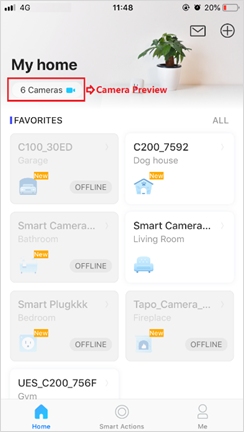
4. On the home page, tap on your camera model card or tap Camera Preview > Manage to go to the Live View page.
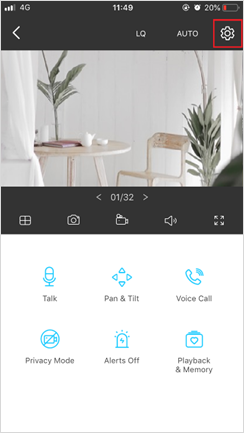
5. On the Live View page, tap the gear icon to enter the Camera Settings page.
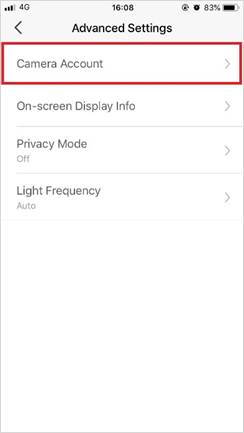
6. Tap Advanced Settings and select Camera Account to create an account (username and password) for the camera and save it.
This will disable the recording of clips and recordings to the SD Card, please remove the card if there is one inserted.