My C120-based smart bird feed

My C120-based smart bird feed

My C120-based smart bird feed
a week ago
Model: Tapo C120  
Hardware Version:
Firmware Version:

Thought I would share, because I think it's too awesome.


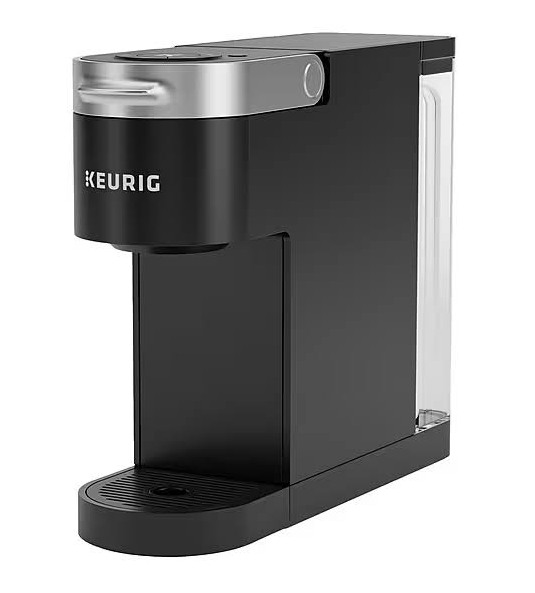
I had an old coffee maker (made terrible coffee btw) lying around:

13f49f8fe95d406bbdb7abd13c9a8bd8


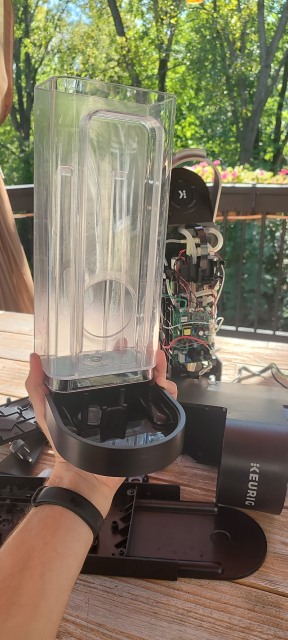
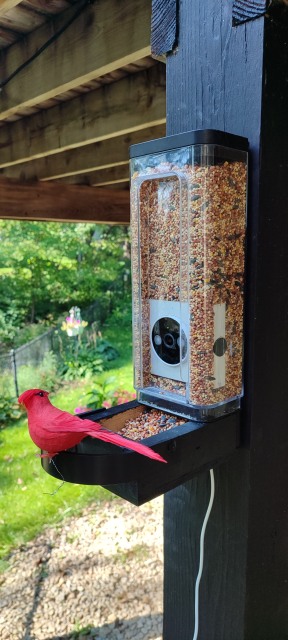
and I've found a new purpose for it - smart bird feeder. I thought it would make an excellent bird feeder because of the coffee maker's transparent tank. Birds need to see the seeds.


A few pics from the process:
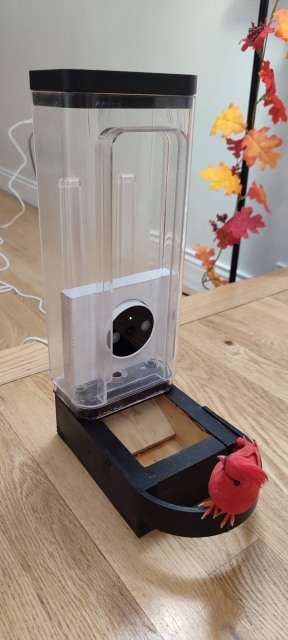
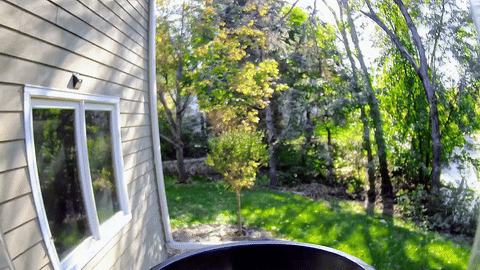
40ffe9ce4a104bc2926d8c98afca36f8d37c00b527a44d53a6b0f9548388fe56799e9e2aae734162858675426f80f860


Installed:

c46dec1bb0014adf9da2f6096233db6366e31111651147d198cdae8fe7c3781e


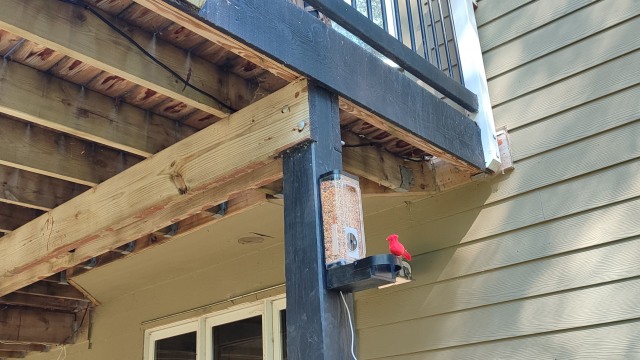
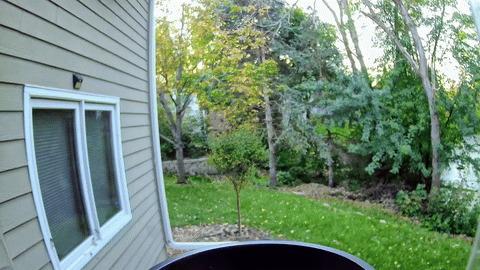
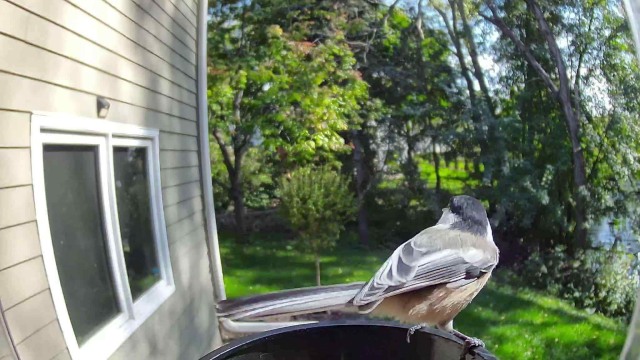
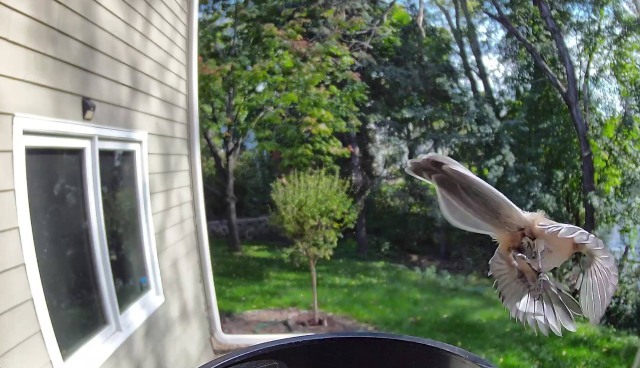
A few bird pics. Nothing too exciting yet, still waiting for the more colorful ones to come around - blue, yellow, etc. But I know it will work.

9e106bd73ed94e9b914a6e2d4754786840641ef6e99e49898a0db07d9b3a2c8d


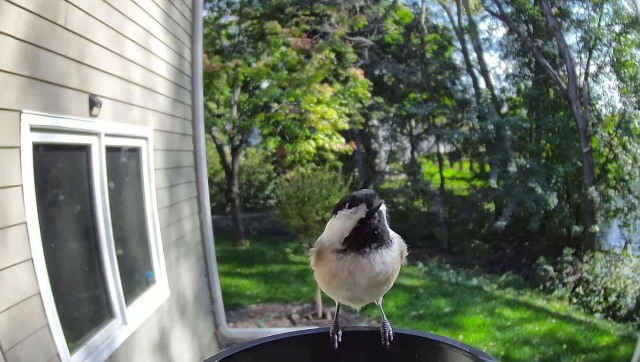
wat wat chicken b#tt:

21aa90a78ddc4b8bb5179a8122ef3bfa


A bit about the process itself ...


The camera out of the box is not suitable for bird feeder because of the fixed focus distance. You need to bring it closer and the process voids the warranty obviously.


Make sure you don't have an SD Card in there, or you'd break it (ask me how I know). You open it from the front, sliding something thin and metal between the black cap and the white plastic body. You need to know that there are 3 "points"  that hold it together, one on each side and one on top, sort of a Mercedes pattern. Aim for them and take it slow. Then you take off the heat sink, it's held by two screws. There are two small screws holding the camera. You'd want to unscrew the top one, almost to the end, this brings the focus as close as it's going to get. While at it, I also removed the microphone on the back, which gives it a bit more space inside the body for heat dispersion. I don't need to talk to the bird. Then you put it all back together, carefully. It's possible that by the time you put it back together, the focus is again not where you want it. Repeat. I've used a dummy bird placed exactly where I anticipate the birds to land, to aim for focus while adjusting. You can adjust the screws while the camera is on (careful, the chip on the back gets hot). There's another method to adjust the focus, which involves using a heat gun and ungluing the camera itself.


The DIY work itself wasn't too difficult. I had to get the incline under hole on the bottom of the water tank just right, so that gravity refills the box on the bottom, when the birds eat the seeds.


I think it turned out quite alright, given it cost me the price of a budget camera. Similar bird feeders go for 150+ bucks. I get notifications, outlet power, recording... everything I needed.

  0      
  0      
#1
Options
2 Reply
Re:My C120-based smart bird feed
4 hours ago

Hey @HYankov,

Thanks for sharing! It's been a bit chaotic here over the last few weeks, and we have not had the time to stop by as much as we would like.
 

While this is far outside the typical recommended use and would void the deviec's warranty, its extremely neat - and looks like a formal bird feeder to boot!


You had mentioned that the chip within the camera on the board is hotter than expected. For your setup, is this a concern, having it in such close proximity to the feed, especially since it will be encased? If it is also in direct sunlight, I could see it getting significantly warm.


Also, just as a heads up, since it will apply more to you than others: The Frame Rate for the camera is adaptive up to 20fps, depending on the light. For the best image quality, ensure that the subject of the camera is always in a well-lit area.


If you have any other examples, feel free to share!

  1  
  1  
#3
Options
Re:My C120-based smart bird feed
3 hours ago - last edited 2 hours ago

  @Riley_S Hi,


you're asking all the right questions. What I meant above was, when you take down the heat sink, you have to be careful not to touch the bare chip, as it gets hot, but that's normal. I had some worries about the heat and possible fire hazard as well, so I very closely monitored the camera the first two days. Seems like the heat sink + the extra space where the microphone was (or even without that mod) is more than sufficient to manage the heat. Also, here in the Midwest, "winter is coming" so that's even less of a worry right now.


Thanks for the hint about the lighting. I had something similar in mind, and tried to setup the camera in such a direction, that the sun would light the subject from the side and/or behind. I catch directly in front only the morning sun. I think a "cap" would help the light management further.


In my opinion, you may have a market for sub-models of C120 with a closer out-of-the-factory focus. A lot of people want to use them for bird feeders and 3D printer monitoring.


A few more shots


CDN media

CDN media

CDN media

CDN media

CDN media


  0  
  0  
#4
Options