Configuration Guide How to Use Disable NAT in Double-NAT Environment on Omada Router

Background:
This post provides a configuration guide on using disable NAT in a double-NAT environment.
This Article Applies to:
Omada routers with Disable NAT capability.
Application Scenario:
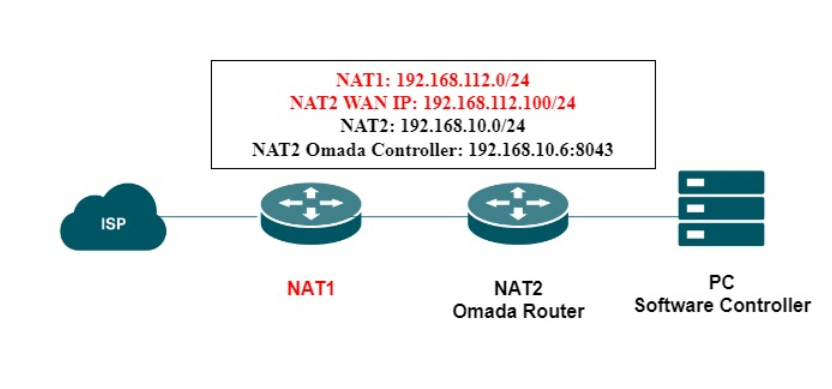
Configuration Steps:
1. For the steps to enable Disable NAT, refer to the previous guide about disabling NAT. Skip the steps here.
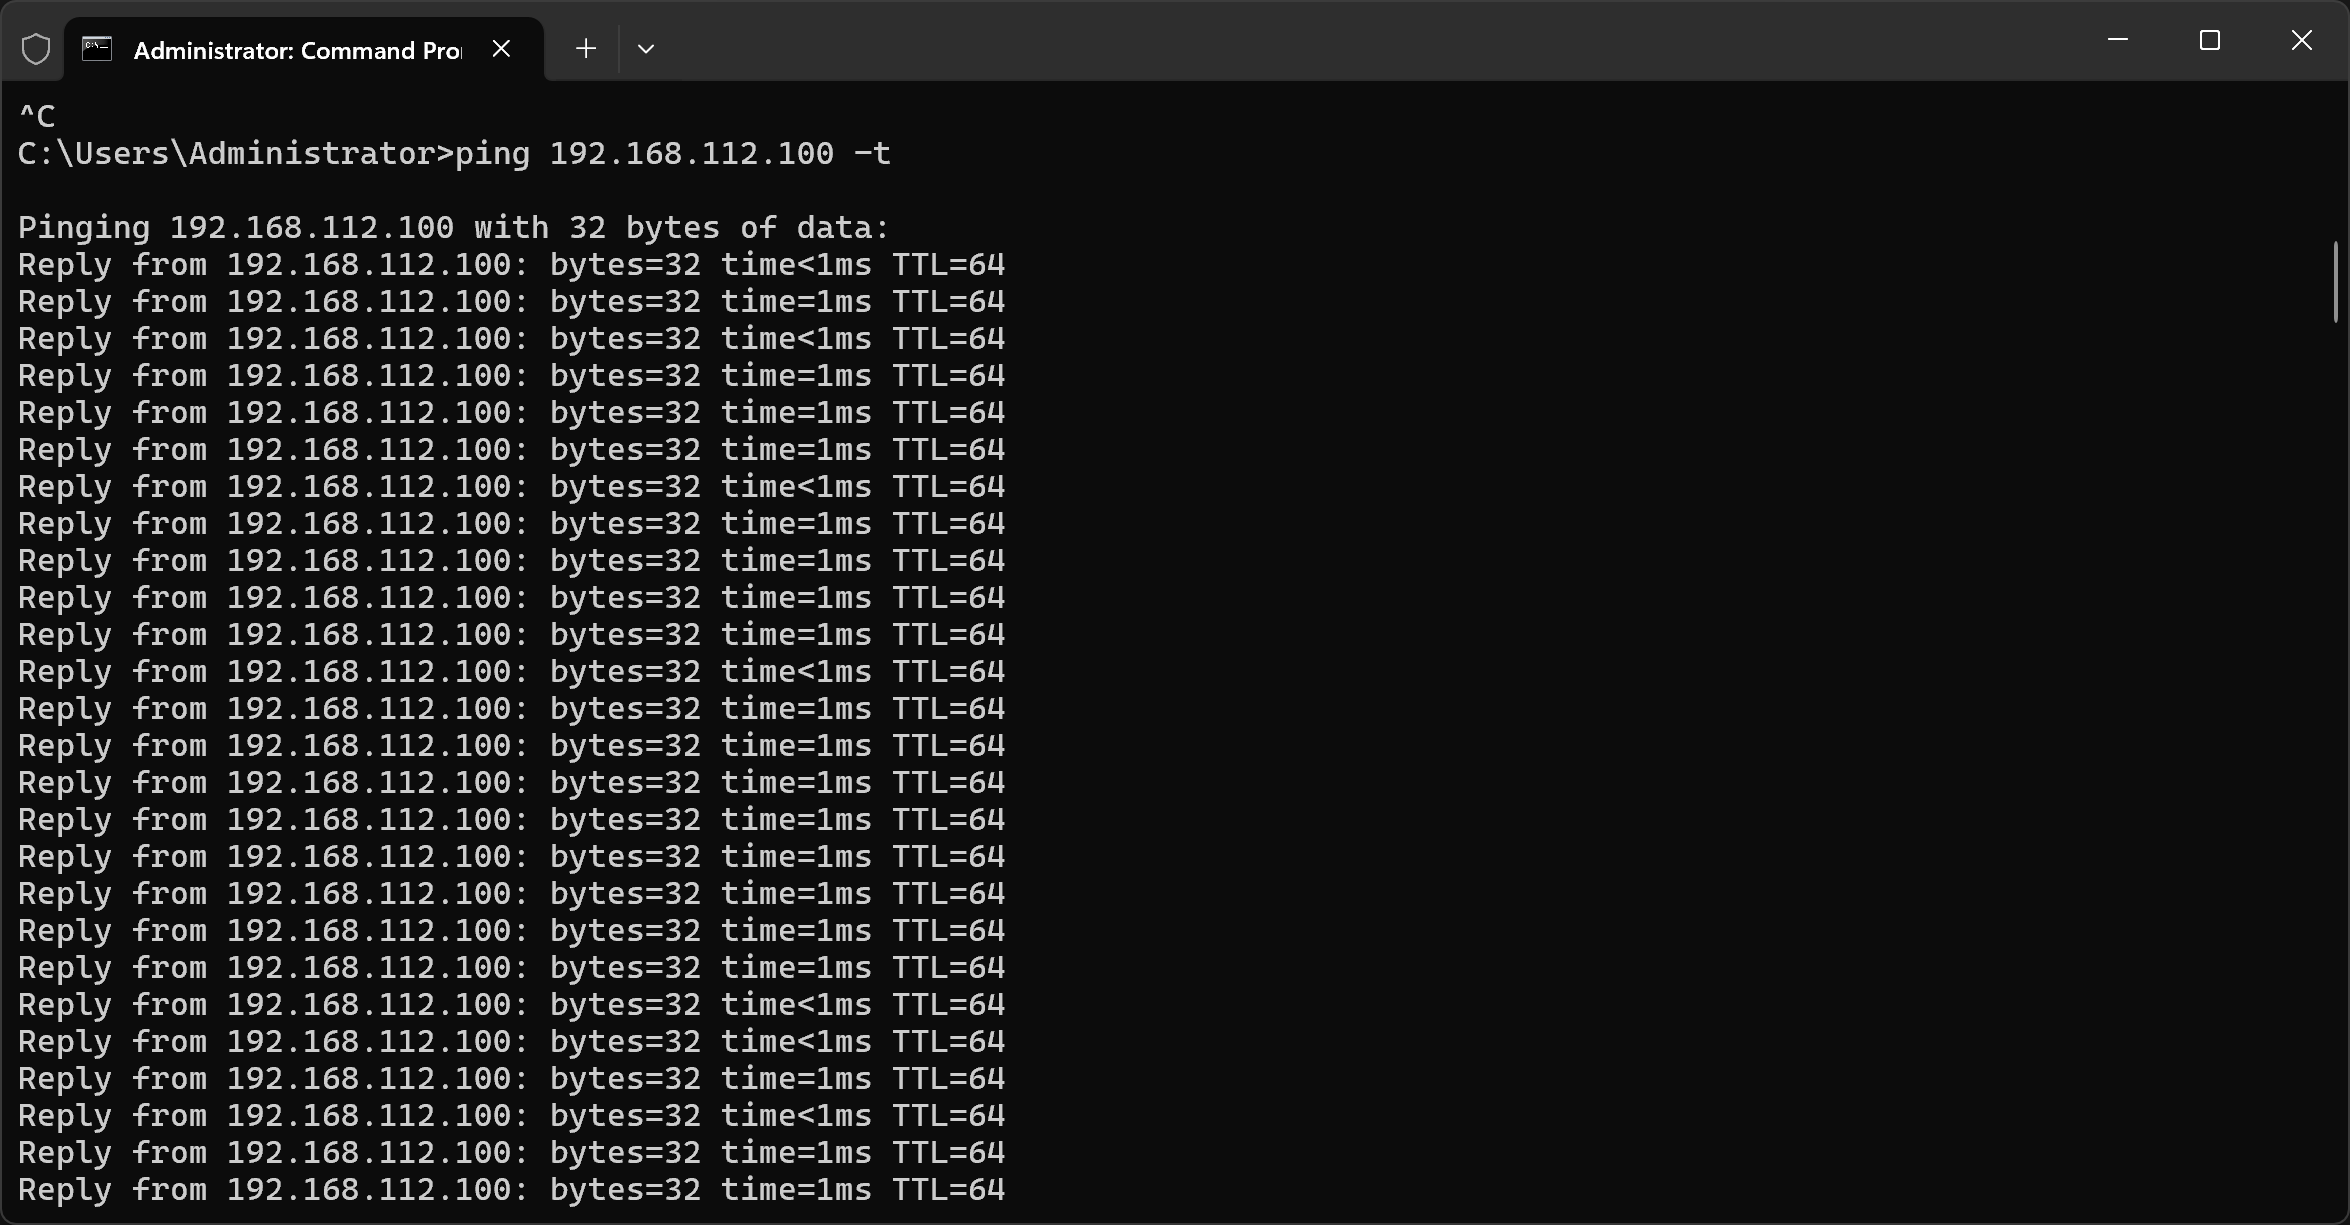
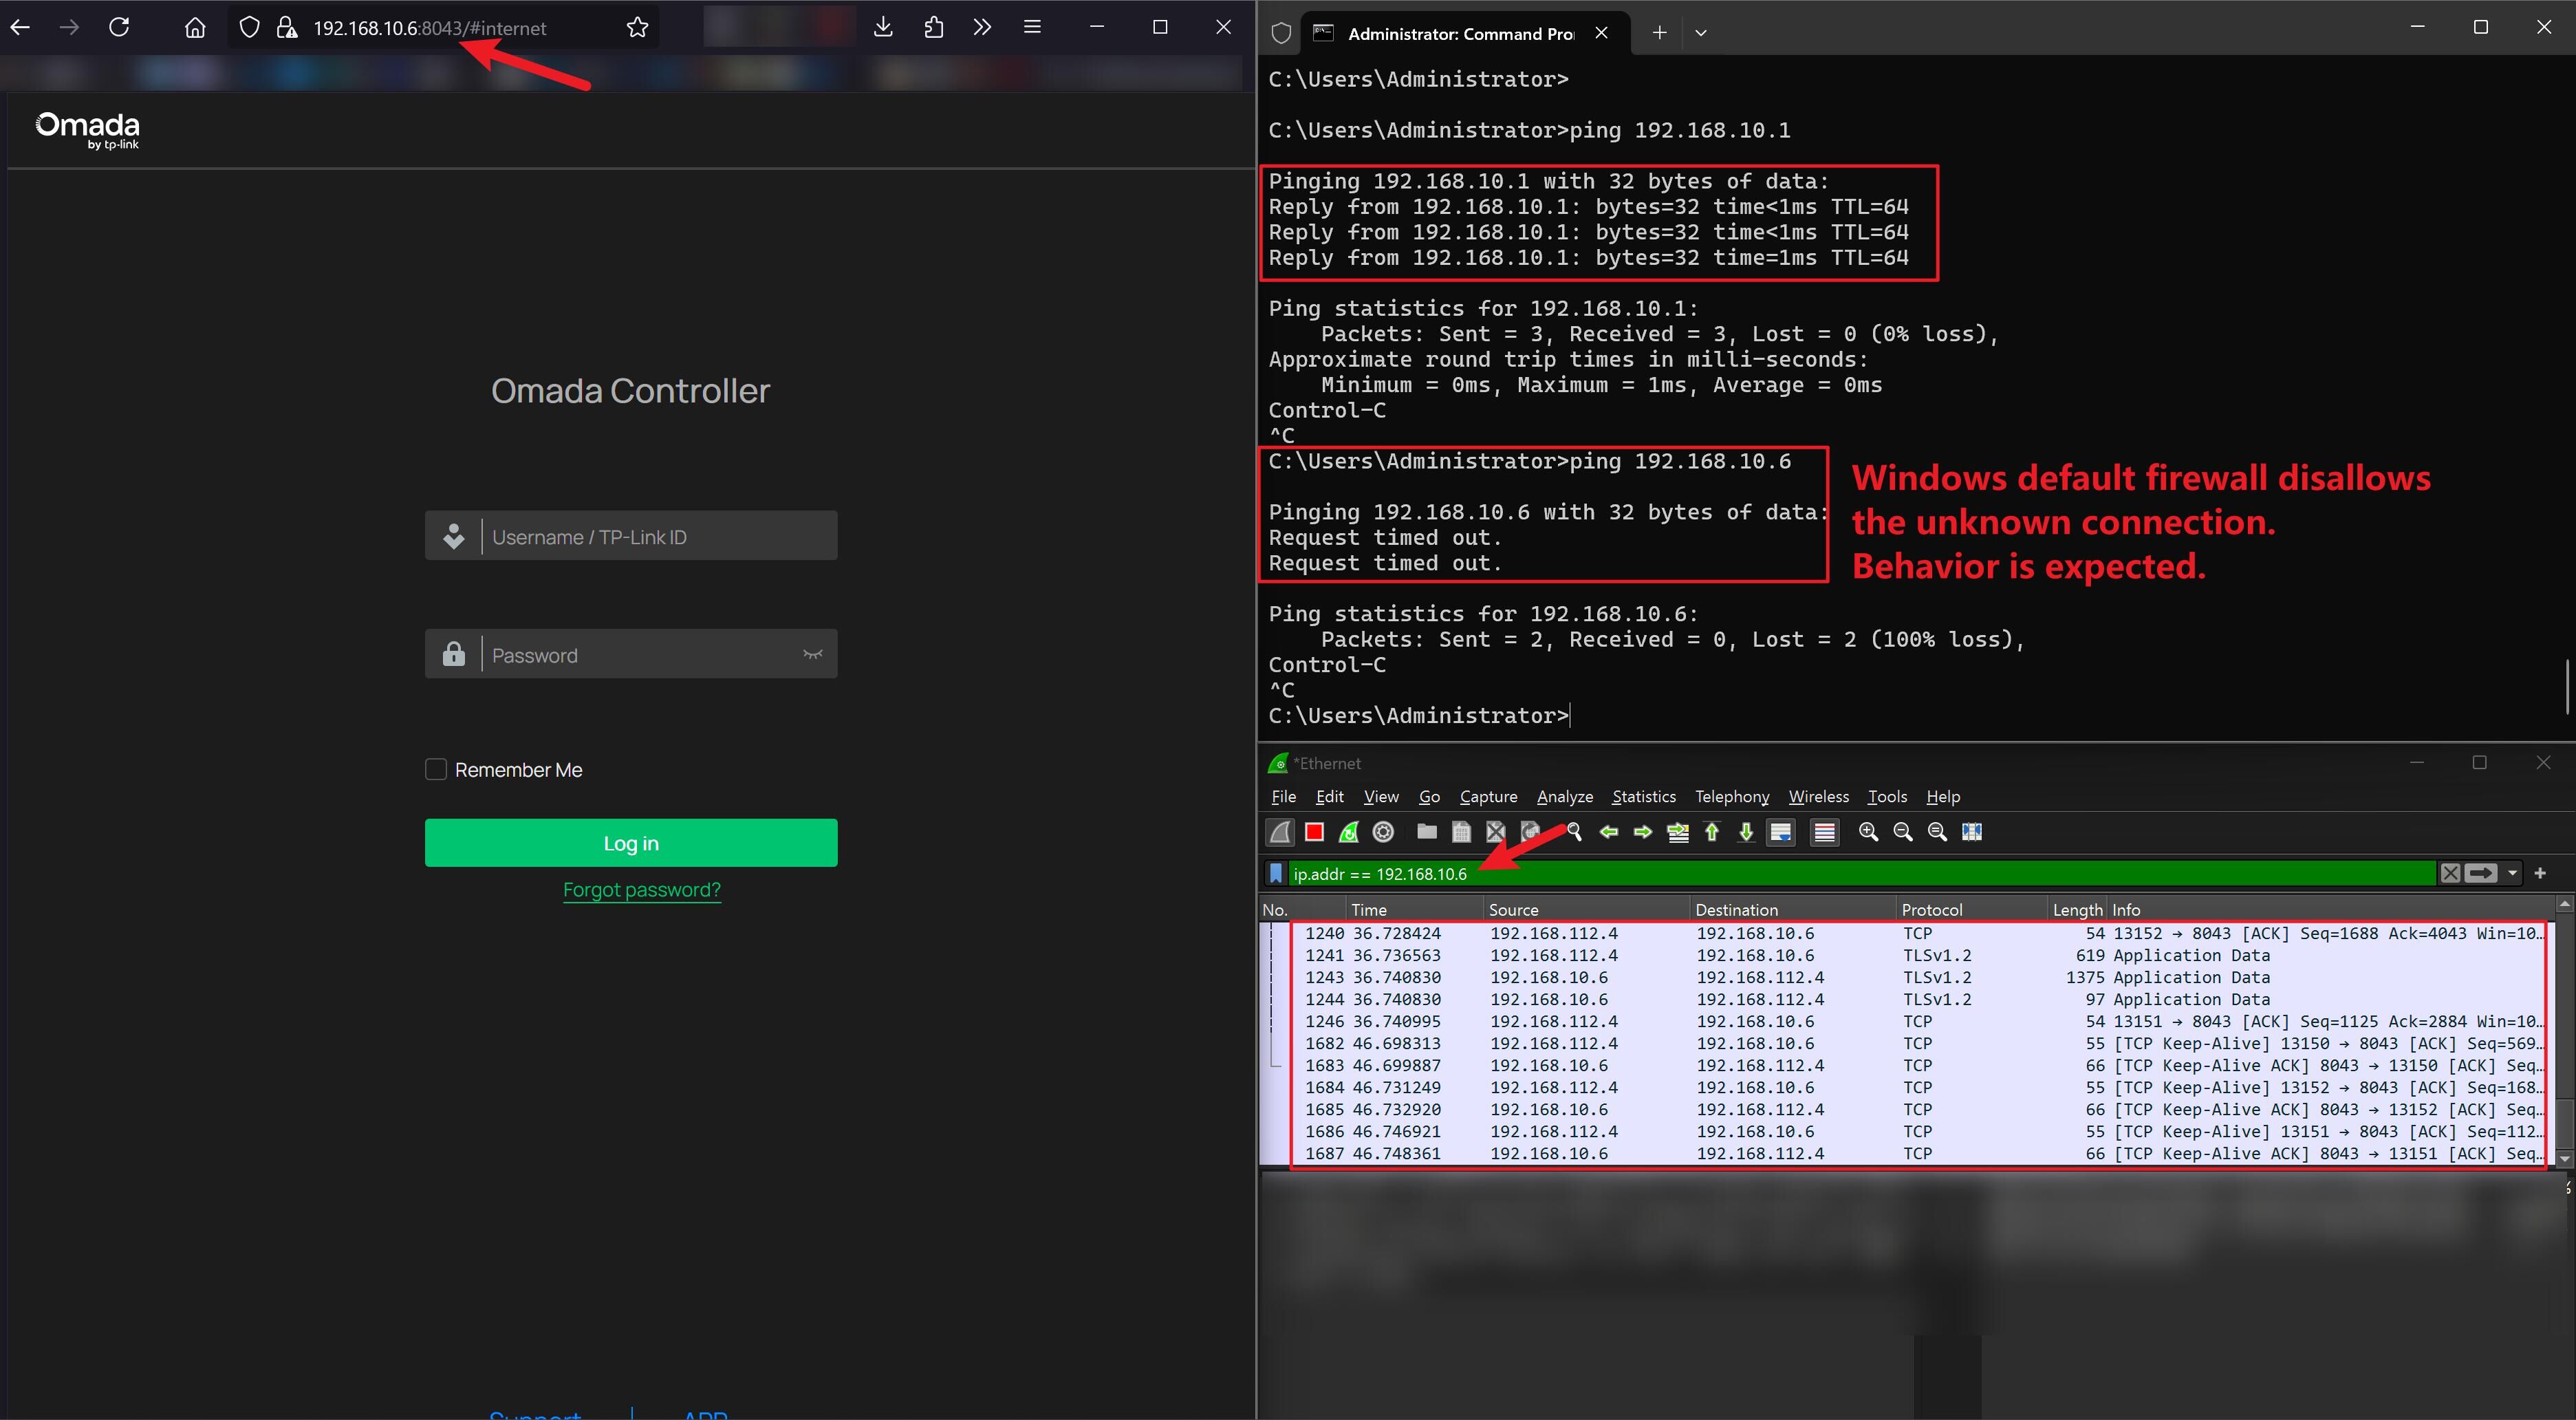
2. Verify the NAT2 is accessible.
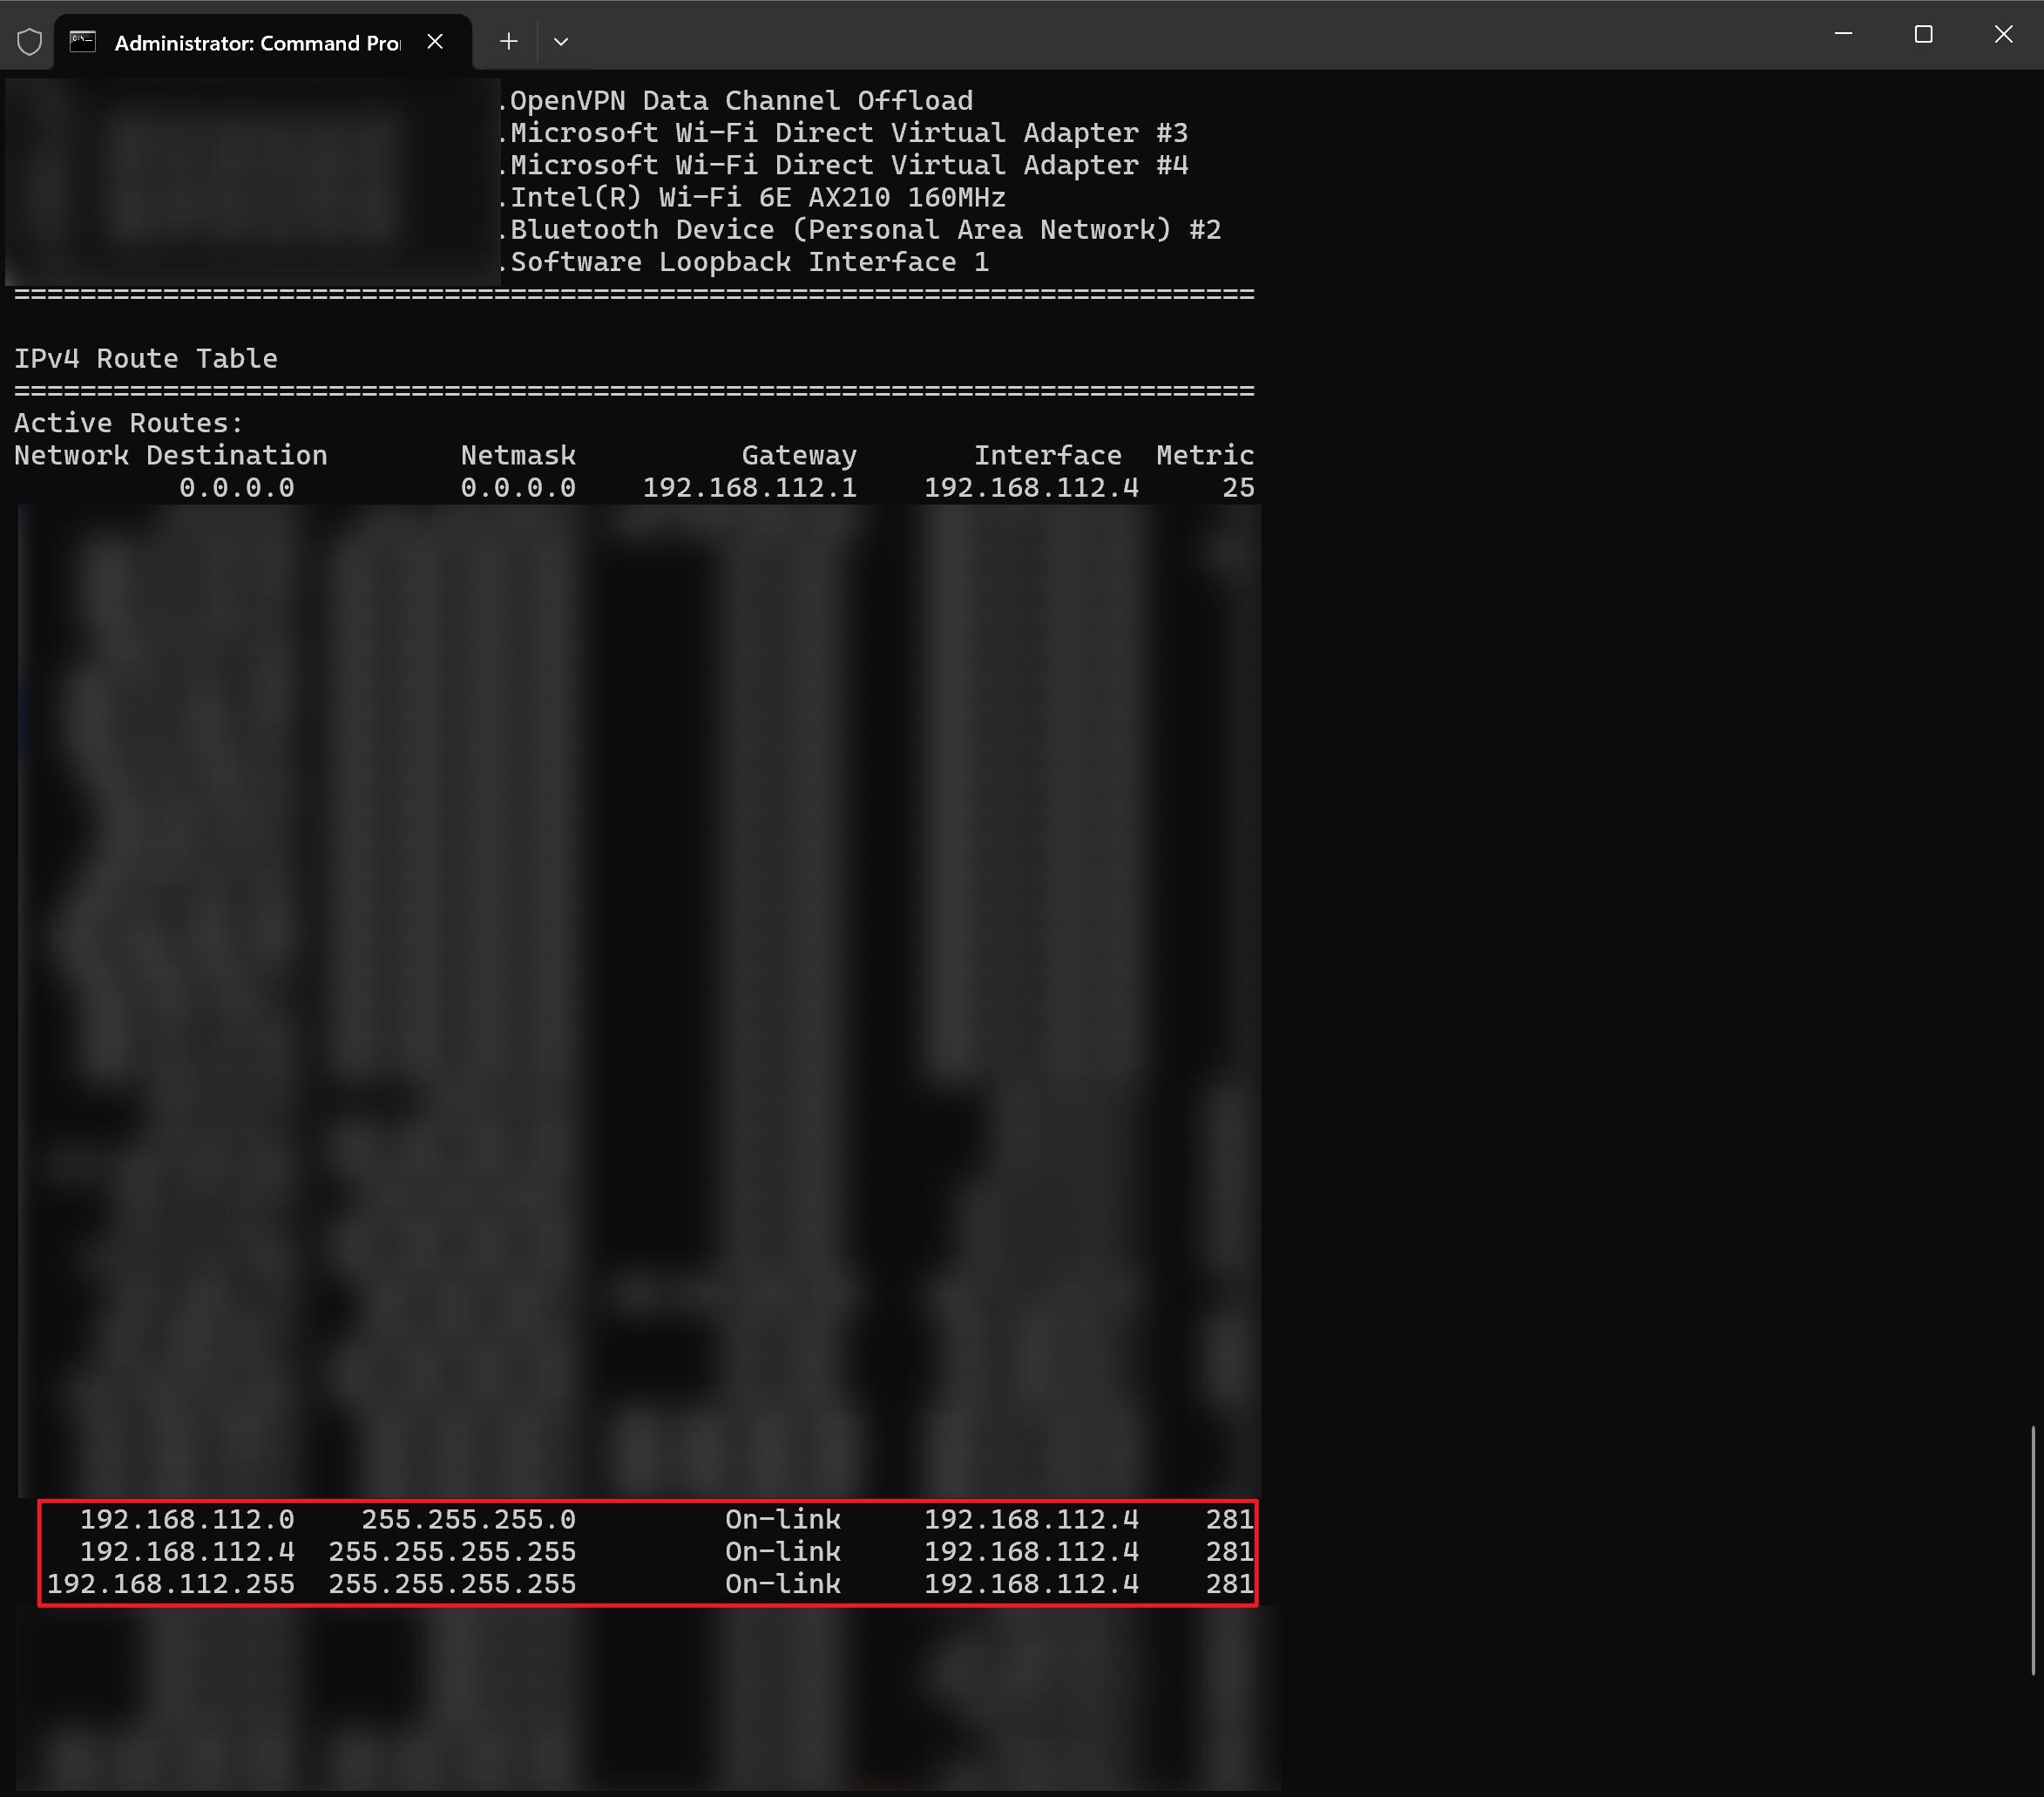
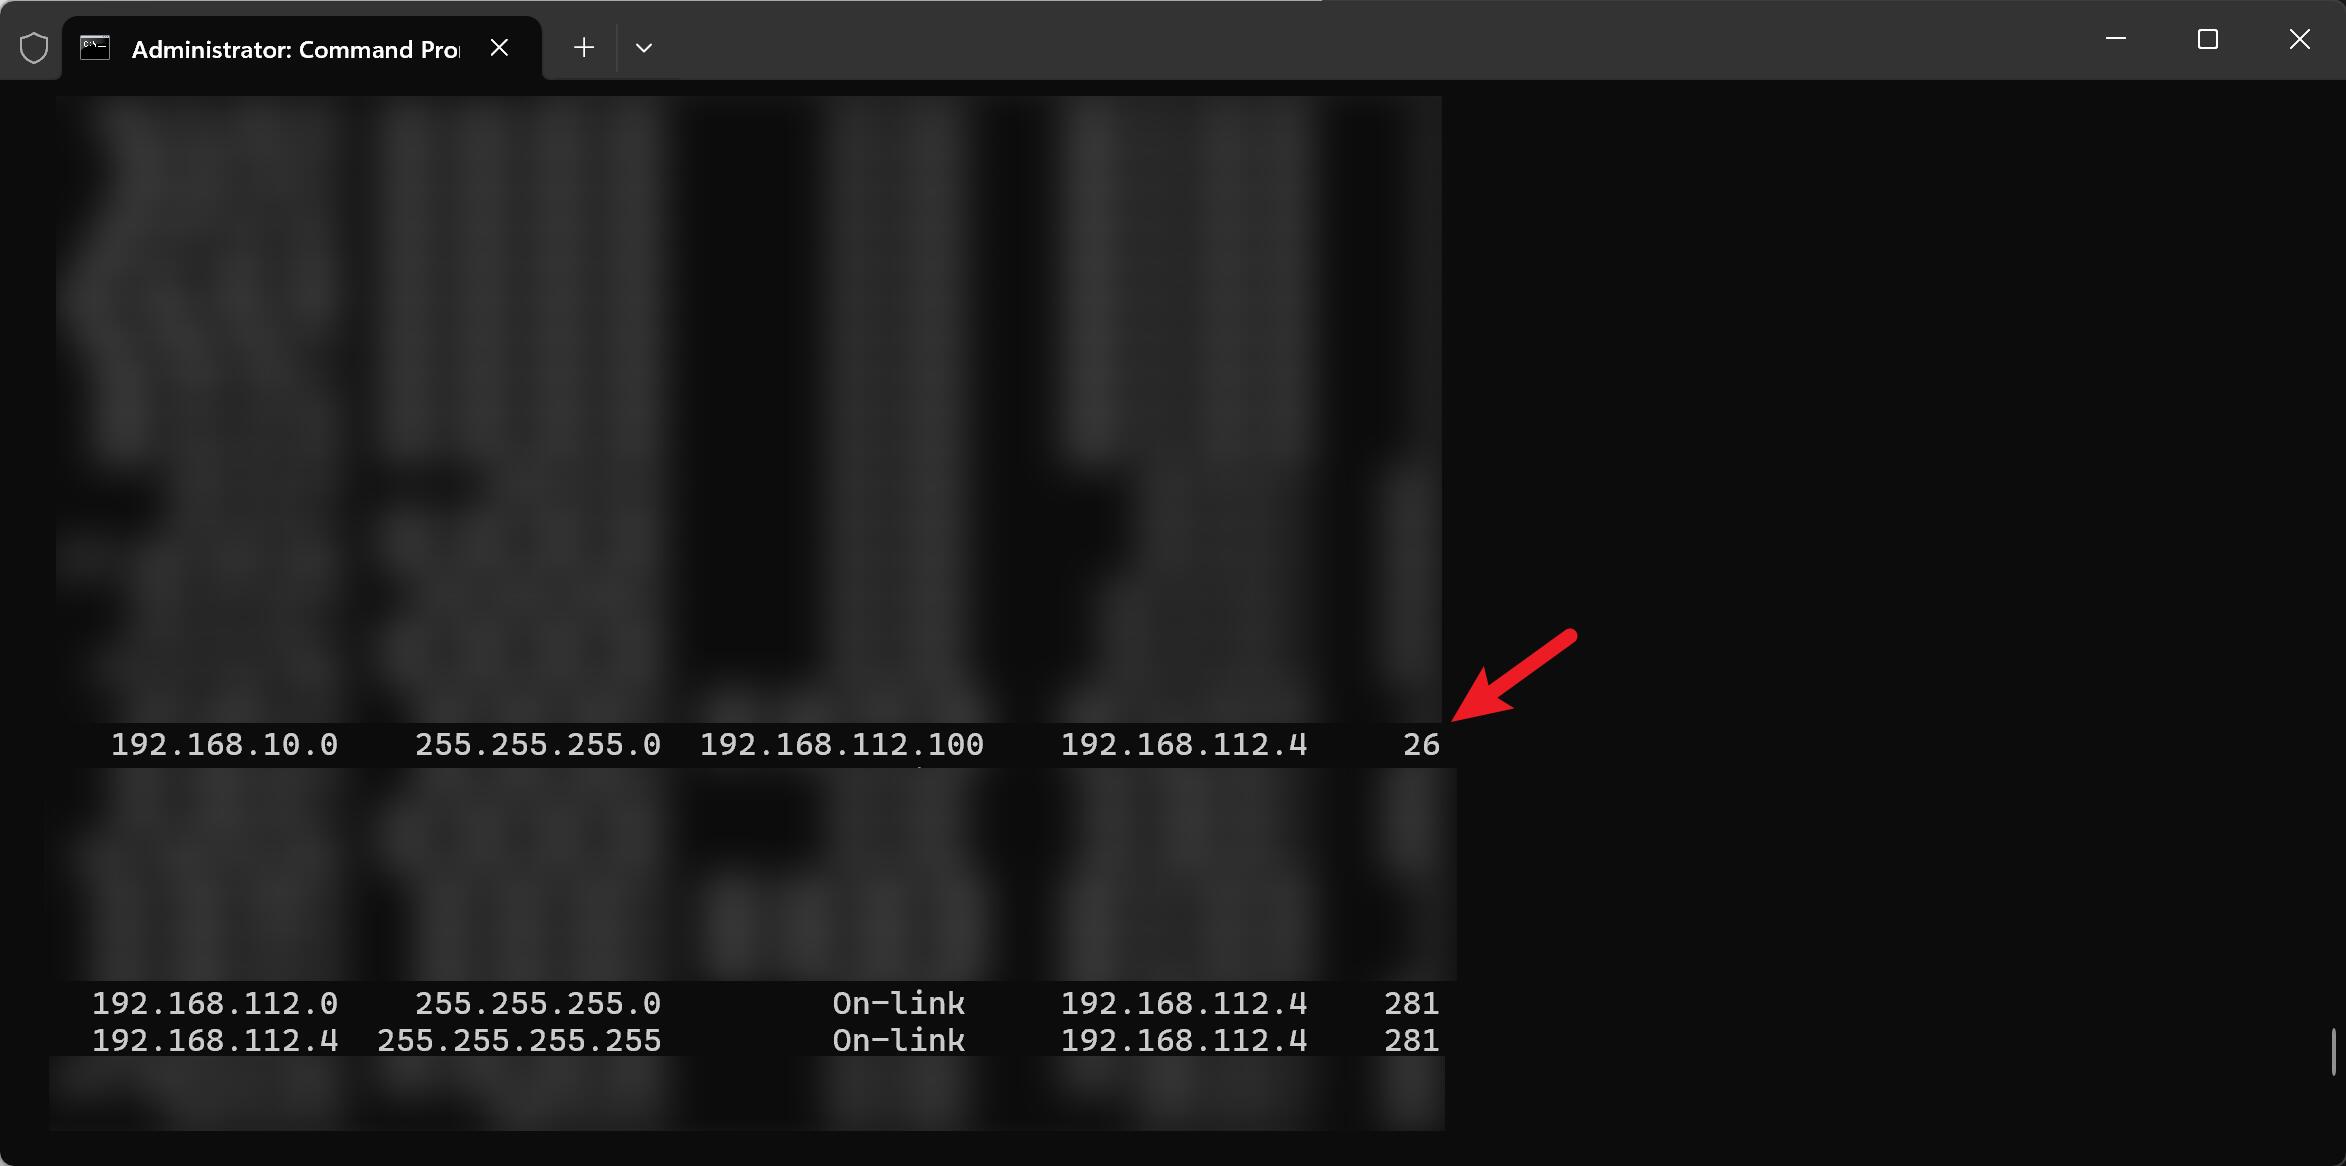
3. Examine the current routing table.
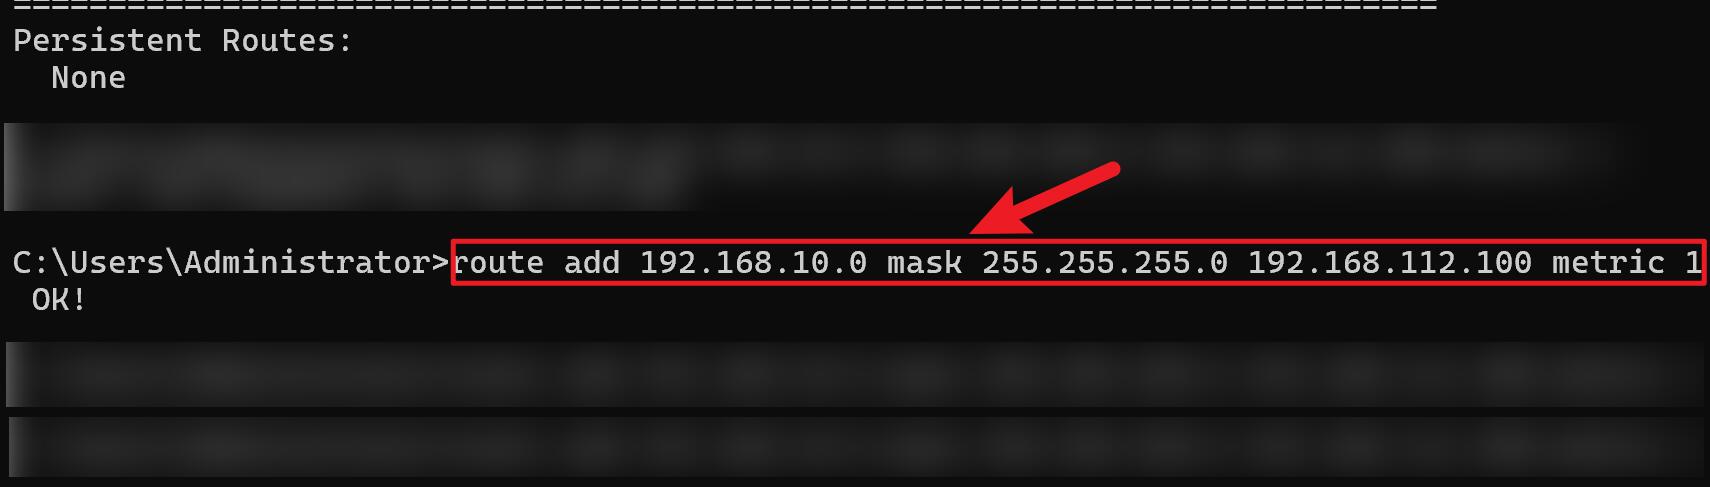
4. Add a route to Windows as this computer plans to access the Omada Controller.
5. Examine the route and access to 192.168.10.6.
Note:
1. For disable NAT configuration: How to Disable NAT on Omada Router
2. Windows firewall regarding the test in the last picture: What If My Windows Computer Is Not Accessible or Pingable Over the VPN/VLAN Interface
3. If you need this to work on your upstream NAT1 for all clients, go to its routing page and configure the same value.
Update Log:
Jul 23rd, 2025:
Release of the article.
Recommended Threads:
Get the Latest Firmware Releases for Omada Routers Here - Subscribe for Updates
Get the Latest Omada SDN Controller Releases Here - Subscribe for Updates
Feedback:
- If this was helpful, welcome to give us Kudos by clicking the upward triangle below.
- If there is anything unclear in this solution post, please feel free to comment below.
Thank you in advance for your valuable feedback!
------------------------------------------------------------------------------------------------
Have other off-topic issues to report?
Welcome to > Start a New Thread < and elaborate on the issue for assistance.