Troubleshooting What can I do if the Tapo battery-powered cameras fail to charge?

Tapo Battery-powered cameras offer flexibility and convenience for smart home security. However, if your Tapo camera or doorbell isn't charging properly with its power adapter or solar panel, it can hinder your monitoring system and compromise security. This guide will help you troubleshoot these issues.
Part 1. Can't charge the Tapo battery-powered cameras with a power adapter connected
If your Tapo battery-powered camera fails to power on when connected to the power adapter, please follow these steps:
1. Use the Original Adapter
Ensure you're using the original power adapter and cable that came with the camera. If the adapter is not included with your camera, try another adapter whose output voltage and current match the specifications listed in the camera's datasheet on the official TP-Link website.
2. Try a Different Adapter.
Test with another power adapter if you have one.
3. Check Connections
Confirm that the hardware connection is secure. The camera's system LED indicator should flash amber for 3 seconds when the charging cable is properly connected.
4. Turn On the Camera
If the System LED is off, press and hold the power button for 3 seconds to turn it on.
5. Factory Reset
If the System LED is on but the camera isn't charging, try to perform a factory reset by holding the reset button for 10 seconds, then reconfigure the camera.
6. Inspect for Water Ingress
If the camera is installed outdoors, check the charging port for water damage and provide a clear photo if available.
Please provide the following information in this thread or contact the technical support team with it for further assistance.
1. A brief description of the phenomenon you're experiencing.
2. Results from each of the troubleshooting steps above.
Part 2. Tapo Solar Panel fails to charge the Tapo battery-powered cameras
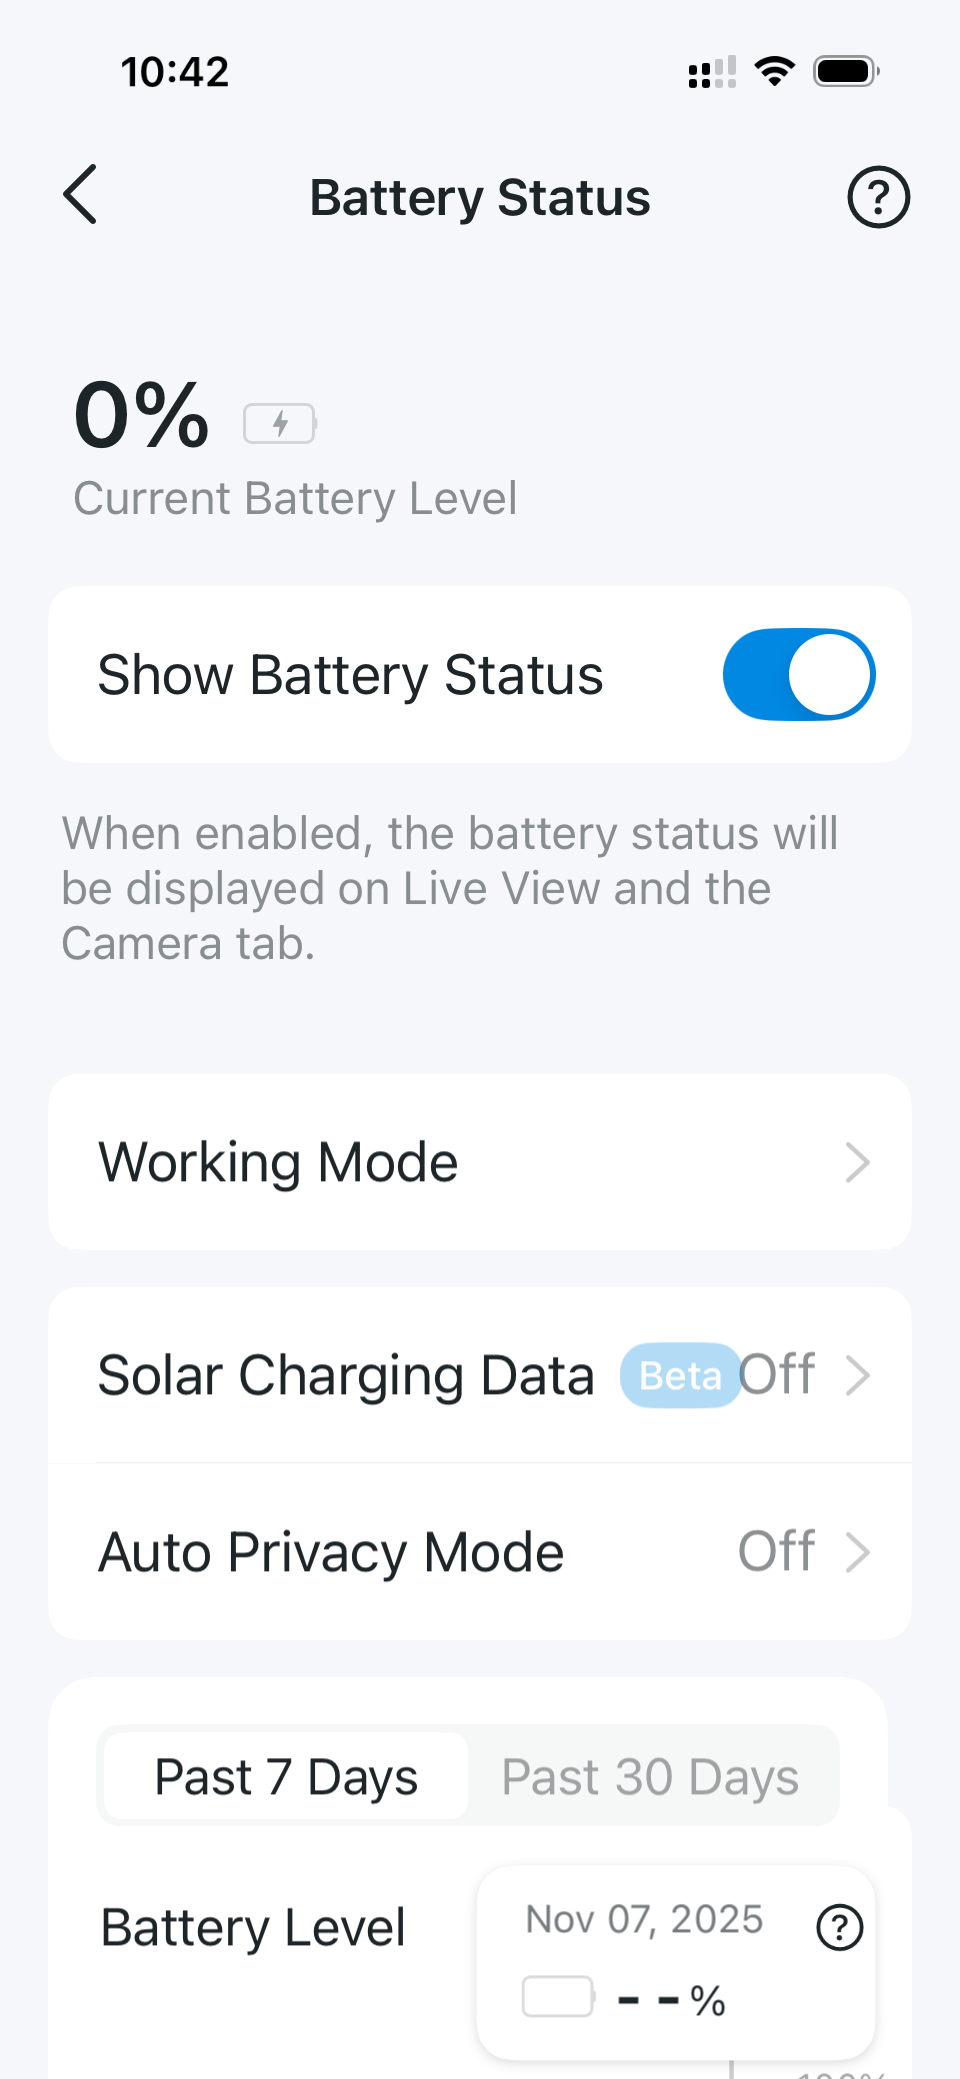
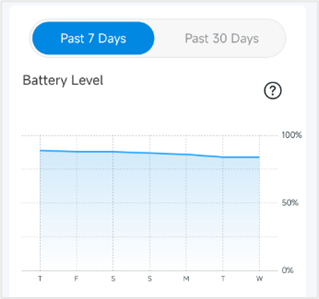
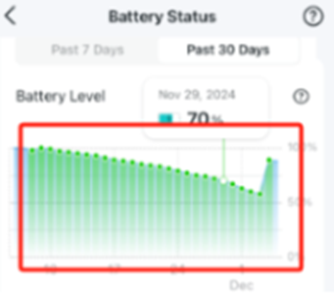
Firstly, open the Tapo app > camera's Device Settings > Battery Status page, check the Battery Level chart.
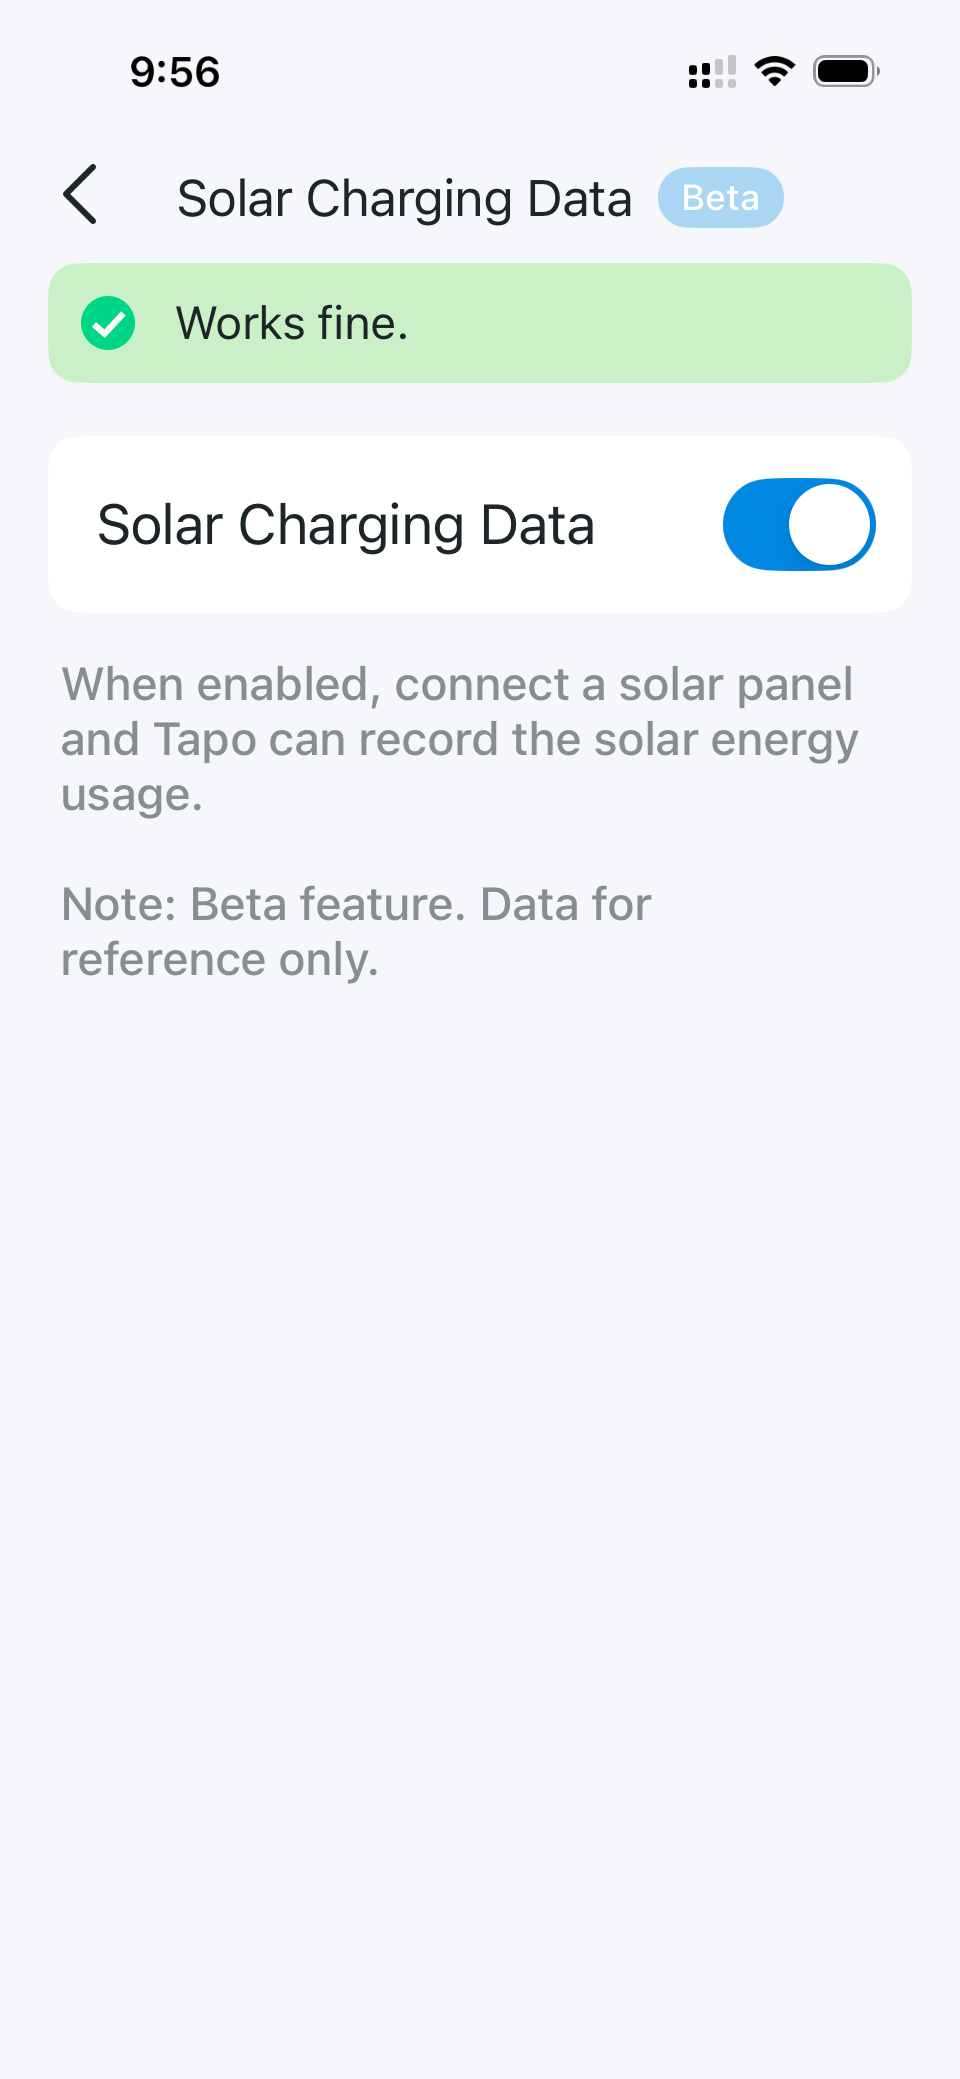
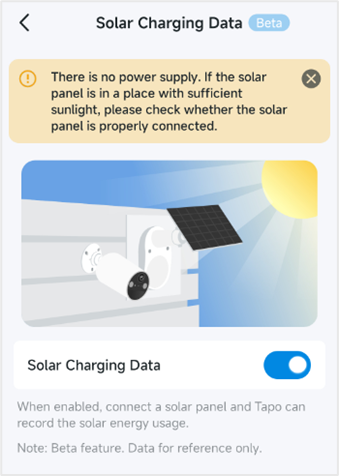
Note: On the Solar Charging Data page, if the "There is no power supply" message in the picture below appears, it means the camera is not currently charging, not that the solar panel is defective. For example, if the camera is almost fully charged or there is insufficient sunlight, you may also see this message.
Case 1. The Tapo solar panel cannot charge the battery-powered camera. (No green part in Battery Level chart)
Note: If the current battery level is 100%, the Tapo battery-powered camera will stop charging to avoid overcharging, and the Tapo app will display that the camera is not charging.
1. Power with the Original Adapter
If the camera doesn't power on, refer back to Part 1 for troubleshooting.
2. Check Connections
Try unplugging and re-plugging the charging cable. Make sure the Solar Panel and camera charging cable are plugged in tightly.
3. Ensure Adequate Sunlight
Ensure the Tapo Solar Panel installation location is unobstructed and receives sufficient sunlight.
4. Clean the Solar Panel
Remove any dirt or pollution from the solar panel using a wet cloth.
5. Check Temperature
Ensure that the environment is not very cold. The battery charging temperature should be maintained between 0°C and 45°C.
6. Inspect for Water Ingress
Take a clear and close-up photo of the inside of the solar panel's Type-C charging port to show whether there is water ingress or corrosion.
7. Check for Damage
Check the Tapo Solar Panel's appearance and see if there's any damage.
Please provide the following information in this thread or contact the technical support team with it for further assistance.
1. A description of the phenomenon you're experiencing.
2. Results from each of the troubleshooting steps above.
3. Has there been any extreme weather, like heavy rain?
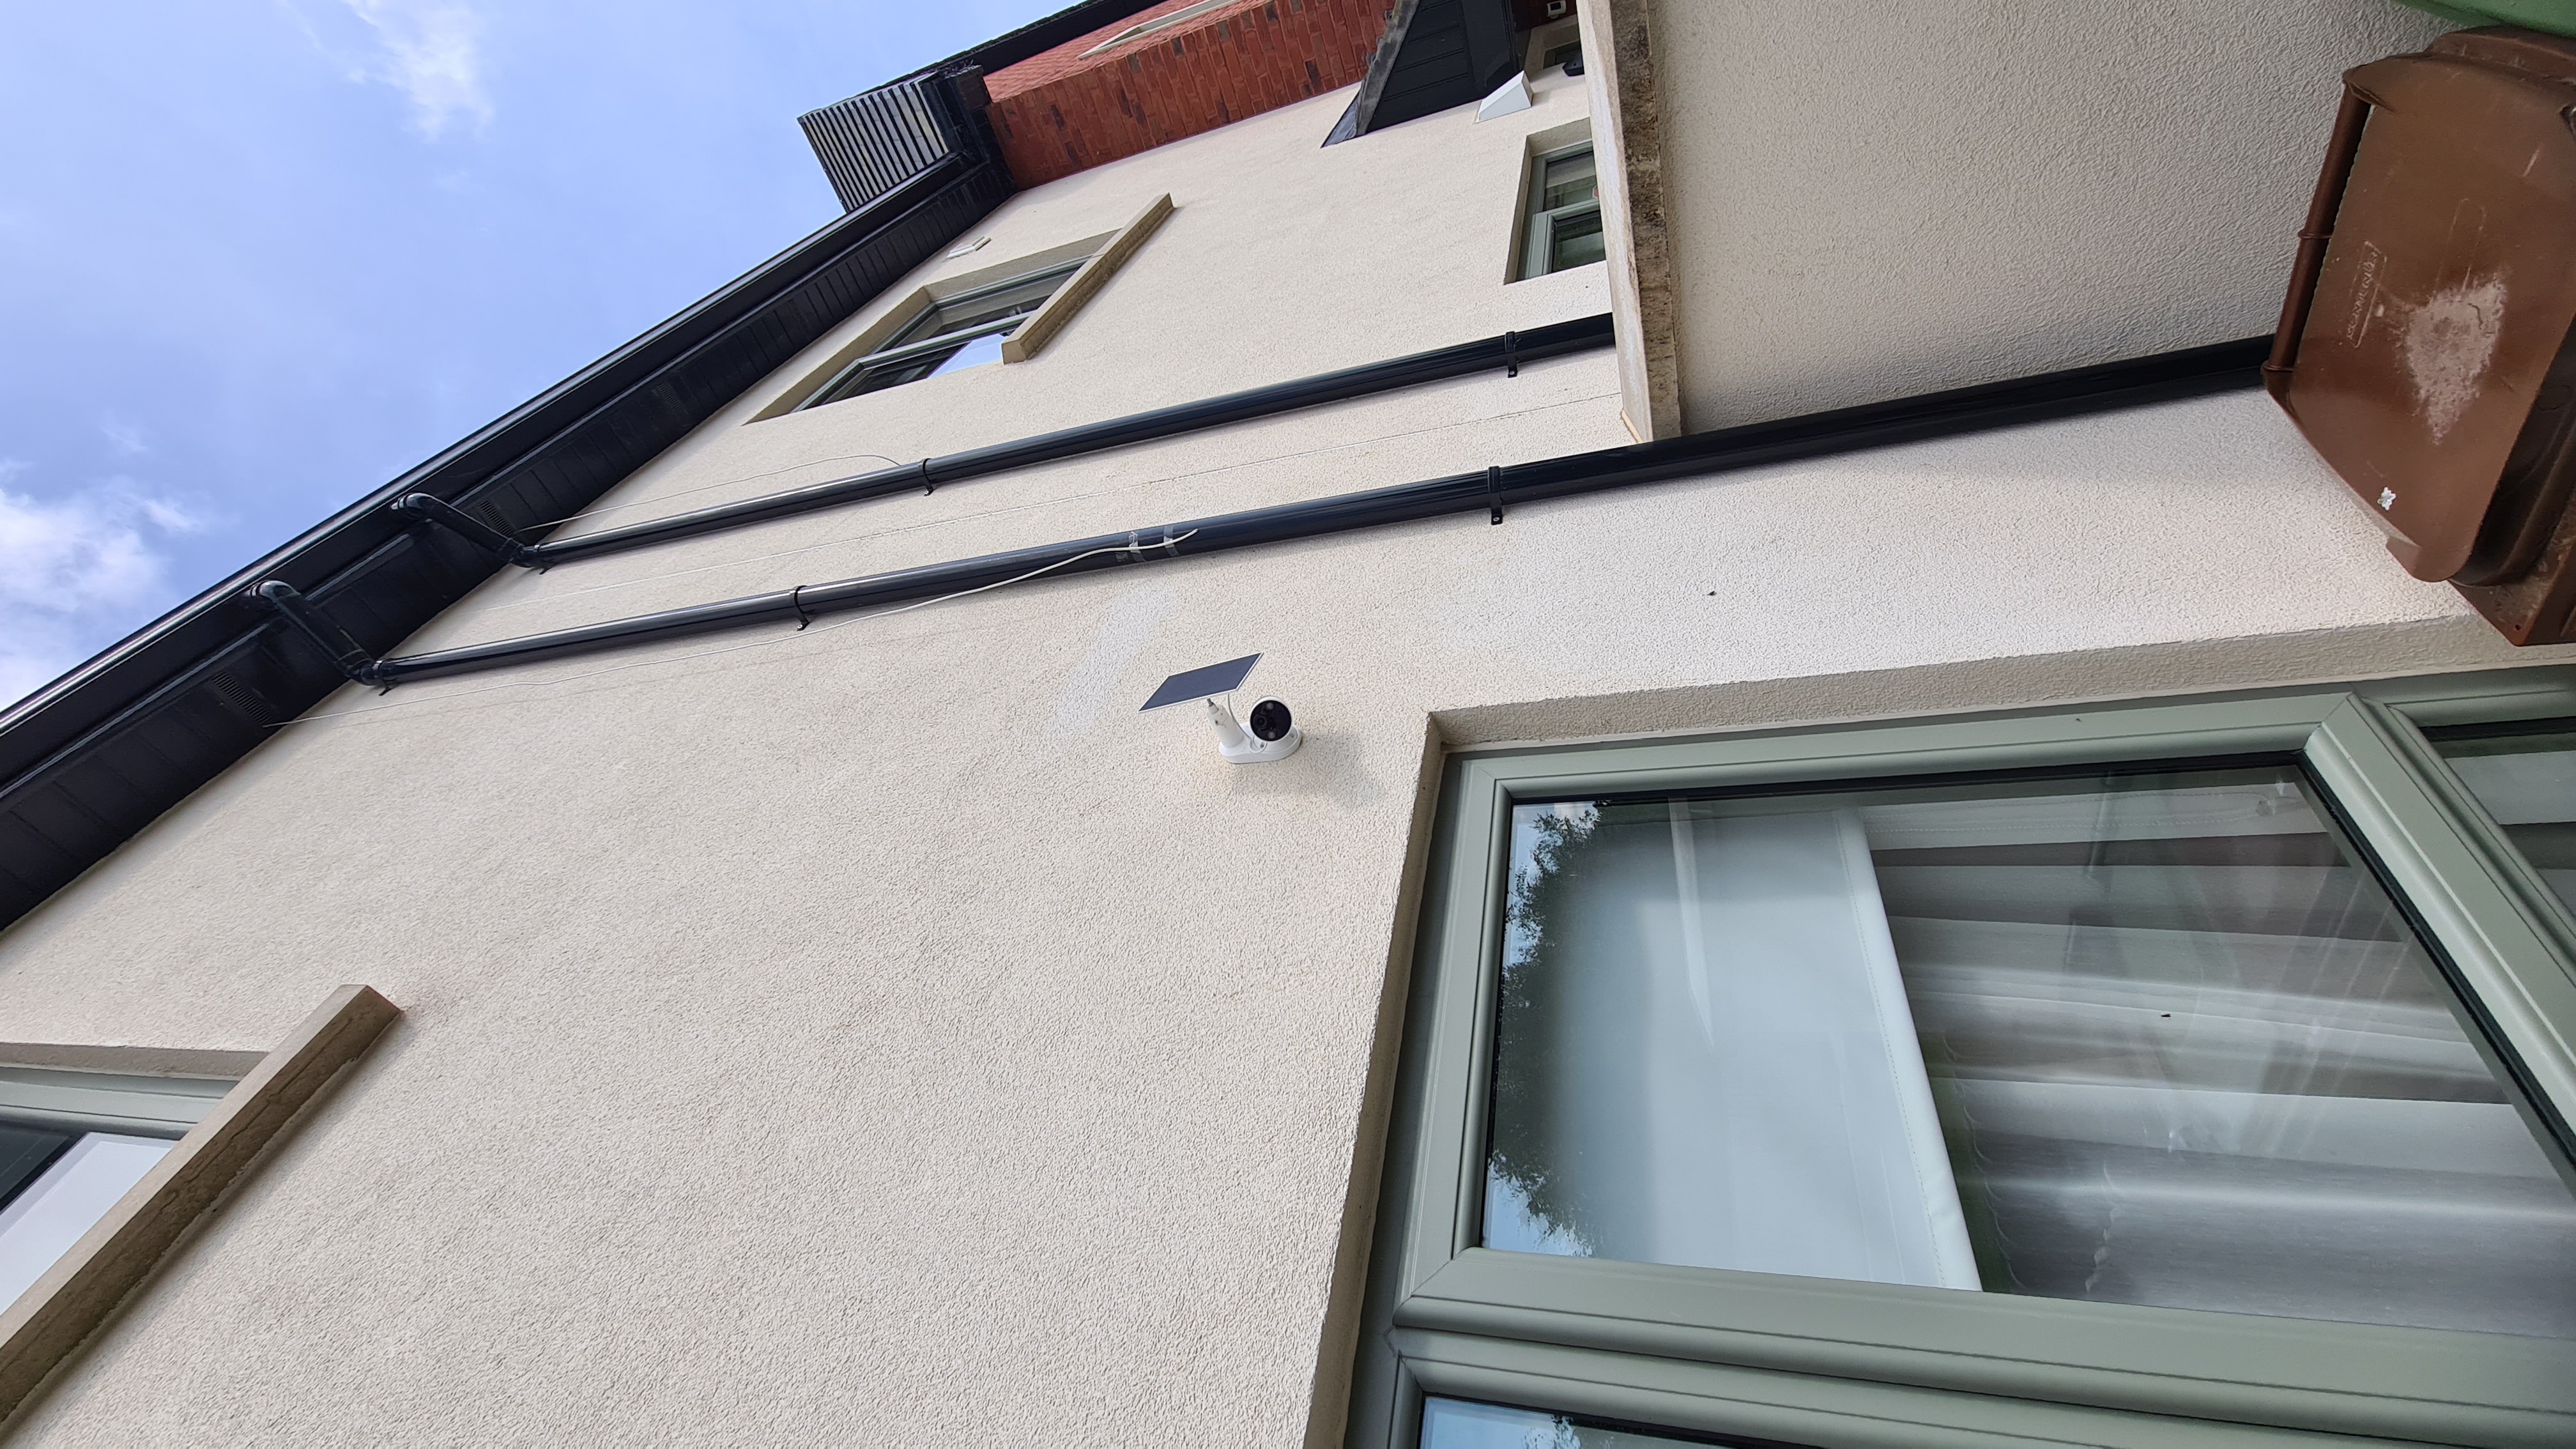
4. Photos of the locations where the solar panel and camera were installed.
Case 2. Intermittent Charging or Battery Level Dropping (Green part shows in Battery level chart)
1. Ensure the camera has been upgraded to the latest firmware.
2. Check Connections
Make sure the Tapo Solar Panel’s charging cable is connected to the camera securely.
3. Ensure Adequate Sunlight
Adjust the Installation location and angle of the solar panel for better performance. The position and tilt angle of the solar panel greatly affect the solar efficiency.
- Choose a location where the solar panel gets the most sunlight throughout the year.
- Position the panel south-facing in the Northern Hemisphere or north-facing in the Southern Hemisphere. The recommended tilt angle between the panel and the horizontal ground is 35° ~ 45°.
- Regularly wipe the panel to remove dust and debris.
- Avoid being obstructed by leaves, buildings, etc.

4. Weather effects
The solar panel is essentially unable to collect solar energy to power the camera on rainy days. Depending on the amount of light, how often the camera wakes up, and other factors, it varies on cloudy days.
5. Check Temperature
Ensure that the environment is not very cold. The battery charging temperature should be maintained between 0°C and 45°C.
6. Rapid Power Drain
If the battery drains quickly on the Tapo battery-powered camera (e.g., more than 10% in 1-2 days), please follow the instructions below to troubleshoot.
What to do if the battery drains quickly on my Tapo battery-powered camera/doorbell?
Please provide the following information in this thread or contact the technical support team with it for further assistance.
1. A description of the phenomenon you are experiencing.
2. Results from each of the troubleshooting steps above.
3. Has there been any extreme weather, like heavy rain?
4. Photos of the locations where the solar panel and camera were installed.
5. The screenshot of the camera's Battery Status page, including all charts.
More Articles:
TP-Link First Solar Panel Tapo A200 Being Released
Introduction to Smart Dual Tracking on Tapo Outdoor Dual-Lens Camera
Troubleshooting for Tapo Camera's Privacy Mode Automatic Activation